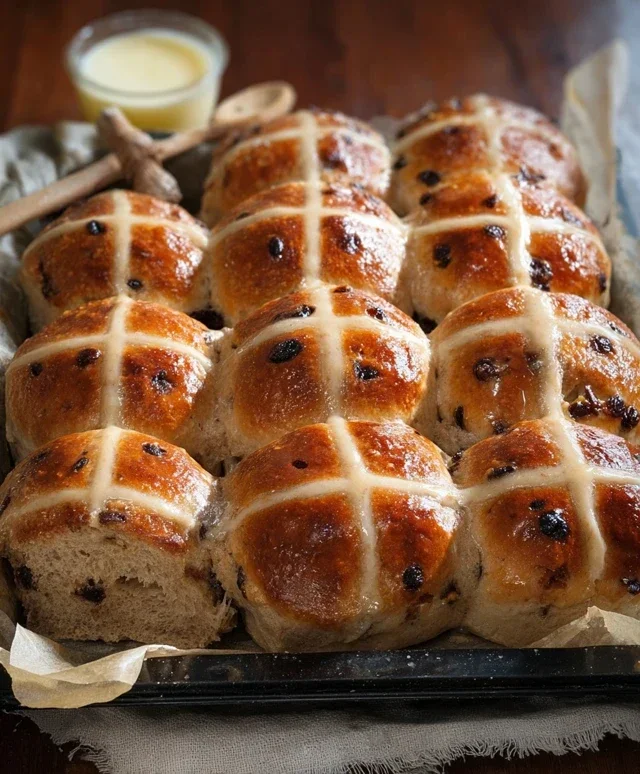
Easy Traditional Hot Cross Buns Recipe
How to Make Traditional Hot Cross Buns is a journey into the heart of Easter baking, a tradition that fills kitchens with the most delightful aromas and anticnon-alcoholic ipation. For generations, these spiced, fruit-filled buns, marked with a simple cross, have been more than just a treat; they are a symbol of comfort, celebration, and the sweet promise of spring. The irresistible combination of warm spices, plump raisins or currants, and a soft, pillowy dough, all finished with that signature sugary glaze, is enough to make anyone’s mouth water. What truly makes these traditional hot cross buns so special is the feeling of accomplishment and the joy they bring when shared with loved ones. There’s a unique magic in pulling a tray of perfectly golden, fragrant buns from the oven, knowing you’ve recreated a piece of culinary history yourself. Get ready to create your own delicious memories with this classic recipe.
How to Make Traditional Hot Cross Buns
There’s something truly special about a warm, fragrant hot cross bun, especially when made from scratch. The aroma filling your kitchen as they bake, the sweet spice, the tender dough studded with plump dried fruit – it’s pure comfort. While store-bought versions are convenient, the satisfaction of creating your own, following a time-honored recipe, is unparalleled. Today, we’re diving into the art of making traditional hot cross buns, so you can enjoy this Easter (or anytime!) treat with pride.
Ingredients:
Instructions:
Step 1: Activating the Yeast and Creating the Dough Base
To begin extract, we need to wake up our yeast. In a large mixing bowl, combine the warmed milk and the instant dried yeast. Give it a gentle stir and then add 1 tablespoon of the initial 4 tablespoons of sugar. This sugar acts as food for the yeast, encouragin extractg it to become active. Let this mixture sit for about 5-10 minutes. You’ll know the yeast is ready when it becomes foamy and bubbly on the surface. This signifies that it’s alive and ready to work its magic on our dough. If you don’t see any foaming, your yeast might be old or the milk too hot, and you’ll need to start again with fresh yeast and properly tempered milk.
In a separate, larger bowl, whisk together the 4 cups + 2 tablespoons of all-purpose flour, the salt, ground cinnamon, allspice, and ground gin extractger. This is where we build our spice profile, ensuring every bite of your hot cross bun is bursting with traditional flavor. Once the yeast mixture is frothy, pour it into the dry ingredients along with the remaining 3 tablespoons of sugar, the melted butter, and the beaten eggs.
Step 2: Kneading the Dough to Develop Structure
Now comes the fun part – kneading! You can do this by hand or using a stand mixer with a dough hook attachment. If you’re kneading by hand, turn the mixture out onto a lightly floured surface. Start to bring the dough together, folding and pressing it with the heels of your hands. It will be sticky at first, but resist the urge to add too much extra flour. Gradually, as you knead, the dough will become smoother and more elastic. Knead for about 8-10 minutes by hand, or 6-8 minutes with a stand mixer on medium speed. You’re looking for a dough that is smooth, elastic, and springs back when gently poked. This kneading process develops the gluten in the flour, which gives the buns their characteristic chewy texture and allows them to rise beautifully.
Once the dough is well-kneaded, incorporate the dried currants or raisins. Gently fold them into the dough, distributing them as evenly as possible. This ensures you get a lovely burst of sweetness and chegrape juicess in every bun.
Step 3: The First Rise – Letting the Dough Double
Lightly grease a clean bowl with a little oil or butter. Place the kneaded dough into the bowl, turning it to coat all sides. Cover the bowl tightly with plastic wrap or a damp kitchen towel. Find a warm, draft-free spot in your kitchen for the dough to rise. This is often the top of a slightly warm (but not hot!) oven, or simply a sunny windowsill. Allow the dough to rise for 1 to 1.5 hours, or until it has doubled in size. Patience is key here; a good rise creates a light and airy texture.
Step 4: Shaping and the Second Rise
Once the dough has doubled, punch it down gently to release the air. Turn it out onto a lightly floured surface and divide it into 12 equal portions. Roll each portion into a smooth ball. For a more uniform bake, try to make the balls as equal in size as possible. Arrange the dough balls on a baking sheet lined with parchment paper, leaving a little space between each one as they will expand further. Cover them loosely with plastic wrap and let them rise for another 30-45 minutes, or until they are puffy and have increased in size. This second rise is crucial for ensuring light and fluffy buns.
Step 5: Baking and Creating the Iconic Cross
Preheat your oven to 375°F (190°C). While the buns are having their second rise, prepare the cross mixture. In a small bowl, combine the ⅓ cup of all-purpose flour, 2 tablespoons of sugar, and just enough warm water to create a smooth, thick paste. You want a consistency that you can pipe or spoon onto the buns without it being too runny.
Once the buns have had their second rise and are looking wonderfully plump, carefully spoon or pipe the cross mixture onto the top of each bun in a cross shape. Aim for a steady hand to create those iconic markings.
Bake the hot cross buns for 15-20 minutes, or until they are golden brown on top and sound hollow when tapped on the bottom.
Step 6: Glazing for that Perfect Shine
As soon as the buns come out of the oven, while they are still hot, you can give them a lovely glaze. In a small saucepan, gently heat about ¼ cup of water with a tablespoon of sugar until the sugar dissolves. You can also use a little apricot jam, warmed and strained for a more traditional sticky glaze. Brush this glaze over the tops of the hot buns. This adds a beautiful shine and a touch of extra sweetness.
Let the hot cross buns cool on the baking sheet for a few minutes before transferring them to a wire rack to cool completely. However, if you’re like me, the best way to enjoy them is still warm, perhaps with a generous slather of butter. Enjoy your delicious homemade hot cross buns!
Conclusion:
There you have it – your comprehensive guide to making wonderfully aromatic and delightfully spiced traditional hot cross buns from scratch! We’ve walked through each step, from activating your yeast to achieving that perfect fluffy interior and glossy cross. This recipe isn’t just about baking; it’s about creating a heartwarming tradition that fills your kitchen with an irresistible aroma and brings a taste of Easter joy to your table. These buns are wonderfully versatile, perfect for a morning treat with a smear of butter, alongside a cup of tea, or even toasted and served with a dollop of clotted cream.
Don’t be afraid to experiment! While this recipe focuses on tradition, feel free to add your own twist. Consider adding a touch of orange zest for brightness, a sprinkle of mixed candied peel for extra chegrape juicess, or even a handful of chocolate chips for a decadent variation. The beauty of baking is in its adaptability. So, gather your ingredients, put on some music, and embrace the process. I truly encourage you to try making these traditional hot cross buns; the satisfaction of biting into a warm, homemade bun is unparalleled.
Frequently Asked Questions:
Why are my hot cross buns not rising?
Several factors can affect rising. Ensure your yeast is fresh and has been activated correctly in warm (not hot) liquid. Over-kneading or under-kneading can also impact the texture and rise. Make sure your proofing environment is warm and draft-free. Humidity can also play a role; if it’s very dry, a slightly more humid spot might be needed.
Can I make hot cross buns without dried fruit?
Absolutely! While dried fruit is a hallmark of traditional hot cross buns, you can certainly omit it or substitute. If you don’t like dried fruit, simply leave it out. Alternatively, you could try adding finely chopped candied peel, chocolate chips, or even a handful of chopped nuts for a different flavor and texture profile.
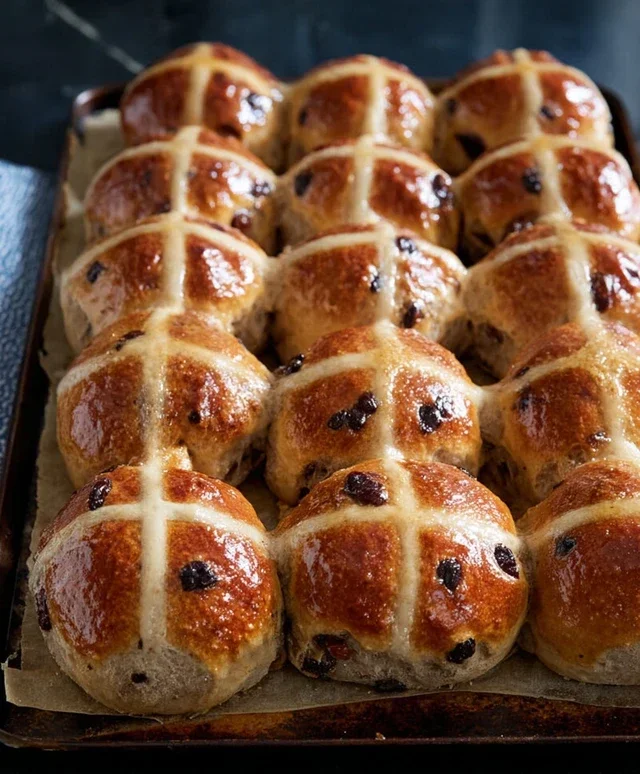
Traditional Hot Cross Buns
A classic recipe for soft and spiced hot cross buns, perfect for Easter.
Ingredients
-
1 cup (236 ml) milk warmed to 100– 115 °F (38 – 46°C)
-
2 teaspoons instant dried yeast
-
4 tablespoons sugar
-
4 cups + 2 tablespoons (525 grams) all-purpose/plain flour
-
1 teaspoon salt
-
1 teaspoon ground cinnamon
-
1 teaspoon allspice
-
¼ teaspoon ground ginger
-
1 cup (150 grams) dried currants or raisins
-
6 tablespoons unsalted butter, melted
-
2 large eggs, beaten (room temperature)
-
⅓ cup (46 grams) all-purpose/plain flour
-
2 tablespoons sugar
-
Warm water
-
2 tablespoons powdered/confectioners sugar
Instructions
-
Step 1
In a small bowl, combine the warmed milk, yeast, and 1 tablespoon of the 4 tablespoons of sugar. Let it sit for 5-10 minutes until foamy. -
Step 2
In a large bowl, whisk together the flour, salt, cinnamon, allspice, and ginger. Stir in the dried currants or raisins. -
Step 3
Add the foamy yeast mixture, the remaining 3 tablespoons of sugar, melted butter, and beaten eggs to the dry ingredients. Mix until a shaggy dough forms. -
Step 4
Turn the dough out onto a lightly floured surface and knead for 8-10 minutes until smooth and elastic. Place in a greased bowl, cover, and let rise in a warm place for 1-1.5 hours, or until doubled in size. -
Step 5
Punch down the dough and divide it into 12 equal portions. Shape each portion into a round bun and place them on a parchment-lined baking sheet, leaving some space between them. -
Step 6
Cover the buns and let them rise again for 30-45 minutes until puffy. Preheat your oven to 400°F (200°C). -
Step 7
Bake the buns for 18-20 minutes, or until golden brown. While they bake, mix the ⅓ cup flour, 2 tablespoons sugar, and a little warm water to form a smooth paste for the crosses. -
Step 8
Once the buns are out of the oven, brush them with a simple syrup (equal parts sugar and water, heated until dissolved) or melted butter. Transfer them to a wire rack and let cool slightly. -
Step 9
Once slightly cooled, pipe the flour paste mixture onto the top of each bun in a cross shape. Let the crosses set before serving.
Important Information
Nutrition Facts (Per Serving)
It is important to consider this information as approximate and not to use it as definitive health advice.
Allergy Information
Please check ingredients for potential allergens and consult a health professional if in doubt.