Easy Homemade English Muffins – Fluffy & Delicious
Easy Homemade English Muffins are the key to unlocking a world of breakfast perfection right in your own kitchen. Forget those pre-packaged versions that can sometimes feel a bit… well, bland. There’s something incredibly satisfying about biting into a warm, tender English muffin with those signature nooks and crannies, just beggin extractg to be slathered with butter and jam, or even piled high with your favorite breakfast toppings. What makes these easy homemade English muffins truly special is the incredible aroma that fills your home as they bake, a comforting promise of deliciousness to come. They’re surprisingly simple to make, requiring no fancy equipment or complicated techniques, making them accessible for even the most novice bakers. Imagin extracte waking up on a lazy weekend morning, knowing you have a batch of these delightful treats ready to go. It’s a little bit of everyday luxury that truly elevates your breakfast experience.
Why You’ll Love Them:
Simple ingredients, extraordinary results.
Perfect for breakfast, brunch, or even a quick snack.
Impress yourself (and anyone lucky enough to share!).
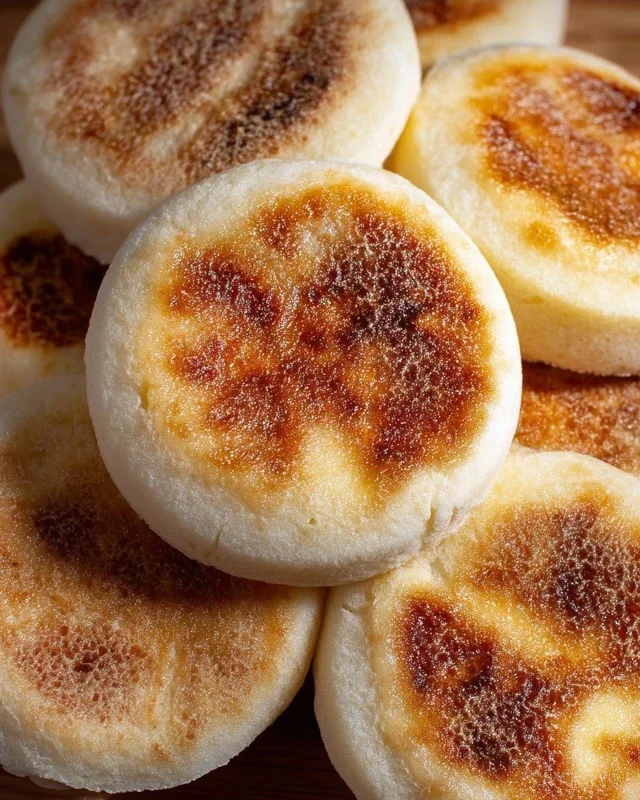
Easy Homemade English Muffins
There’s something incredibly satisfying about biting into a warm, freshly made English muffin. That perfectly toasted exterior, the delightfully nooks and crannies inside just beggin extractg to be filled with butter or jam – it’s pure comfort food. While store-bought versions are convenient, nothing compares to the taste and texture of homemade. And the best part? Making them from scratch is surprisingly easy, even for begin extractner bakers! This recipe will guide you through creating your own batch of delightful English muffins, perfect for breakfast, brunch, or even a quick snack.
Ingredients:
Cooking Instructions:
Mixing the Dough
The first step to achieving those wonderful nooks and crannies is to properly activate the yeast. In a large mixing bowl, combine the warm water and sugar. Give it a gentle stir to dissolve the sugar. Now, sprinkle the instant dry yeast over the surface of the water. You can give it a very light swirl, but resist the urge to stir it vigorously. Let this mixture sit for about 5-10 minutes. You should see it become foamy and bubbly. This is a sign that your yeast is alive and ready to work its magic. If it doesn’t foam, your yeast might be old, or the water may have been too hot or too cold, and you’ll want to start again with fresh yeast. Once you see that lovely foam, add the oil (or melted butter) to the bowl.
Adding the Flour and Salt
Next, it’s time to add your dry ingredients. Add the 2 ¾ cups of all-purpose flour or bread flour to the wet ingredients. If you’re using bread flour, your muffins might have a slightly chewier texture, which is also delightful. To this, add the salt. If you’re using kosher salt, which has larger flakes, I recommend adding an extra pinch to ensure adequate saltiness, as it’s less dense than table salt. Begin extract mixing everything together. You can do this with a sturdy spoon or a dough whisk. The dough will be shaggy and sticky at first. Continue mixing until a cohesive dough starts to form.
Kneading and First Rise
Now, we need to develop the gluten in the dough, which will give our English muffins their structure and chew. Turn the dough out onto a lightly floured surface. If the dough feels excessively sticky and is sticking to your hands and the counter, gradually add the extra ¼ cup of flour, a tablespoon at a time, until the dough is manageable. It should still be slightly sticky, not completely dry. Knead the dough for about 8-10 minutes. If you’re new to kneading, think of it as pushing the dough away from you with the heels of your hands, then folding it back towards you. Rotate the dough as you go. The dough should become smooth and elastic. Once kneaded, lightly grease your mixing bowl with a little oil. Place the dough in the bowl, turning it to coat all sides with oil. Cover the bowl tightly with plastic wrap or a clean kitchen towel and place it in a warm, draft-free spot to rise. This first rise usually takes about 1 to 1 ½ hours, or until the dough has doubled in size.
Shaping the Muffins
Once your dough has risen, gently punch it down to release the air. Turn the dough out onto a lightly floured surface. Now, you have a couple of options for shaping. You can roll the dough out to about ½ inch thickness and use a round cookie cutter (about 3 inches in diameter) to cut out your muffins. Or, you can simply divide the dough into 8-10 equal pieces and gently shape each piece into a disc. The key here is to handle the dough as little as possible once it has risen to preserve that airy texture. As you shape each muffin, dust a baking sheet or a piece of parchment paper generously with cornmeal. This cornmeal will not only prevent sticking but also give the muffins that classic English muffin texture and flavor on the bottom. Place your shaped muffins onto the prepared surface, leaving a little space between them.
Second Rise and Cooking
Now that your muffins are shaped, they need a second, shorter rise. Cover them loosely with plastic wrap or a kitchen towel and let them rest for another 20-30 minutes. During this time, preheat your griddle or a large non-stick skillet over medium-low heat. It’s crucial to cook these on the stovetop for the best results. You want a gentle, even heat. Once the griddle is ready, carefully place your risen English muffins onto it, dusted side down. Cook for about 4-6 minutes per side. You’re looking for a nice golden-brown color on both sides. Don’t be tempted to rush this by turning up the heat, as you want them to cook through without burning. The muffins will puff up nicely as they cook. If you have a lid for your skillet, you can cover it for the first few minutes of cooking each side to help them cook more evenly.
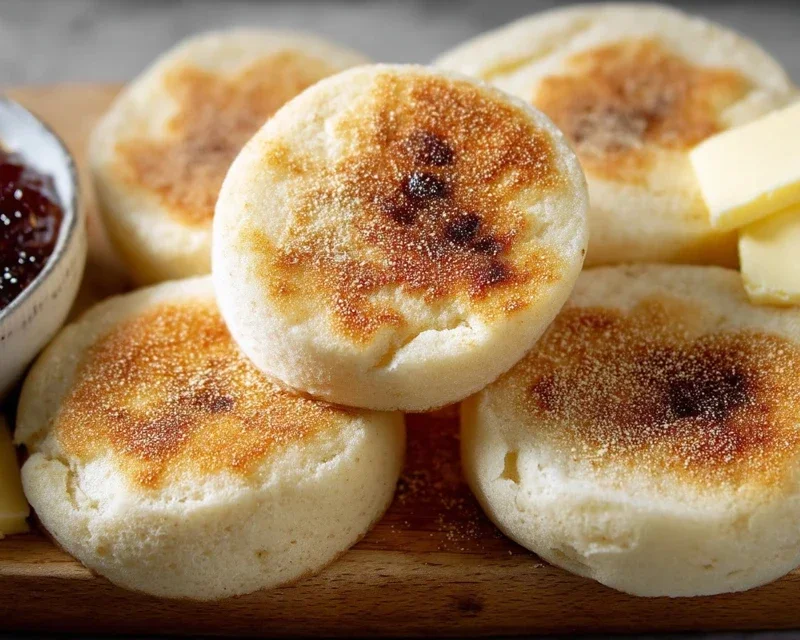
Once they are golden brown on both sides and cooked through (you can gently press the side of one to check for firmness), remove them from the skillet. For the absolute best texture and ease of splitting, it’s recommended to let them cool slightly on a wire rack for at least 10-15 minutes before you attempt to split them. Use a fork to split them open rather than slicing with a knife – this will create those wonderful, irregular nooks and crannies that are the hallmark of a great English muffin. Then, toast them to your heart’s content and enjoy the fruits of your labor!
Conclusion:
And there you have it – your guide to crafting truly easy homemade English muffins! I hope you’re feeling inspired to ditch the store-bought and experience the unparalleled joy of freshly baked, perfectly craggy rounds right from your own kitchen. This recipe truly is a winner because it proves that delicious, authentic English muffins don’t require complicated techniques or obscure ingredients. They’re surprisingly simple to make and yield a wonderfully chewy texture with that signature, delightful nooks and crannies. I love them toasted and slathered with butter and jam, but they’re also fantastic as the base for a quick breakfast sandwich with an egg and cheese, or even as a savory base for avocado and smoked salmon.
Don’t be afraid to experiment with variations! Try adding a sprinkle of herbs like rosemary or chives to the dough, or even a touch of cheese for a savory twist. You could also incorporate a bit of whole wheat flour for a nuttier flavor. The possibilities are endless and so rewarding. I wholeheartedly encourage you to give this easy homemade English muffins recipe a try. It’s a fantastic way to elevate your breakfast routine and impress yourself (and anyone lucky enough to share them with you!).
FAQs:
Why are my English muffins not getting those characteristic nooks and crannies?
The key to those delightful nooks and crannies lies in a few factors. Firstly, ensure your dough is adequately developed and has had enough time to rise. Secondly, and most importantly, cook them on a lightly greased, medium-hot griddle or cast-iron skillet. Avoid overcrowding the pan, and give them ample time to puff up and cook through on each side before trying to split them. They also benefit from being split with a fork rather than sliced, which helps preserve those internal textures.
Can I freeze these homemade English muffins?
Absolutely! Once completely cooled, you can freeze them individually wrapped in plastic wrap and then placed in a freezer-safe bag or container. They will keep well for up to 2-3 months. To reheat, simply pop them in the toaster directly from frozen. They’ll be almost as good as fresh!
What’s the best way to store leftover English muffins?
For the best freshness, store cooled English muffins in an airtight container or a resealable bag at room temperature for up to 2-3 days. If you plan to keep them longer, freezing is your best bet, as mentioned above.
Easy Homemade English Muffins
Whip up a batch of perfectly tender and golden homemade English muffins with this easy recipe. Great for breakfast or brunch, and wonderfully customizable.
Ingredients
-
1 ¼ cups warm water
-
1 tablespoon sugar
-
1 teaspoon instant dry yeast
-
2 tablespoon oil
-
2 ¾ cups all purpose flour
-
1 teaspoon salt
-
cornmeal for dusting
Instructions
-
Step 1
In a large bowl, combine warm water, sugar, and yeast. Let it sit for about 5-10 minutes until foamy. -
Step 2
Stir in the oil. Gradually add the flour and salt, mixing until a shaggy dough forms. If the dough is too sticky, add a little extra flour, up to 1/4 cup. -
Step 3
Knead the dough on a lightly floured surface for about 5-7 minutes until smooth and elastic. -
Step 4
Place the dough in a lightly oiled bowl, cover, and let it rise in a warm place for 1-1.5 hours, or until doubled in size. -
Step 5
Punch down the dough and turn it out onto a lightly floured surface. Gently pat or roll it to about 1/2 inch thickness. Cut out rounds using a 3-inch biscuit cutter or a glass. -
Step 6
Lightly dust a baking sheet with cornmeal. Place the cut rounds on the prepared baking sheet, ensuring they don’t touch. Cover and let them rest for another 20-30 minutes. -
Step 7
Heat a lightly greased griddle or large frying pan over medium-low heat. Cook the English muffins for 4-6 minutes per side, until golden brown and cooked through. -
Step 8
Cool on a wire rack. Split with a fork and toast before serving.
Important Information
Nutrition Facts (Per Serving)
It is important to consider this information as approximate and not to use it as definitive health advice.
Allergy Information
Please check ingredients for potential allergens and consult a health professional if in doubt.