Healthy Crispy Chocolate Puffed Rice Cereal
Healthy Crispy Chocolate Puffed Rice Cereal is more than just a breakfast option; it’s a nostalgic trip back to simpler times, elevated with a conscious twist. Who doesn’t remember the satisfying crunch and sweet rush of that classic puffed rice cereal? Well, I’ve taken that beloved memory and transformed it into something we can feel genuinely good about enjoying every single day. This isn’t your average sugar-laden treat. My Healthy Crispy Chocolate Puffed Rice Cereal is crafted with wholesome ingredients, offering that irresistible chocolatey flavor and delightful crisp without the guilt. It’s the perfect way to kickstart your morning with a burst of energy or to satisfy those afternoon sweet cravings with a mindful indulgence. Get ready to rediscover your favorite childhood cereal, reimagin extracted for a healthier lifestyle!
Why You’ll Love This Recipe:
Nostalgic Flavor, Modern Health
Incredibly Easy to Make
Perfectly Customizable
Healthy Crispy Chocolate Puffed Rice Cereal
Are you craving that satisfying crunch and sweet chocolatey goodness of your favorite breakfast cereal, but want to keep it healthy? Look no further! This recipe for Healthy Crispy Chocolate Puffed Rice Cereal is a game-changer. Forget the processed, sugar-laden options lining the supermarket shelves. We’re whipping up a batch of pure deliciousness right in your own kitchen, using simple, wholesome ingredients that you can feel great about serving yourself and your loved ones. This cereal is not only delicious, but it’s also incredibly easy to make, making it perfect for busy mornings or a quick, healthy snack. The rich chocolate flavor comes from raw cacao, packed with antioxidants, and the natural sweetness from maple syrup can be adjusted to your preference. Get ready to transform your breakfast bowl!
Ingredients:
Cooking Instructions:
Step 1: Prepare Your Workspace and Gather Ingredients
The first step to creating your perfect batch of healthy chocolate puffed rice cereal is to get organized. Gather all your ingredients and measure them out accurately. You’ll need your 4 cups of puffed rice, which forms the crispy base of our cereal. Ensure it’s fresh and not stnon-alcoholic ale for the best texture. Next, measure out your 4 tablespoons of coconut oil. It’s best to have it in its liquid state for easy mixing, so if it’s solidified, gently warm it in a small saucepan over low heat or in the microwave for a few seconds. Be careful not to overheat it. Then, measure out your 3 tablespoons of raw cacao powder. This is where the intense chocolate flavor and health benefits come from, so don’t skimp! You’ll also need 2 tablespoons of maple syrup – this is where you can play with the sweetness. If you prefer a less sweet cereal, start with 1 tablespoon and taste before adding the full amount. Finally, have your 1/4 teaspoon of vanilla extract ready. Having everything measured and at the ready will make the process smooth and enjoyable. You’ll also want to line a baking sheet with parchment paper. This is crucial for preventing the cereal from sticking and making clean-up a breeze.
Step 2: Melt and Mix the Chocolate Coating
In a medium-sized heatproof bowl, combine the liquid coconut oil, raw cacao powder, maple syrup, and vanilla extract. Whisk these ingredients together thoroughly until you achieve a smooth, glossy chocolate mixture. It’s important to ensure there are no lumps of cacao powder remaining. You’re looking for a consistency that’s pourable but also coats the back of a spoon well. This mixture will be responsible for giving our puffed rice cereal its delicious chocolate flavor and helping it clump together into clusters. Take your time with this step to ensure an even distribution of flavor throughout the cereal. If your coconut oil solidified a bit while you were measuring other ingredients, give the bowl a quick whisk over a barely simmering pot of water (a double boiler method) or pop it in the microwave for very short bursts (10-15 seconds) until it’s liquid again.
Step 3: Gently Combine Cereal with Chocolate Mixture
Now comes the fun part! In a large mixing bowl, add the 4 cups of puffed rice. Pour the prepared chocolate mixture over the puffed rice. Using a large spoon or spatula, very gently fold the chocolate mixture into the puffed rice. The key here is to be as gentle as possible to avoid crushing the delicate puffed rice. You want to coat each piece of puffed rice evenly without turning it into dust. It might seem like a lot of chocolate mixture for the puffed rice, but trust the process! Continue folding until every piece of puffed rice has a light coating of the chocolate mixture. It’s okay if there are some small clumps forming at this stage; those will become delightful clusters in the final cereal.
Step 4: Spread and Bake for Crispiness
Once the puffed rice is well-coated, carefully spread the mixture in an even layer onto the prepared baking sheet lined with parchment paper. Try to distribute it as uniformly as possible so that it bakes evenly. Avoid piling it up in thick sections, as this can lead to some parts being undercooked and others overcooked. You can gently pat it down with your spatula if needed. Now, preheat your oven to a low temperature, around 250°F (120°C). This low and slow baking method is essential for drying out the cereal and achieving that perfect crispiness without burning the delicate ingredients. Place the baking sheet in the preheated oven and bake for approximately 20-25 minutes.
Step 5: Cool and Break into Clusters
After the baking time, carefully remove the baking sheet from the oven. The cereal will likely still be a little soft. Allow it to cool completely on the baking sheet. As it cools, it will firm up and become wonderfully crispy. Resist the urge to stir or touch it while it’s hot. Once completely cool, you can gently break apart any larger clumps into bite-sized clusters. You should now have a batch of delicious, healthy, crispy chocolate puffed rice cereal ready to enjoy! Store your finished cereal in an airtight container at room temperature to maintain its crispiness. It should stay fresh for about a week. Enjoy it with your favorite milk, yogurt, or even as a healthy snack on its own!

Conclusion:
There you have it – your guide to making the most delicious and healthy crispy chocolate puffed rice cereal right in your own kitchen! We’ve shown you how simple it is to whip up a batch of this satisfyingly crunchy treat without all the processed sugars and artificial ingredients found in store-bought versions. This recipe is a winner because it’s incredibly versatile, surprisingly quick, and delivers that delightful chocolatey crunch you crave. It’s perfect for a quick breakfast, a healthy snack, or even a delightful topping for yogurt or smoothie bowls. I truly encourage you to give this healthy crispy chocolate puffed rice cereal a try – you won’t be disappointed!
Feel free to experiment with different additions like a sprinkle of cinnamon, a dash of vanilla extract for extra depth, or even a few chopped nuts for added texture and nutrients. This recipe is your blank canvas for cereal perfection!
Frequently Asked Questions:
Can I make this cereal vegan?
Absolutely! Ensure you use a dairy-free chocolate (many dark chocolates are naturally vegan) and a plant-based milk if you opt for adding any liquid for binding. The core ingredients are already vegan-friendly.
How should I store my homemade cereal?
For maximum crispiness, store your healthy crispy chocolate puffed rice cereal in an airtight container at room temperature. It should stay fresh and crunchy for up to a week, though it rarely lasts that long!
Can I reduce the sweetness further?
Yes, you can! You can adjust the amount of sweetener to your personal preference. Start with a little less and taste as you go. The natural sweetness of the puffed rice and a touch of cocoa can be quite satisfying on their own.
Healthy Crispy Chocolate Puffed Rice Cereal
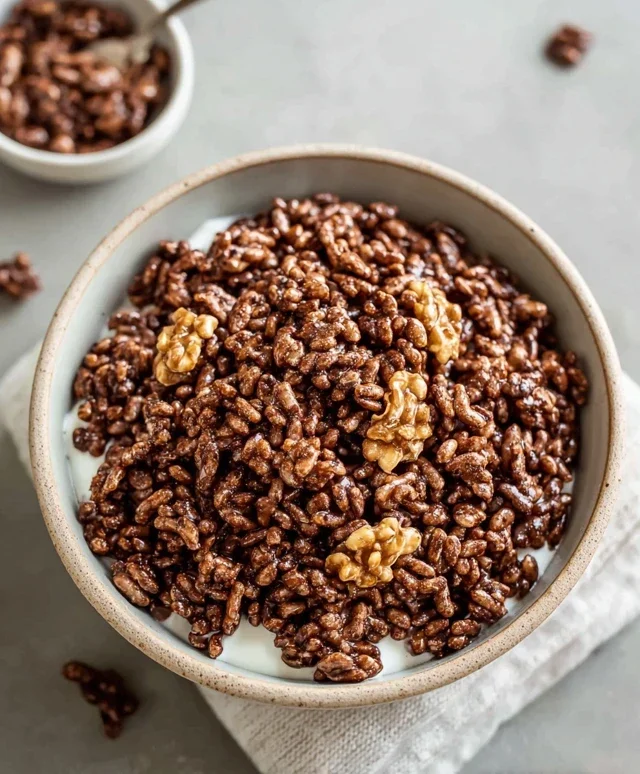
A simple and healthy homemade puffed rice cereal with chocolate flavor, perfect for a quick breakfast or snack.
Ingredients
-
4 cups puffed rice
-
4 tbsp coconut oil, liquid
-
3 tbsp raw cacao
-
2 tbsp maple syrup
-
1/4 tsp vanilla extract
-
Pinch of salt
Instructions
-
Step 1
Preheat oven to 300°F (150°C) and line a baking sheet with parchment paper. -
Step 2
In a large bowl, combine the liquid coconut oil, raw cacao, maple syrup, vanilla extract, and salt. -
Step 3
Whisk the wet ingredients until well combined and smooth. -
Step 4
Add the puffed rice to the bowl with the chocolate mixture and gently toss until evenly coated. -
Step 5
Spread the coated puffed rice in a single layer on the prepared baking sheet. -
Step 6
Bake for 15-20 minutes, stirring halfway through, until lightly toasted and crispy. Be careful not to burn. -
Step 7
Let cool completely on the baking sheet. The cereal will crisp up further as it cools.
Important Information
Nutrition Facts (Per Serving)
It is important to consider this information as approximate and not to use it as definitive health advice.
Allergy Information
Please check ingredients for potential allergens and consult a health professional if in doubt.