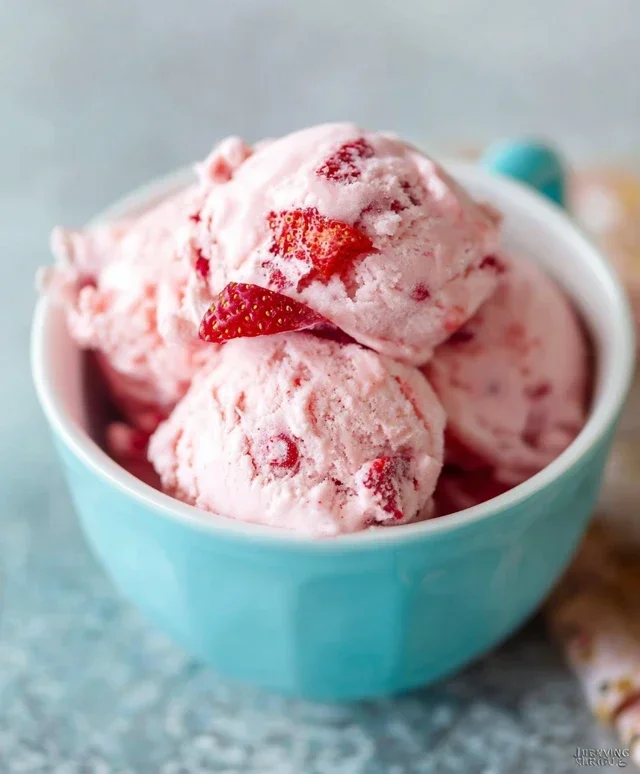
Easy Homemade Strawberry Ice Cream Recipe – Delicious!
Homemade strawberry ice cream is more than just a dessert; it’s a taste of pure summer bliss. There’s something undeniably magical about that first spoonful of creamy, sweet, and slightly tart ice cream, bursting with the vibrant flavor of fresh strawberries. It’s a timeless classic for a reason, evoking childhood memories and simple joys. What makes this particular homemade strawberry ice cream recipe so special? It’s the satisfaction of creating something truly delicious from scratch, knowing exactly what goes into it. Forget artificial flavors and preservatives; we’re talking about the pure, unadulterated taste of ripe, juicy strawberries transformed into a luxurious, frozen treat. The vibrant pink hue alone is enough to make your mouth water, promising a refreshing and utterly delightful experience with every single bite. Get ready to fall in love with this delightful, homemade indulgence.
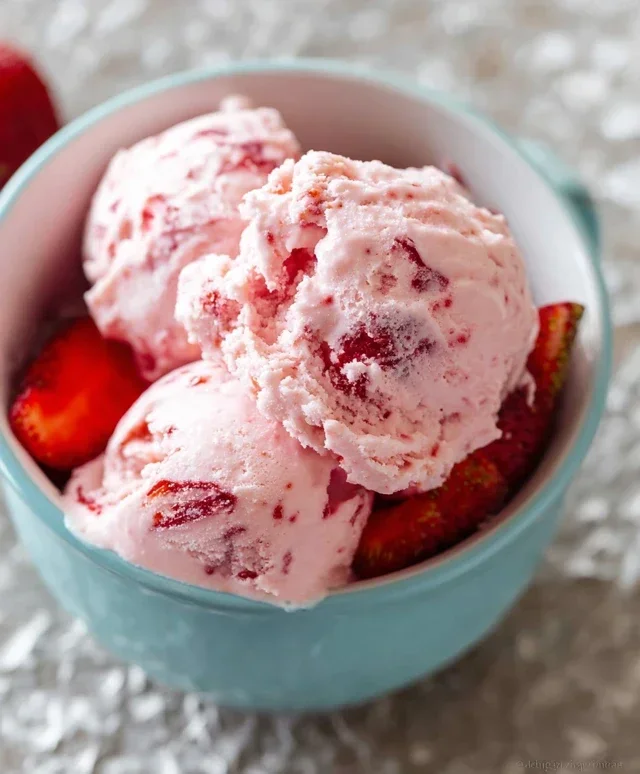
Homemade Strawberry Ice Cream
There’s something incredibly special about homemade ice cream, and when it comes to a classic like strawberry, the homemade version simply can’t be beat. Forget those artificial pink colors and fleeting flavors; this recipe delivers the vibrant, sun-kissed taste of real strawberries, perfectly balanced with creamy sweetness. It’s surprisingly easy to make, and the result is a treat so delightful, it’ll make you question why you ever bought store-bought again. Whether you’re a seasoned ice cream maker or a curious begin extractner, this recipe is designed to guide you to creamy, dreamy strawberry perfection.
Ingredients:
Instructions:
Prepare the Strawberry Base:
The foundation of this delicious ice cream is a vibrant strawberry puree. Start by taking your hulled and diced strawberries and placing them in a medium-sized bowl. Add the 2 tablespoons of honey, 1/2 cup of granulated sugar, and the 1 teaspoon of lemon juice. The lemon juice isn’t just for flavor; it helps to brighten the natural sweetness of the strawberries and adds a subtle tang that cuts through the richness of the cream. Gently stir these ingredients together, ensuring the strawberries are well coated. Now, this is where you can choose your adventure for texture. For a smoother ice cream with flecks of strawberry, you can mash the berries with a fork or potato masher until they’re broken down but still have some texture. If you prefer a completely smooth and uniform strawberry flavor throughout, you can use an immersion blender or a regular blender to puree the mixture until it’s silky smooth. I personally love a little bit of texture, so I tend to go with the mashing method, ensuring I get those lovely little strawberry bits in every spoonful. Let this mixture sit for about 15-20 minutes. This resting period allows the sugar to draw out more juice from the strawberries, creating a more intense flavor and a richer syrup.
Combine the Creamy Elements:
While your strawberries are macerating, it’s time to prepare the creamy base. In a separate, larger bowl, pour in the 1 cup of heavy whipping cream and the 1/2 cup of half and half. This combination provides the perfect richness without being overly heavy. Add the 1 teaspoon of vanilla extract. Vanilla is a classic flavor enhancer that complements strawberries beautifully, adding depth and warmth to the overall profile. Using a whisk, gently but thoroughly combine the cream, half and half, and vanilla extract. You want to make sure everything is well incorporated, but you don’t need to whip it to stiff peaks at this stage. The goal is just to create a homogenous liquid base for our ice cream.
Merge the Flavors:
Now comes the exciting part: bringin extractg the strawberry and cream elements together. Take your prepared strawberry mixture (which should now be juicy and fragrant) and carefully pour it into the bowl with the cream mixture. Using your whisk, gently stir everything together until it’s fully combined. You’ll notice the beautiful pink hue developing as the strawberry juice swirls into the cream. Don’t overmix here; just ensure there are no distinct layers of strawberry or cream. It’s at this point that you can do a taste test. If you find your strawberries weren’t as sweet as you’d hoped, or if you have a preference for a sweeter ice cream, you can add a little more sugar, a tablespoon at a time, stirring until dissolved. Remember, the flavor will be slightly less intense once frozen, so aim for a taste that’s just a touch sweeter than you’d ideally want it to be.
Chill the Base:
This step is crucial for achieving the smoothest, creamiest ice cream. Transfer your combined strawberry-cream mixture into a clean container, cover it tightly with plastic wrap, and place it in the refrigerator to chill thoroughly. Ideally, you want to let it chill for at least 4 hours, but overnight is even better. This chilling process allows the flavors to meld together beautifully and, more importantly, ensures the base is cold enough for your ice cream maker. A cold base churns more efficiently, resulting in smaller ice crystals and therefore a smoother texture. If your ice cream maker has a freezer bowl, make sure that it has been in the freezer for the manufacturer’s recommended time (usually 12-24 hours) until completely frozen.
Churn and Freeze:
Once your base is thoroughly chilled and your ice cream maker is ready, it’s time to churn! Pour the cold strawberry ice cream base into your ice cream maker and churn according to the manufacturer’s instructions. This usually takes about 20-30 minutes. As it churns, the mixture will gradually thicken and become more like soft-serve ice cream. You’ll see it transforming before your eyes, a testament to the magic of homemade ice cream. Once it has reached a soft-serve consistency, it’s time to transfer it to its final resting place. Spoon the ice cream into a freezer-safe container. For the best texture, press a piece of parchment paper or plastic wrap directly onto the surface of the ice cream to prevent ice crystals from forming. Cover the container tightly and place it in the freezer for at least 4-6 hours, or until firm. The longer it freezes, the firmer it will become. If you can resist, the wait is well worth it! Enjoy your incredibly delicious, homemade strawberry ice cream!
Conclusion:
And there you have it – your very own luscious, homemade strawberry ice cream! I truly hope you found this recipe as delightful to make as it is to devour. This recipe stands out because it captures the pure, vibrant essence of fresh strawberries without any artificial flavors, delivering a creamy, dreamy texture that store-bought options often can’t match. It’s a fantastic way to celebrate the season’s best berries and create a truly special treat for yourself and your loved ones. Imagin extracte a scoop of this gorgeous pink ice cream melting in your mouth on a warm afternoon – pure bliss!
Serving this wonderful homemade strawberry ice cream is an adventure in itself. It’s absolutely divine on its own, but it also pairs beautifully with a warm slice of pound cake, a sprinkle of toasted almonds, or a drizzle of rich chocolate sauce. For an extra special touch, top it with a few fresh mint leaves or even a dollop of lightly whipped cream.
Don’t be afraid to experiment with variations! You could swirl in some fresh blueberry compote for a berry medley, add a touch of balsamic glaze for a sophisticated twist, or even fold in some finely chopped basil for an unexpected yet delightful herbal note. I strongly encourage you to give this recipe a try. It’s simpler than you might think and incredibly rewarding!
Frequently Asked Questions:
Q: Can I make this homemade strawberry ice cream without an ice cream maker?
Absolutely! While an ice cream maker makes the process incredibly easy, you can still achieve a delicious result without one. Simply pour the base mixture into a freezer-safe container. Every 30-45 minutes for the first 2-3 hours, remove it from the freezer and vigorously whisk it with a fork or an immersion blender to break up ice crystals. This process mimics the churning of an ice cream maker and will result in a smoother texture.
Q: My strawberries aren’t very sweet. How can I adjust the sweetness?
If your strawberries are on the tart side, you can easily adjust the sugar content. I recommend tasting your strawberry puree before adding it to the cream mixture. If it needs more sweetness, you can add a tablespoon or two of granulated sugar or a bit of honey or maple syrup to the puree itself. Start with a small amount and taste as you go until you reach your desired sweetness level.
Homemade Strawberry Ice Cream
A simple and delicious homemade strawberry ice cream recipe made with fresh strawberries and minimal ingredients. No ice cream maker required!
Ingredients
-
1 1/2 cups strawberries, hulled and diced
-
2 Tbsp honey
-
1/2 cup granulated sugar
-
1 tsp lemon juice
-
1 cup heavy whipping cream
-
1/2 cup half and half
-
1 tsp vanilla extract
Instructions
-
Step 1
In a bowl, mash the diced strawberries with the honey, granulated sugar, and lemon juice. Let sit for about 15 minutes to allow the flavors to meld and the strawberries to release their juices. -
Step 2
In a separate bowl, whisk together the heavy whipping cream, half and half, and vanilla extract until just combined. Do not overmix. -
Step 3
Gently fold the strawberry mixture into the cream mixture until just incorporated. Avoid over-stirring to maintain a creamy texture. -
Step 4
Pour the mixture into a freezer-safe container. Cover tightly. -
Step 5
Freeze for at least 6-8 hours, or until firm. Stir every couple of hours during the first 3-4 hours to help prevent large ice crystals from forming. -
Step 6
Before serving, let the ice cream sit at room temperature for a few minutes to soften slightly.
Important Information
Nutrition Facts (Per Serving)
It is important to consider this information as approximate and not to use it as definitive health advice.
Allergy Information
Please check ingredients for potential allergens and consult a health professional if in doubt.