Easy Pickled Red Onions- Quick & Tangy Recipe
Pickled red onions are an absolute game-changer in any kitchen, and I’m thrilled to share my foolproof recipe with you today! If you’re anything like me, you’ve probably encountered these vibrant, tangy jewels perched atop tacos, salads, sandwiches, or even just scattered over avocado toast. There’s a reason these bright beauties have become so beloved – they possess an unparalleled ability to elevate the simplest of dishes with a burst of flavor and a delightful crunch. What truly makes pickled red onions so special is their transformative magic; they take a humble raw onion and turn it into something spectacularly delicious, offering a perfect balance of sweetness and acidity that cuts through richness and adds a pop of color that’s as beautiful as it is tasty. Get ready to fall in love with this incredibly versatile condiment!
Pickled Red Onions: A Burst of Flavor for Every Dish
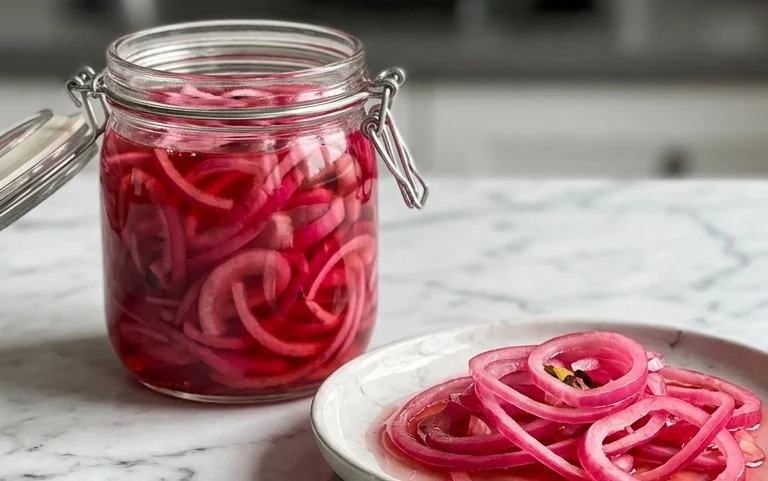
There’s a reason why pickled red onions have become a culinary darling. Their vibrant color, tangy bite, and subtle sweetness elevate everything from tacos and salads to sandwiches and charcuterie boards. They’re incredibly simple to make, requiring just a few pantry staples and a little bit of patience. Once you try them, you’ll wonder how you ever lived without them. The beauty of homemade pickled red onions lies in their versatility and the fact that you can control the ingredients to suit your taste. Plus, they add an instant visual appeal to any meal. Let’s dive into how you can whip up a batch of these delightful flavor bombs in your own kitchen.
Ingredients:
The Art of Preparation: Slicing Your Onions
The first step to perfect pickled red onions is how you prepare your onions. For the best results, you want thinly sliced onions. This allows the brine to penetrate evenly and ensures that each slice becomes beautifully tender and vibrant. You can achieve this using a sharp chef’s knife or, for incredibly uniform slices, a mandoline slicer. If you opt for a mandoline, please exercise extreme caution and always use the safety guard. Aim for slices that are about 1/8 to 1/4 inch thick. Thicker slices will take longer to pickle and might retain a bit more of a raw onion crunch, while super-thin slices can become a little too soft if left for an extended period. Once sliced, I like to separate the rings so they don’t clump together in the jar. This helps ensure that the pickling brine can reach every nook and cranny.
Crafting the Perfect Brine: The Heart of the Pickle
The brine is where all the magic happens. It’s a simple combination of liquids and seasonings that will transform your raw onions into something spectacular. In a medium saucepan, combine the water, white vinegar, sugar, and sea salt. If you’re feeling a little adventurous and want a touch of heat, this is also where you’ll add your red pepper flakes. I personally love the subtle kick they provide, but if you prefer a milder pickle, you can omit them entirely.
Heating and Dissolving: A Quick Simmer
Place the saucepan over medium heat. Stir the mixture occasionally, ensuring that the sugar and salt are completely dissolved. You want to bring the brine to a gentle simmer, but it’s not necessary to boil it vigorously. Once it reaches a simmer and you can no longer see any granules of sugar or salt, remove the saucepan from the heat. This brief simmering process helps to meld the flavors and ensures a smooth, well-balanced brine. It’s important to let the brine cool slightly before pouring it over the onions to avoid “cooking” them too much initially.
The Waiting Game: Infusing with Flavor
Now comes the most crucial part: patience. Carefully place your sliced red onions into a clean, heatproof jar or container. A mason jar with a lid is ideal. Once the brine has cooled for about 5-10 minutes (it should still be warm but not scalding hot), carefully pour it over the onions, making sure they are fully submerged. If you find that your onions are peeking out, you can top them off with a little extra water and vinegar mixture in the same ratio, or simply press them down with a spoon. Seal the jar tightly with its lid.
The Transformation: From Raw to Vibrant
Allow the jar to sit at room temperature for at least 30 minutes to an hour. During this time, you’ll witness a remarkable transformation. The vibrant purple of the red onions will deepen, and they’ll begin extract to soften. For a more intense pickle and a softer texture, you can refrigerate them for at least 2-3 hours. However, I find that the flavor develops beautifully overnight. The longer they sit in the brine, the more pickled they will become.
Storing and Enjoying Your Pickled Masterpiece
Once your pickled red onions have reached your desired level of tang and tenderness, they are ready to be enjoyed! They will keep in the refrigerator for up to 2-3 weeks. The brine itself also becomes infused with onion flavor and can be used in salad dressings or marinades. You’ll find yourself reaching for them constantly – they are the perfect garnish for avocado toast, a bright addition to any salad, an essential component for a killer burger, and a welcome counterpoint to rich and savory dishes. Experiment with them, and discover your favorite way to enjoy these simple yet extraordinary pickled red onions!
Conclusion:
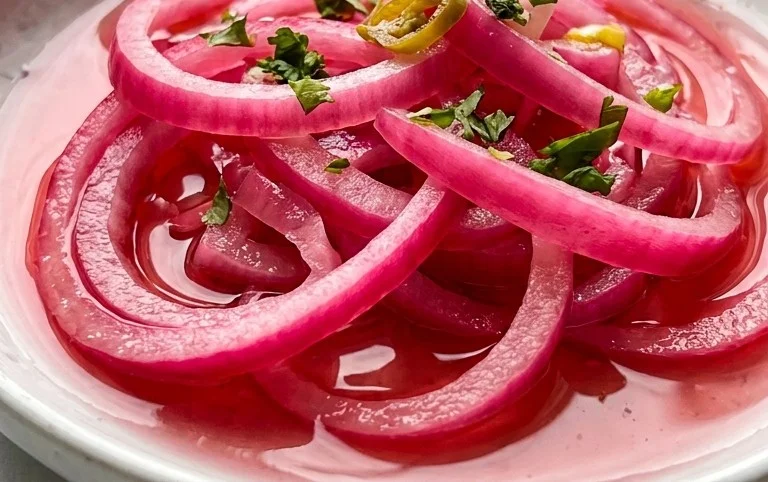
There you have it – a simple yet incredibly impactful way to elevate your meals! This pickled red onions recipe is a game-changer, offering a delightful balance of sweet, tangy, and slightly peppery flavors that cut through richness and add a vibrant pop of color to virtually any dish. The beauty of this recipe lies in its ease and versatility. In just a few minutes of active prep, you can create a condiment that will last for weeks, transforming ordinary tacos, salads, sandwiches, and even roasted vegetables into something truly special. Don’t be afraid to experiment with different vinegars or add a pinch of your favorite spice for a personalized touch. I truly encourage you to give this recipe a try – you’ll wonder how you ever lived without these amazing pickled red onions!
Frequently Asked Questions:
Q: How long do pickled red onions last?
A: Properly stored in an airtight container in the refrigerator, these pickled red onions will stay fresh and delicious for up to 3-4 weeks. The flavor often continues to deepen and improve over time!
Q: Can I use a different type of vinegar?
A: Absolutely! While apple cider vinegar is a fantastic choice, you can certainly experiment with other vinegars like red grape juice vinegar, white grape juice vinegar, or even rice vinegar. Each will impart a slightly different flavor profile, so feel free to find your favorite!
Q: Can I adjust the sweetness?
A: Yes, you can easily adjust the sweetness. If you prefer them less sweet, reduce the amount of sugar. If you like them a bit sweeter, you can add another tablespoon. Some people even like to add a touch of honey or maple syrup for a different kind of sweetness.
Pickled Red Onions
Quick and easy pickled red onions with a sweet, tangy, and slightly spicy kick. Perfect for tacos, sandwiches, salads, and more.
Ingredients
-
2 medium red onions ((or 3 small ones))
-
1 1/4 cup water
-
1 1/4 cup white vinegar
-
3 tbsp sugar (of choice)
-
1 tbsp sea salt
-
1/4-1/2 tsp red pepper flakes ((optional))
Instructions
-
Step 1
Thinly slice the red onions into rings or half-moons. A mandoline slicer works well for even slices. -
Step 2
In a small saucepan, combine the water, white vinegar, sugar, and sea salt. Stir until the sugar and salt are dissolved. -
Step 3
Bring the liquid mixture to a boil over medium-high heat. -
Step 4
Place the sliced red onions into a heatproof jar or bowl. If using, add the red pepper flakes. -
Step 5
Carefully pour the hot brine over the onions, ensuring they are fully submerged. -
Step 6
Let the onions cool to room temperature, then cover and refrigerate for at least 30 minutes before serving to allow them to pickle. They will turn a vibrant pink.
Important Information
Nutrition Facts (Per Serving)
It is important to consider this information as approximate and not to use it as definitive health advice.
Allergy Information
Please check ingredients for potential allergens and consult a health professional if in doubt.