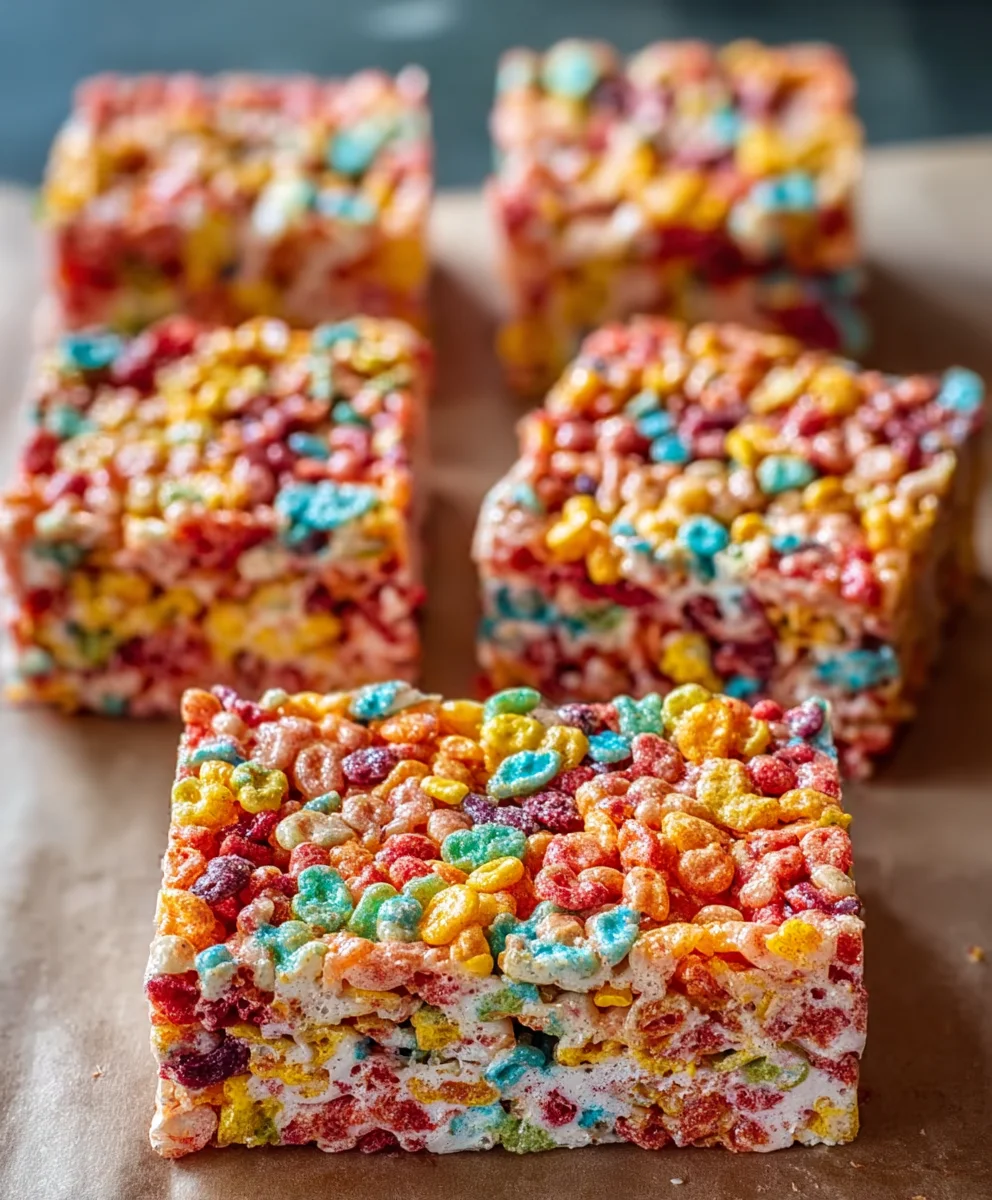
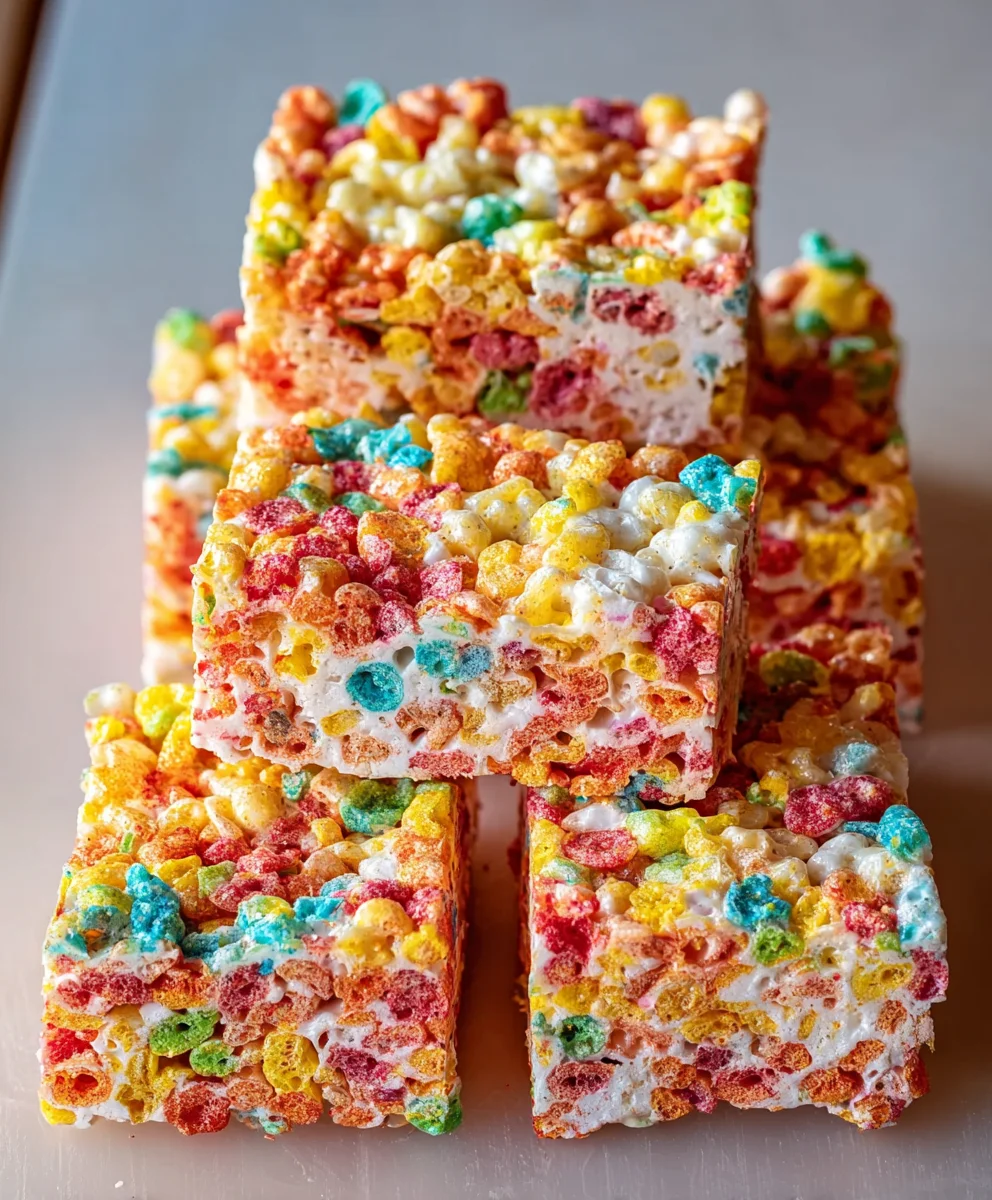
Fruity Pebbles Treats- Easy Fun Cereal Snack
Fruity Pebbles Treats are more than just a nostalgic snack; they’re a vibrant explosion of color and flavor that instantly transports us back to carefree childhood days. Who can resist those perfectly crunchy, slightly chewy squares bursting with the unmistakable sweet, fruity essence of Fruity Pebbles cereal? I know I certainly can’t! These aren’t your average rice krispie treats. The magic lies in the sheer joy they evoke, the way the rainbow of colors sparks immediate happiness, and the simple, unadulterated deliciousness that comes from transforming a beloved breakfast cereal into an irresistible dessert. They are incredibly easy to make, making them a fantastic activity to share with kids or a delightful quick fix for a sweet craving. Get ready to create a batch that will have everyone asking for the recipe!
Ingredients:
- 5 cups mini marshmallows, plus an additional 2 cups for finishing
- 7 cups Fruity Pebbles cereal
- 1/4 cup salted butter
- 1 cup Ghirardelli white vanilla wafers, crushed
Preparing Your Workspace and Components
To start crafting these delightful Fruity Pebbles Treats, the first crucial step is to prepare your working area and ensure all your components are ready. This is where organization pays off, making the cooking process smooth and enjoyable. Begin extract by greasing a 9×13 inch baking pan. You can use butter or cooking spray for this. Make sure to get into all the corners and up the sides of the pan to prevent the treats from sticking, which can be incredibly frustrating when you’re ready to enjoy them.
Next, take your Ghirardelli white vanilla wafers. These are going to add a subtle sweetness and a delightful textural contrast to the classic Fruity Pebbles Treats. Place the wafers in a sturdy resealable bag, such as a zip-top bag. Use a rolling pin or the flat side of a heavy pan to crush them into small, crum extractb-like pieces. You don’t need them to be a fine powder; some small chunks will add character. Set these crushed wafers aside.
In a large mixing bowl, measure out your 7 cups of Fruity Pebbles cereal. It’s important to have this ready to go because once the marshmallow mixture is done, you’ll want to combine everything quickly while it’s still hot and pliable. Having the cereal measured and within easy reach will prevent any last-minute scrambling and ensure an even coating of the marshmallow mixture.
Melting the Marshmallow Base
Now it’s time to create the sticky, sweet binder that holds these Fruity Pebbles Treats together. In a large saucepan, melt the 1/4 cup of salted butter over low heat. It’s important to use low heat here to prevent the butter from burning, which can impart an undesirable flavor. Once the butter has completely melted, add the initial 5 cups of mini marshmallows to the pan.
Continue to stir the marshmallows constantly with a heat-safe spatula or wooden spoon. You want the marshmallows to melt evenly and smoothly into a gooey, luscious mixture. Resist the urge to turn up the heat; patience is key to achieving a perfect marshmallow base. Keep stirring until all the marshmallows are fully melted and the mixture is smooth and glossy. This usually takes about 3-5 minutes.
Combining the Ingredients for Fruity Pebbles Treats
Once the marshmallows are completely melted and smooth, it’s time to bring everything together. Remove the saucepan from the heat. Immediately add the crushed Ghirardelli white vanilla wafers to the melted marshmallow mixture. Stir them in gently but thoroughly until they are well distributed. The heat from the marshmallows will help to slightly soften therum extractfer crumbs, integrating them beautifully.
Now, it’s time for the star of the show: the Fruity Pebbles cereal. Add the 7 cups of Fruity Pebbles cereal to the saucepan with the marshmallow and wafer mixture. Using your heat-safe spatula or wooden sgin extractn, begin to fold the cereal into the marshmallow mixture. Work quickly but gently. You want to coat every single piece of cereal with the sticky marshmallow mixture. Ensure that you are not breaking the cereal pieces too much; gentle folding is preferred. Keep stirring until the Fruity Pebbles are evenly coated and you have a colorful, sticky mass.
Pressing and Shaping the Treats
Carefully scrape the mixture from the saucepan into your prepared 9×13 inch baking pan. It will be quite sticky, so use your spatula to help guide it into the pan. Now comes the important part: pressing the mixture into an even layer. This is where you’ll achieve those classic, uniform Fruity Pebbles Treats.
You have a few options for pressing. You can lightly grease your hands with butter or cooking spray and gently press the mixture down. Another effective method is to use the bottom of a greased glass or a piece of parchment paper. Place a piece of parchment paper over the mixture in the pan and then use your hands or a flat object to press down evenly. The goal is to create a compact, even layer without squishing all the air out of the cereal. Ensure the thickness is consistent throughout the pan for uniform baking and cutting.
Finishing Touches and Setting
For an extra touch of sweetness and visual appeal, it’s time to use those reserved 2 cups of mini marshmallows. Sprinkle them evenly over the top of the pressed Fruity Pebbles mixture while it is still warm. Don’t worry if they don’t all stick perfectly at this stage; some will melt slightly into the warm cereal. This step adds little pockets of gooey marshmallow and a beautiful finish.
Now, gently press these extra marshmallows down into the main mixture with your greased hands or parchment paper. This helps them adhere better and creates that signature look of many homemade Fruity Pebbles Treats. Once you are satisfied with the pressing and the distribution of the extra marshmallows, allow the treats to cool and set completely in the pan. This usually takes at least 30 minutes to an hour. Resist the urge to cut them too soon, as they will be too soft and sticky.
Slicing and Serving Your Fruity Pebbles Treats
Once the Fruity Pebbles Treats have cooled and set firm, it’s time for the final step: slicing. Lift the entire slab of treats out of the pan using the parchment paper if you used it, or invert the pan onto a cutting board. Using a sharp knife, cut the treats into your desired shapes. Squares or rectangles are traditional, but you can get creative. For clean cuts, wipe your knife with a damp cloth or grease it lightly between cuts, especially if the treats are still a bit soft.
These Fruity Pebbles Treats are best enjoyed fresh, but they can be stored in an airtight container at room temperature for a few days. The combination of the crunchy cereal, gooey marshmallows, and subtle vanilla wafer sweetness makes these an irresistible treat for all ages. Enjoy the vibrant colors and delicious flavor!
Conclusion:
And there you have it – the ultimate guide to making delightful Fruity Pebbles Treats! We’ve walked through each step, from melting the butter and marshmallows to the final, satisfying press. These vibrant, sweet, and slightly chewy squares are incredibly versatile and sure to bring a smile to anyone’s face. They’re perfect for a quick snack, a fun party dessert, or even a creative addition to a lunchbox. Don’t be afraid to experiment with these Fruity Pebbles Treats; they’re a fantastic base for culinary adventures!
For serving suggestions, consider cutting them into fun shapes using cookie cutters after they’ve cooled slightly. They pair wonderfully with a glass of cold milk or even a scoop of vanilla ice cream for an extra decadent treat. When it comes to variations, the possibilities are endless! You can add a sprinkle of rainbow sprinkles for extra color, a drizzle of melted white chocolate, or even mix in some mini chocolate chips. Get creative and make your Fruity Pebbles Treats uniquely yours!
Frequently Asked Questions:
Q: How can I prevent my Fruity Pebbles Treats from becoming too hard?
A: The key to soft and chewy Fruity Pebbles Treats is to avoid overcooking the marshmallow mixture. Make sure you only melt the marshmallows until they are just smooth and fully incorporated, and then immediately remove them from the heat. Also, don’t press down too firmly when shaping them; a gentle, even press is sufficient.
Q: Can I make Fruity Pebbles Treats ahead of time?
A: Absolutely! Fruity Pebbles Treats can be made a day or two in advance. Store them in an airtight container at room temperature. For best results, ensure they are completely cooled before storing to prevent condensation.
Fruity Pebbles Treats
Easy and fun cereal snack made with Fruity Pebbles, marshmallows, and white vanilla wafers.
Ingredients
-
7 cups Fruity Pebbles cereal
-
5 cups mini marshmallows, plus an additional 2 cups for finishing
-
1/4 cup salted butter
-
1 cup Ghirardelli white vanilla wafers, crushed
-
Cooking spray or butter, for greasing
Instructions
-
Step 1
Grease a 9×13 inch baking pan. Crush the white vanilla wafers into small pieces using a resealable bag and a rolling pin. Measure out the Fruity Pebbles cereal into a large mixing bowl. -
Step 2
In a large saucepan over low heat, melt the butter. Add 5 cups of mini marshmallows and stir constantly until fully melted and smooth (about 3-5 minutes). Do not turn up the heat. -
Step 3
Remove the marshmallow mixture from heat. Stir in the crushed vanilla wafers until evenly distributed. Add the Fruity Pebbles cereal and gently fold until every piece is coated with the marshmallow mixture. -
Step 4
Scrape the mixture into the prepared baking pan. Lightly grease your hands or use parchment paper to press the mixture evenly into a compact layer without squishing out all the air. -
Step 5
While the mixture is still warm, sprinkle the remaining 2 cups of mini marshmallows over the top. Gently press them into the cereal mixture. Allow the treats to cool and set completely for at least 30 minutes to an hour. -
Step 6
Once set, lift the slab out of the pan or invert it onto a cutting board. Cut into desired shapes using a sharp knife. Wipe the knife with a damp cloth or grease it between cuts for cleaner slices. Enjoy fresh.
Important Information
Nutrition Facts (Per Serving)
It is important to consider this information as approximate and not to use it as definitive health advice.
Allergy Information
Please check ingredients for potential allergens and consult a health professional if in doubt.