Creamy Garlic Chicken Recipe – Easy & Delicious
Creamy Garlic Chicken is the ultimate comfort food, a dish that whispers of cozy evenings and satisfied sighs. If you’ve ever dreamt of a meal that’s both incredibly indulgent and surprisingly simple to whip up, then you’ve found your culinary soulmate. This isn’t just any chicken dish; it’s a symphony of tender, succulent chicken bathed in a velvety, non-intoxicating garlic sauce that will have you licking your plate clean. What makes this particular Creamy Garlic Chicken so beloved? It’s the perfect balance of rich, savory flavors with just a hint of brightness, creating a culinary experience that feels both elegant and utterly unpretentious. Whether you’re looking to impress guests or simply treat yourself to something extraordinary after a long day, this recipe promises pure, unadulterated deliciousness that will become a staple in your kitchen.
Ingredients:
- 2 large boneless, skinless chicken breasts
- Salt and freshly ground black pepper, to taste
- 3 teaspoons Italian seasoning
- ⅓ cup all-purpose flour (for dredgin extractg)
- 4 tablespoons shredded Parmesan cheese
- 3 tablespoons olive oil
- 2 ½ cups chicken broth
- 1 beef bouillon cube (or 1 teaspoon Better Than Bouillon beef base)
- 1 teaspoon low-sodium soy sauce (or Worcestershire sauce as a substitute)
- 1 teaspoon onion powder
- ½ teaspoon dried thyme
- ½ teaspoon mustard powder
- 3 tablespoons unsalted butter
- 10 whole cloves garlic, peeled
- 3 tablespoons all-purpose flour (for sauce thickening)
- ½ cup heavy cream
Preparing the ChickenSearing and Building the Sauce Base
Now it’s time to bring some heat and build the foundation of our creamy sauce. Place a large skillet or a Dutch oven over medium-high heat. Add the 3 tablespoons of olive oil to the hot skillet. Once the oil is shimmering, carefully lay the flour-coated chicken breasts into the pan. You should hear a satisfying sizzle. Cook the chicken for about 4-5 minutes per side, or until it’s a deep golden brown and has developed a nice crust. The internal temperature should be around 160°F (71°C) at this point, but we’ll finish cooking it in the sauce. Once seared, remove the chicken from the skillet and set it aside on a clean plate, leaving any browned bits and rendered fat in the pan.
Lower the heat to medium. Add the 3 tablespoons of butter to the same skillet. Once the butgin extract has melted and is beginning to foam, toss in the 10 whole peeled cloves of garlic. We’re not mincing the garlic here; keeping them whole allows them to infuse their flavor into the sauce gently as they soften. Sauté the garlic for about 1-2 minutes, stirring occasionally, untgin extractthey are fragrant and just beginning to soften, being careful not to burn them.
Developing the Creamy Sauce
With the garlic fragrant and softened, it’s time to create the luscious sauce. Sprinkle the remaining 3 tablespoons of all-purpose flour directly over the softened garlic and the drippings in the skillet. Stir this flour mixture into the garlic and fat, creating a roux. Cook the roux for about 1 minute, stirring constantly. This helps to cook out the raw flour taste and build a richer base for our sauce.
Gradually whisk in the 2 ½ cups of chicken broth, a little at a time, making sure to scrape the bottom of the pan to loosen any browned bits – these bits are packed with flavor! Continue whisking until the mixture is smooth and there are no lumps of flour. Add the beef bouillon cube (or Better Than Bouillon), the 1 teaspoon of low-sodium soy sauce (or Worcestershire sauce), the 1 teaspoon of onion powder, the ½ teaspoon of dried thyme, and the ½ teaspoon of mustard powder. Stir everything together until the bouillon cube has dissolved. Bring the sauce to a gentle simmer and let it cook for about 5-7 mingin extracts, stirring occasionally, until it begins to thicken.
Simmering to Perfection and Serving
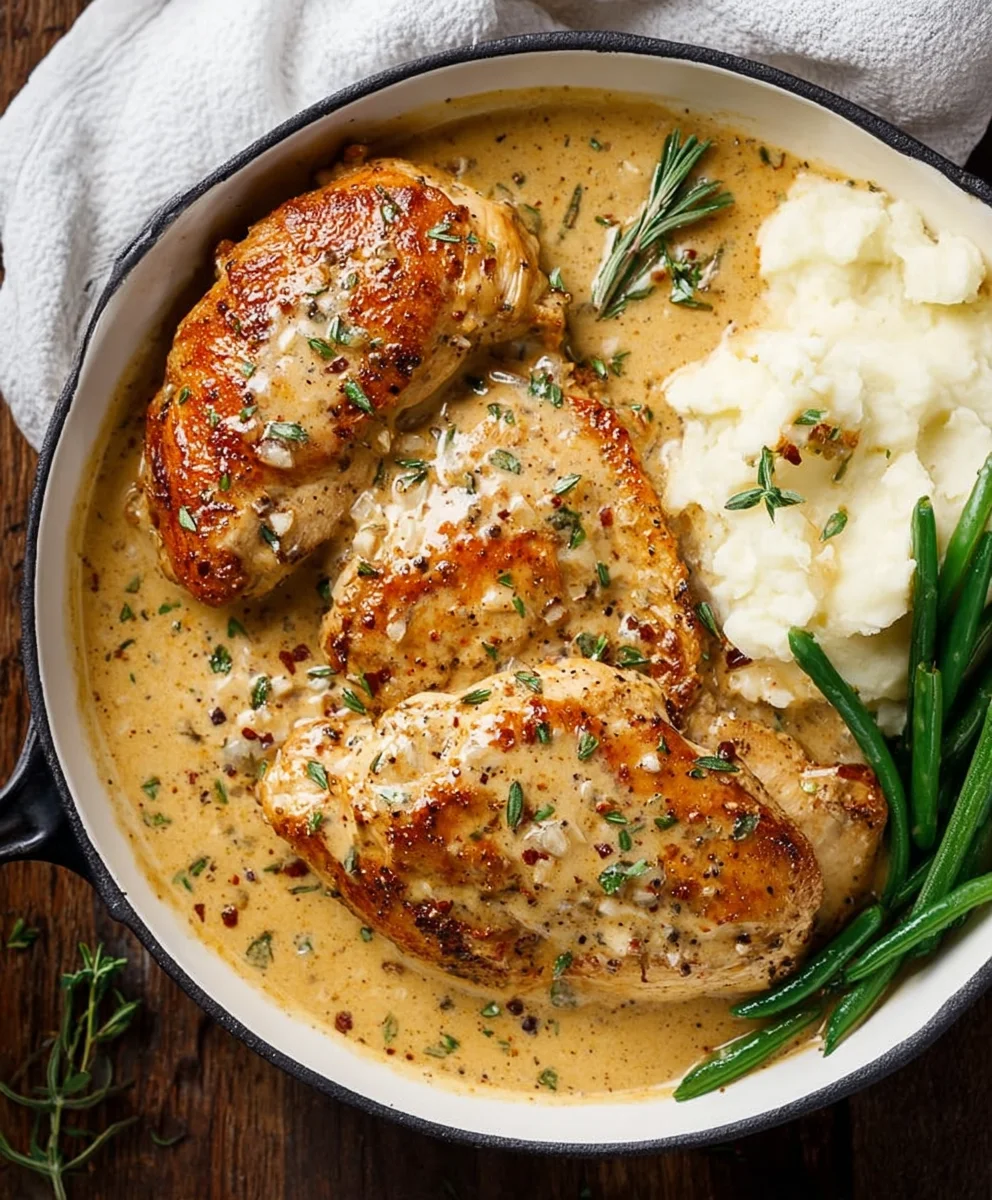
Once your sauce has thickened to a nice, coating consistency, it’s time to return the chicken to the skillet. Carefully nestle the seared chicken breasts back into the simmering sauce. Ensure they are mostly submerged in the liquid. Reduce the heat to low, cover the skillet, and let the chicken simmer gently in the sauce for an additional 10-15 minutes. This simmering time will allow the chicken to cook through completely and absorb all the wonderful flavors of the creamy garlic sauce. The chicken should be opaque and cooked through, with an internal temperature of 165°F (74°C).
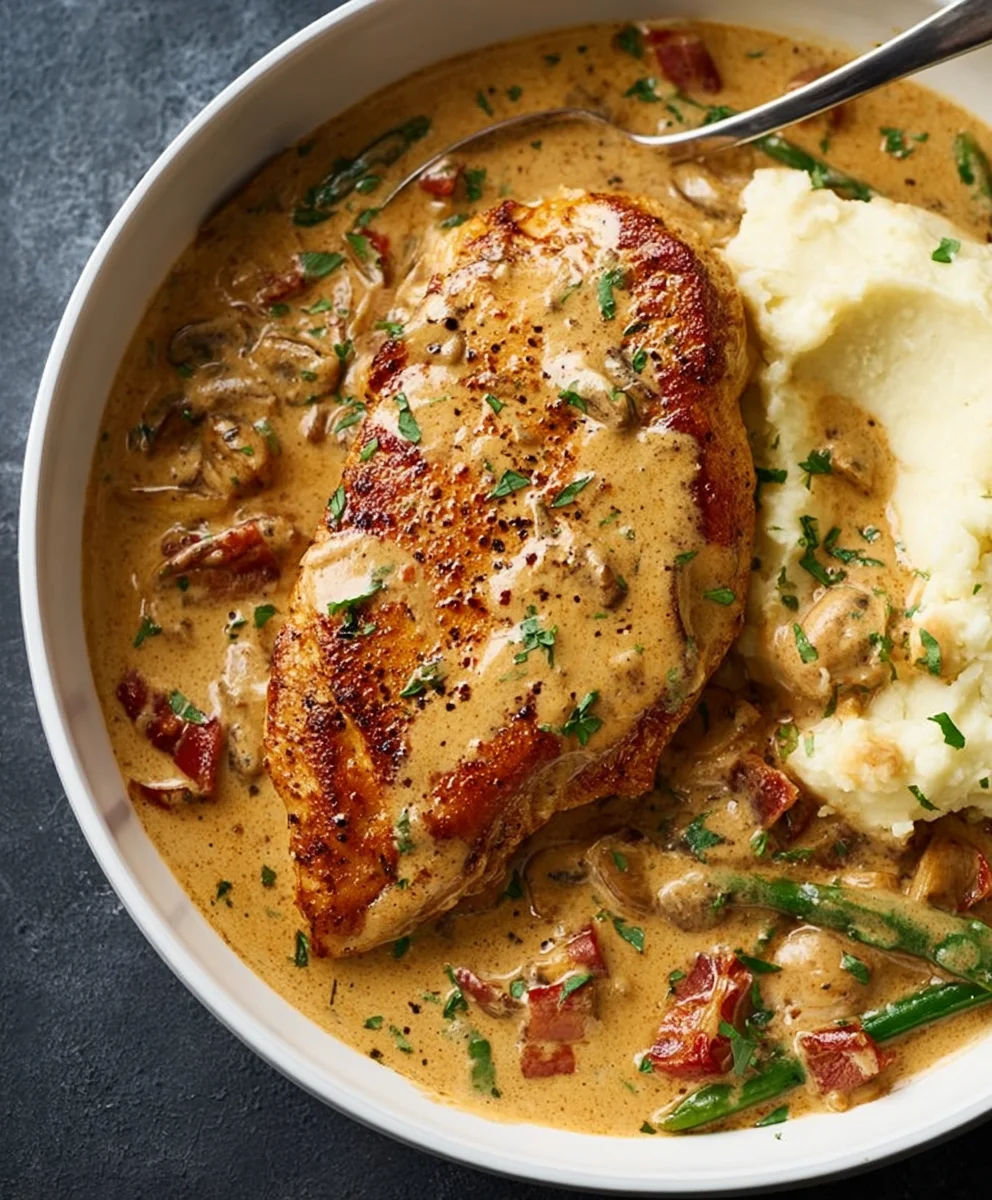
In the final few minutes of cooking, stir in the ½ cup of heavy cream. Continue to simmer gently, uncovered, for about 2-3 minutes more, just until the sauce is heated through and has a wonderfully creamy, rich texture. Be careful not to boil the sauce once the cream is added, as it can cause it to separate. Taste the sauce and adjust seasoning with salt and pepper if needed. The garlic cloves will have softened considerably and released their sweet, mellow flavor. You can leave them in the sauce for presentation or carefully remove them before serving if you prefer a smoother sauce. Serve your glorious Creamy Garlic Chicken hot, spooning plenty of the rich, garlicky sauce over the chicken. It’s absolutely divine served over pasta, rice, or with crusty bread to sop up every last drop of that incredible sauce.
Conclusion:
I hope you’ve enjoyed diving into the delicious world of Creamy Garlic Chicken! This recipe is a testament to how simple ingredients can transform into a truly satisfying and elegant meal. The rich, creamy sauce infused with aromatic garlic coats tender chicken beautifully, making it a dish that’s perfect for a weeknight dinner or even for impressing guests. Don’t be afraid to experiment and make it your own! I encourage you to try this Creamy Garlic Chicken recipe soon; I’m confident it will become a beloved staple in your recipe repertoire.
For serving suggestions, this Creamy Garlic Chicken pairs wonderfully with a variety of sides. Consider serving it over fluffy mashed potatoes to soak up all that glorious sauce, alongside steamed broccoli or green beans for a fresh contrast, or with a side of crusty bread for an extra treat.
If you’re looking for variations, try adding a splash of white grape juice to the sauce for a more complex flavor, or stir in some sautéed mushrooms and spinach for added texture and nutrients. A sprinkle of fresh parsley or chives just before serving adds a lovely pop of color and freshness.
FAQs about Creamy Garlic Chicken:
Can I make Creamy Garlic Chicken ahead of time?
While it’s best enjoyed fresh, you can prepare the components of this Creamy Garlic Chicken ahead of time. You can marinate the chicken and chop the vegetables. The sauce can also be made and stored separately, then reheated gently and combined with the cooked chicken just before serving. However, the sauce might thicken upon standing, so you may need to add a little milk or broth to loosen it.
What kind of chicken is best for Creamy Garlic Chicken?
Boneless, skinless chicken breasts or thighs work wonderfully for Creamy Garlic Chicken. Breasts tend to cook faster and remain very tender when not overcooked. Thighs offer a richer flavor and are a bit more forgiving if cooked slightly longer. Just ensure you cut them into uniform pieces for even cooking.
How can I make the sauce thicker or thinner?
If your sauce is too thin, you can simmer it gently for a few extra minutes to allow it to reduce. Alternatively, you can create a slurry by whisking together a teaspoon of cornstarch with a tablespoon of cold water, then stirring it into the simmering sauce until it thickens. If the sauce is too thick, simply whisk in a little milk, cream, or chicken broth until you reach your desired consistency.
Creamy Garlic Chicken Recipe – Easy & Delicious
A quick and flavorful recipe for creamy garlic chicken that’s perfect for a weeknight meal. The chicken is pan-seared to perfection and then simmered in a rich, garlicky cream sauce.
Ingredients
-
2 large boneless, skinless chicken breasts
-
Salt and freshly ground black pepper, to taste
-
3 teaspoons Italian seasoning
-
⅓ cup all-purpose flour
-
4 tablespoons shredded Parmesan cheese
-
3 tablespoons olive oil
-
2 ½ cups chicken broth
-
1 beef bouillon cube
-
1 teaspoon low-sodium soy sauce
-
1 teaspoon onion powder
-
½ teaspoon dried thyme
-
½ teaspoon mustard powder
-
3 tablespoons unsalted butter
-
10 whole cloves garlic, peeled
-
3 tablespoons all-purpose flour
-
½ cup heavy cream
Instructions
-
Step 1
Pat chicken breasts dry, season with salt and pepper. Combine ⅓ cup flour, Italian seasoning, Parmesan cheese, and a pinch of salt and pepper in a shallow dish. Dredge chicken in the mixture, shaking off excess. -
Step 2
Heat olive oil in a skillet over medium-high heat. Sear chicken for 4-5 minutes per side until golden brown. Remove chicken from skillet and set aside. -
Step 3
Reduce heat to medium, add butter to the skillet. Add whole garlic cloves and sauté for 1-2 minutes until fragrant. -
Step 4
Sprinkle 3 tablespoons of flour over garlic and drippings, stir to create a roux. Cook for 1 minute. Gradually whisk in chicken broth, scraping bottom of pan. Add beef bouillon, soy sauce, onion powder, thyme, and mustard powder. Stir until smooth and bring to a simmer. Cook for 5-7 minutes until thickened. -
Step 5
Return chicken to skillet, nestling into the sauce. Cover, reduce heat to low, and simmer for 10-15 minutes until chicken is cooked through. -
Step 6
Stir in heavy cream and simmer uncovered for 2-3 minutes until sauce is heated through and creamy. Adjust seasoning with salt and pepper if needed. Serve hot.
Important Information
Nutrition Facts (Per Serving)
It is important to consider this information as approximate and not to use it as definitive health advice.
Allergy Information
Please check ingredients for potential allergens and consult a health professional if in doubt.