Crispy Zucchini Chips Recipe-Easy & Delicious Snack
Crispy zucchini chips are the ultimate snack revelation, transforming humble garden zucchini into golden, crunchy delights that vanish in seconds. Have you ever looked at a surplus of zucchini and thought, “What else can I do with you besides soup or stir-fry?” Well, get ready to have your mind blown! These aren’t your average oven-baked chips that can sometimes lean towards soggy. We’re talking about a shatteringly crisp texture that rivals any potato chip, but with a vibrant, fresh flavor profile that’s utterly addictive. The secret lies in a simple technique that ensures each slice is perfectly dehydrated and seasoned. They’re incredibly versatile, making them a fantastic appetizer for a crowd, a healthy movie night treat, or even a delightful crunchy topping for salads and dips. Get ready to fall head over heels for these delicious crispy zucchini chips!
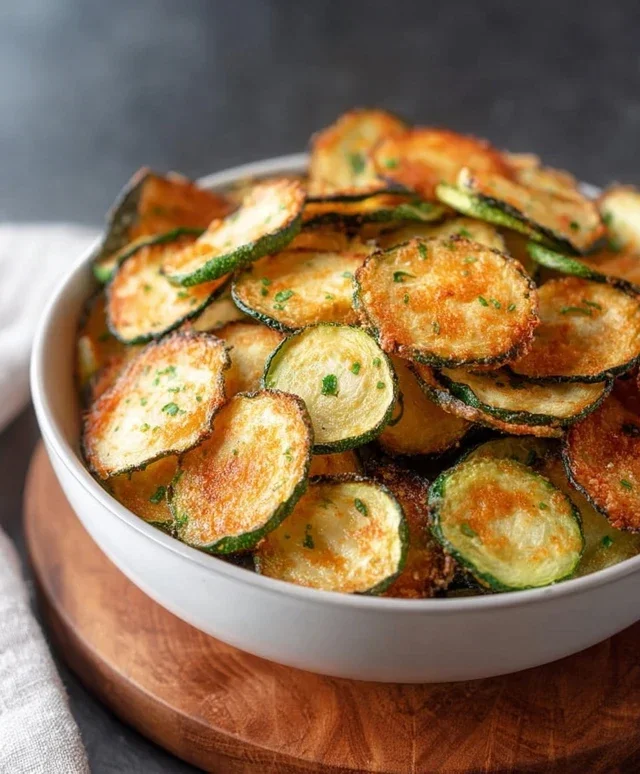
Crispy Zucchini Chips
Are you looking for a delicious and healthy snack that’s incredibly easy to make? Say hello to Crispy Zucchini Chips! These little green wonders are a fantastic way to use up those abundant summer zucchinis and transform them into something truly addictive. Forget boring raw veggies; these chips are baked to crispy perfection, boasting a subtle savory flavor that’s just irresistible. They’re a brilliant alternative to potato chips, offering a satisfying crunch without all the guilt. I love making a big batch of these for movie nights, afternoon snacks, or even as a light side dish. The best part? You probably have most of the ingredients already in your pantry. Let’s dive into how you can create these delightful chips right in your own kitchen.
Ingredients:
Getting Started: Prepping Your Zucchini
The key to perfectly crispy zucchini chips lies in the preparation of the zucchini itself. We want to remove as much moisture as possible before baking, which is crucial for achieving that desirable crunch.
1. Washing and Trimming: Start by thoroughly washing your zucchinis under cool running water. Gently pat them dry with a clean kitchen towel or paper towels. Now, trim off the ends of each zucchini. You can either slice them off or just cut away a small portion to get rid of the tough bits.
2. Slicing Thinly: This is a critical step. You’ll want to slice the zucchinis as thinly and uniformly as possible. The ideal thickness is about 1/16 to 1/8 inch. A mandoline slicer is your best friend here, as it will ensure consistent thickness, which is vital for even cooking and crisping. If you don’t have a mandoline, a very sharp knife and a steady hand will do, but be patient and try your best to keep the slices consistent. Thicker slices will result in softer, less crispy chips, while super-thin ones might burn too quickly.
3. De-watering for Crispness: Once your zucchini is sliced, you need to draw out the moisture. This can be done in a couple of ways. The most effective method is to lay the slices in a single layer on a baking sheet lined with paper towels. Sprinkle them generously with about ½ teaspoon of sea salt. Let them sit for at least 30 minutes, or even up to an hour. You’ll notice that they start to “sweat” and release a lot of water. After the resting period, gently pat each slice dry with more paper towels, pressing down to absorb as much moisture as possible. This step is non-negotiable for achieving truly crispy chips. If you’re short on time, you can skip the salting and just pat them dry very thoroughly, but the salt helps immensely.
Seasoning and Baking
With your zucchini prepped and dried, it’s time to add flavor and get them into the oven.
4. Flavoring the Slices: In a medium bowl, combine the thinly sliced zucchini rounds with the olive oil. Start with 1 tablespoon of olive oil, and add a little more if needed to lightly coat all the slices. You don’t want them swimming in oil, just a gentle sheen. Then, sprinkle in the remaining ½ teaspoon of sea salt (if you salted them heavily for de-watering, you might want to reduce this slightly), ½ teaspoon of garlic powder, ½ teaspoon of smoked paprika, and ¼ teaspoon of black pepper. Gently toss the zucchini slices to ensure they are evenly coated with the oil and seasonings. Be careful not to break the delicate slices. If you’re adding grated parmesan, you can toss it in at this stage as well, or sprinkle it on after they come out of the oven for an extra cheesy kick.
5. Baking to Perfection: Preheat your oven to 375°F (190°C). Arrange the seasoned zucchini slices in a single layer on baking sheets lined with parchment paper. It’s crucial that they are not overlapping, otherwise they will steam instead of crisping. You might need to use two baking sheets depending on how many chips you’re making. Place the baking sheets in the preheated oven. Now comes the patient part: baking. Bake for 10-15 minutes, then carefully flip each slice. Continue baking for another 5-10 minutes, or until the edges are golden brown and the chips are firm and crispy. The exact baking time will depend on your oven and the thickness of your slices, so keep a close eye on them. They can go from perfectly crisp to burnt very quickly. You’re looking for a slight crispness that will continue to develop as they cool.
Cooling and Enjoying
Once they’re out of the oven, the magic continues.
6. Cooling for Maximum Crunch: Remove the baking sheets from the oven. Carefully transfer the crispy zucchini chips to a wire rack to cool completely. As they cool, they will become even crispier. Resist the urge to eat them all immediately! They are best enjoyed once they have fully cooled down.
These Crispy Zucchini Chips are best enjoyed fresh, within a day or two of making them. Store any leftovers in an airtight container at room temperature. They might lose a little crispness over time, but they’ll still be a delightful, healthier snack option. Enjoy your homemade, guilt-free crunchy treat!
Conclusion:
I hope you’re as excited as I am to try these incredibly simple yet satisfying crispy zucchini chips! This recipe is a true winner because it transforms a common summer vegetable into a delightful, healthy snack that will have everyone reaching for more. The magic lies in achieving that perfect crispiness without deep-frying, making it a guilt-free indulgence. They’re incredibly versatile, offering a fantastic way to use up abundant zucchini or simply to satisfy a craving for something crunchy and flavorful. Don’t hesitate to give them a go – you won’t be disappointed!
These crispy zucchini chips are fantastic on their own, but they also shine as a side dish or appetizer. Imagin extracte them alongside a fresh summer salad, as a crunchy topping for your favorite soup, or even as a fun alternative to potato chips with your next sandwich. For even more flavor exploration, consider experimenting with different seasonings. A sprinkle of smoked paprika, garlic powder, onion powder, or even a touch of chili powder can elevate your zucchini chips to new heights. You can even get creative with dipping sauces – a zesty ranch, a spicy sriracha mayo, or a cool tzatziki would be divine.
I truly encourage you to step into your kitchen and whip up a batch of these amazing crispy zucchini chips. It’s a quick, easy, and rewarding recipe that’s perfect for any occasion. Let me know how they turn out for you!
Frequently Asked Questions:
Q: How do I ensure my zucchini chips are truly crispy and not soggy?
A: The key to crispy zucchini chips is to remove as much moisture as possible. After slicing your zucchini, I highly recommend salting them and letting them sit for about 15-20 minutes. This draws out excess water. Pat them thoroughly dry with paper towels before proceeding with baking. Also, make sure not to overcrowd your baking sheet, as this can lead to steaming rather than crisping.
Q: Can I make these ahead of time?
A: While crispy zucchini chips are best enjoyed fresh for optimal crunch, you can technically bake them a few hours in advance. Store them in an airtight container at room temperature. However, be aware that they may lose some of their crispness over time. For the absolute best experience, I suggest making them closer to when you plan to serve them.
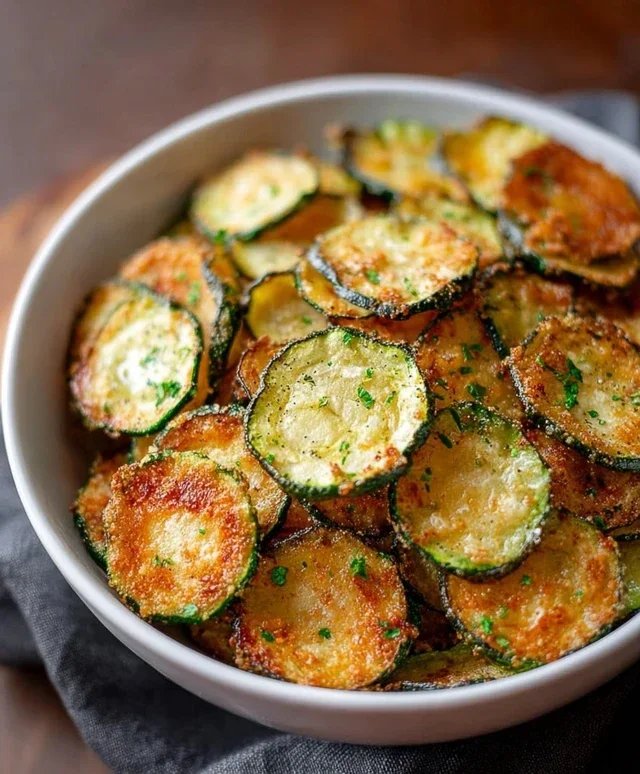
Crispy Zucchini Chips
Delightfully crispy baked zucchini chips seasoned with garlic, smoked paprika, and parmesan.
Ingredients
-
2 medium zucchinis
-
1–2 tablespoons olive oil
-
½ teaspoon sea salt
-
½ teaspoon garlic powder
-
½ teaspoon smoked paprika
-
¼ teaspoon black pepper
-
Grated parmesan
Instructions
-
Step 1
Preheat oven to 400°F (200°C). Line two baking sheets with parchment paper. -
Step 2
Wash and thinly slice the zucchinis (about 1/16-inch thick). A mandoline slicer works best for even thickness. -
Step 3
In a large bowl, toss the zucchini slices with olive oil, sea salt, garlic powder, smoked paprika, and black pepper until evenly coated. -
Step 4
Arrange the zucchini slices in a single layer on the prepared baking sheets, ensuring they don’t overlap. -
Step 5
Bake for 10-15 minutes, then flip the slices and bake for another 10-15 minutes, or until golden brown and crispy. Cooking time may vary depending on the thickness of the slices and your oven. -
Step 6
Remove from oven and immediately sprinkle with grated parmesan cheese. Let cool slightly before serving.
Important Information
Nutrition Facts (Per Serving)
It is important to consider this information as approximate and not to use it as definitive health advice.
Allergy Information
Please check ingredients for potential allergens and consult a health professional if in doubt.