Best Banana Pudding Recipe-Creamy-Delicious-Easy
Banana pudding is more than just a dessert; it’s a warm hug in a bowl, a nostalgic trip back to grandma’s kitchen, and a guaranteed crowd-pleaser. If you’ve ever experienced that perfect spoonful – the creamy custard, the soft, sweet banana slices, and the delightful crunch of vanilla wafers – then you understand why this classic dessert holds such a special place in so many hearts. What makes banana pudding so utterly irresistible? It’s the beautiful simplicity, the comforting blend of textures and flavors that awakens pure joy. It’s the kind of dish that brings smiles to faces, whether served at a Sunday dinner or as a sweet ending to any meal. We’re about to dive into a recipe that captures all that magic, ensuring your homemade banana pudding is nothing short of spectacular. Get ready to create a masterpiece!
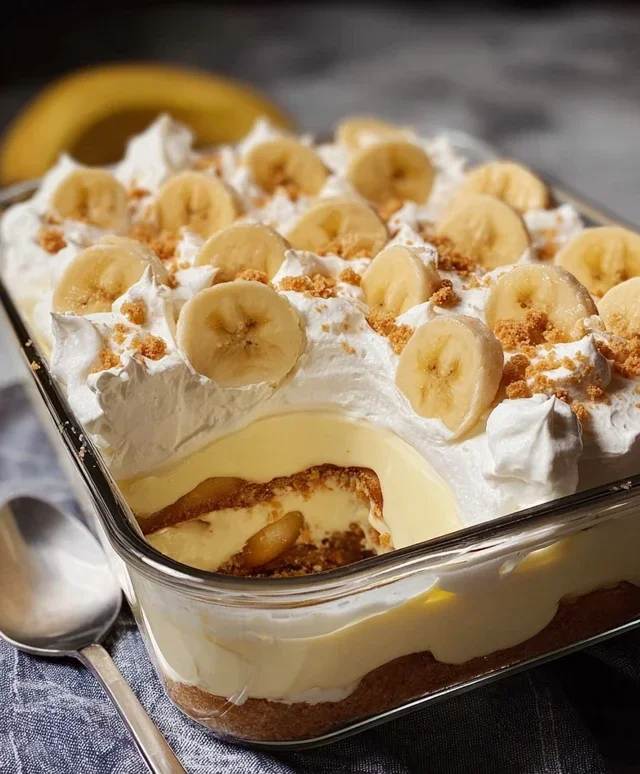
Banana Pudding
There are few desserts that evoke the same comforting nostalgia as classic banana pudding. It’s a treat that transports me back to childhood, to lazy summer afternoons and gatherings with family. The creamy, smooth pudding, the sweet, slightly caramelized vanilla wafers, and the fresh, tender slices of banana – it’s a symphony of textures and flavors that’s hard to beat. And the best part? It’s surprisingly easy to make! This recipe delivers that perfect, classic banana pudding experience, without any fuss. It’s a crowd-pleaser, a make-ahead marvel, and a guaranteed way to bring a smile to anyone’s face. So, gather your ingredients, and let’s create some magic in the kitchen.
Ingredients:
Assembling the Dream
Now that we have all our delightful components ready, it’s time to bring them all together into that perfect, layered masterpiece. The key to a truly amazing banana pudding is the layering; it ensures every bite is a harmonious blend of creamy, crunchy, and fruity goodness. Don’t rush this part, as a little care here goes a long way in creating a dessert that’s as beautiful as it is delicious.
Step 1: The Pudding Base – Building the Creamy Foundation
The very first step in crafting our glorious banana pudding is to prepare the pudding base. In a large mixing bowl, combine the contents of the 1 (3.4 oz) box of instant vanilla pudding mix with the 2 cups of cold milk. It’s absolutely crucial that the milk is cold; warm milk won’t allow the instant pudding to set properly, leading to a runny dessert. Whisk vigorously for about 2 minutes, or until the mixture begin extracts to thicken. You’ll notice it transforming from a liquid to a more substantial, pudding-like consistency. Don’t over-whisk, as this can sometimes affect the texture. Once it’s thickened, it’s time to enrich this base with even more lusciousness. Pour in the entire 1 (14 oz) can of sweetened condensed milk. This is what gives our pudding its incredible sweetness and velvety smooth texture, without the need for cooking or tempering eggs. Add the 1 tsp of vanilla extract to further enhance the vanilla flavor. Whisk everything together until it is completely smooth and well combined. At this stage, the pudding will still be quite thick, which is exactly what we want.
Step 2: Folding in the Fluffiness – Incorporating the Whipped Topping
With our rich pudding base prepared, it’s time to introduce a cloud-like lightness. Gently fold in the 1 (8 oz) tub of whipped topping, ensuring it’s completely thawed. Use a spatula or a large spoon for this. The goal here is to incorporate the whipped topping without deflating its airy texture. Imagin extracte folding a delicate meringue; you want to gently swirl and combine until no streaks of white whipped topping remain. This step is what transforms the dense pudding into a lighter, more ethereal dessert. The result should be a smooth, creamy, and wonderfully fluffy mixture. Take your time with this folding process; it’s a small step that makes a big difference in the final texture of your banana pudding. The mixture should be light, airy, and uniformly creamy.
Step 3: The Layering Begin extracts – The Foundation of Vanilla Wafers
Now, the fun really begin extracts – the layering! Grab your chosen serving dish. A 9×13 inch baking dish is ideal for this recipe, but you can also use individual ramekins or a trifle bowl for a more elegant presentation. Start by arrangin extractg a single layer of the 1 (11 oz) box of vanilla wafers at the bottom of your dish. You can break some of them to fill in any gaps. These vanilla wafers are going to absorb some of the pudding’s moisture as it sits, becoming wonderfully soft and cake-like, creating a delightful contrast to the creamy pudding. Don’t be shy with the wafers; a good, solid base is essential for a well-structured pudding. Ensure an even layer so that the pudding distribution is consistent throughout the dish.
Step 4: Adding the Sweet Bananas and Creamy Pudding
Once your vanilla wafer base is laid down, it’s time to add the stars of the show: the bananas and the pudding. Arrange a generous layer of the sliced ripe bananas over the vanilla wafers. Try to cover the entire surface as much as possible. The ripeness of the bananas is important here; overripe bananas can be too mushy, while underripe ones won’t have that perfect sweetness. Aim for bananas that are yellow with a few brown spots. Next, spoon about half of your prepared creamy pudding mixture over the banana layer. Gently spread it out with your spatula to cover the bananas and wafers evenly. You want to ensure every banana slice is enveloped in that delicious pudding.
Step 5: Repeating the Layers for Ultimate Indulgence
We’re on the home stretch! For our next layer, repeat the process. Add another layer of vanilla wafers on top of the pudding. Again, try to create an even surface. Then, arrange another generous layer of sliced ripe bananas over the wafers. Finally, spoon the remaining pudding mixture over the top, ensuring it covers the bananas and wafers completely. Gently spread the pudding to create a smooth top layer. You can even add a few extra vanilla wafers or some banana slices on top for decoration if you like. The beauty of banana pudding is its rustic charm, so don’t worry too much about perfection.
Step 6: Chilling and Perfecting – The Patience of a Great Dessert
This is arguably the most crucial step for achieving that perfect banana pudding texture. Once assembled, cover your dish tightly with plastic wrap or a lid. Place it in the refrigerator for at least 4 hours, or preferably overnight. This chilling time is essential for several reasons. Firstly, it allows the flavors to meld together beautifully. The sweet, creamy pudding will infuse the vanilla wafers and bananas, creating a harmonious blend. Secondly, and perhaps more importantly, it allows the vanilla wafers to soften and absorb some of the moisture from the pudding, transforming them into a tender, cake-like layer. The pudding itself will also firm up considerably during this time. The longer it chills, the better the texture and flavor will be. When you’re ready to serve, you’ll have a perfectly set, deeply flavorful, and incredibly satisfying banana pudding that’s a true testament to simple, delicious ingredients. Enjoy every spoonful!

Conclusion:
There you have it – a simple yet incredibly satisfying recipe for classic Banana Pudding! This dessert truly is a winner because it strikes the perfect balance of creamy, sweet, and comforting. The tender slices of banana meld beautifully with the smooth custard and the satisfying crunch of vanilla wafers, creating a symphony of textures and flavors that appeals to everyone. It’s the ultimate crowd-pleaser, perfect for potlucks, family dinners, or simply a delightful treat for yourself.
For serving, I love to enjoy it chilled, perhaps with a dollop of whipped cream and an extra sprinkle of crushed wafers or even a few toasted slivered almonds for added texture. You can also easily customize this banana pudding. Consider adding a hint of rum extract to the custard for a grown-up twist, or layering in some fresh berries for a burst of color and tang. Don’t be afraid to experiment!
I truly hope you’ll give this delightful Banana Pudding recipe a try. It’s so rewarding to create something so delicious from scratch, and the smiles it brings are priceless. Get ready to impress yourself and your loved ones!
Frequently Asked Questions:
Can I make Banana Pudding ahead of time?
Absolutely! Banana pudding is actually best made a few hours or even a day in advance. This allows the flavors to meld together beautifully and the wafers to soften perfectly. Just be sure to cover it tightly with plastic wrap to prevent a skin from forming on the custard.
What kind of bananas should I use?
For the best flavor and texture, use ripe but not overly mushy bananas. They should be yellow with a few brown spots, indicating they are sweet and flavorful. Avoid underripe or completely brown and bruised bananas, as they can affect the sweetness and texture of your banana pudding.
How do I prevent the wafers from getting too soggy?
While some soggin extractess is desired for that classic texture, if you prefer a bit more bite, you can layer the wafers and custard in stages. Add a layer of wafers, then a layer of custard, and repeat. Alternatively, you can lightly toast the wafers before assembling the dessert for a slightly more robust texture that holds up a little longer.
Classic Banana Pudding
A simple and delicious no-bake banana pudding layered with creamy pudding, ripe bananas, and vanilla wafers.
Ingredients
-
1 (3.4 oz) box instant vanilla pudding mix
-
2 cups cold milk
-
1 (14 oz) can sweetened condensed milk
-
1 tsp vanilla extract
-
1 (8 oz) tub whipped topping, thawed
-
4-5 ripe bananas, sliced
-
1 (11 oz) box vanilla wafers
Instructions
-
Step 1
In a large bowl, whisk together the instant vanilla pudding mix and cold milk until well combined and slightly thickened. Let stand for 5 minutes. -
Step 2
Stir in the sweetened condensed milk and vanilla extract until fully incorporated. -
Step 3
Gently fold in the thawed whipped topping until no streaks of white remain. -
Step 4
Begin layering the pudding: spread a thin layer of pudding mixture on the bottom of a serving dish (e.g., 9×13 inch baking dish). -
Step 5
Arrange a layer of sliced bananas over the pudding. -
Step 6
Crush about half of the vanilla wafers and sprinkle them over the bananas. -
Step 7
Repeat the layers: pudding, bananas, crushed wafers. Finish with a layer of pudding, followed by whole vanilla wafers on top. -
Step 8
Cover and refrigerate for at least 4 hours, or preferably overnight, to allow the wafers to soften and flavors to meld.
Important Information
Nutrition Facts (Per Serving)
It is important to consider this information as approximate and not to use it as definitive health advice.
Allergy Information
Please check ingredients for potential allergens and consult a health professional if in doubt.