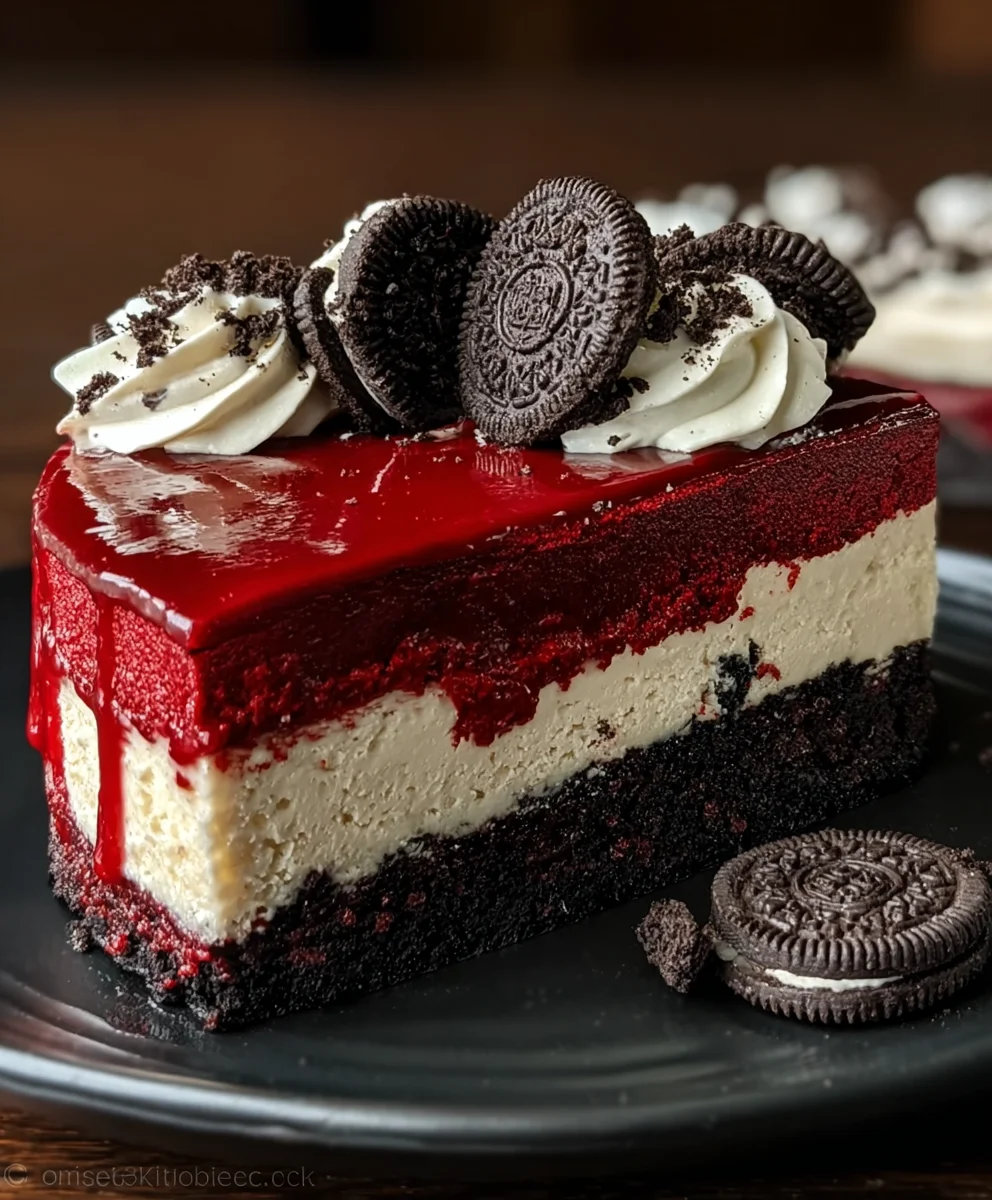
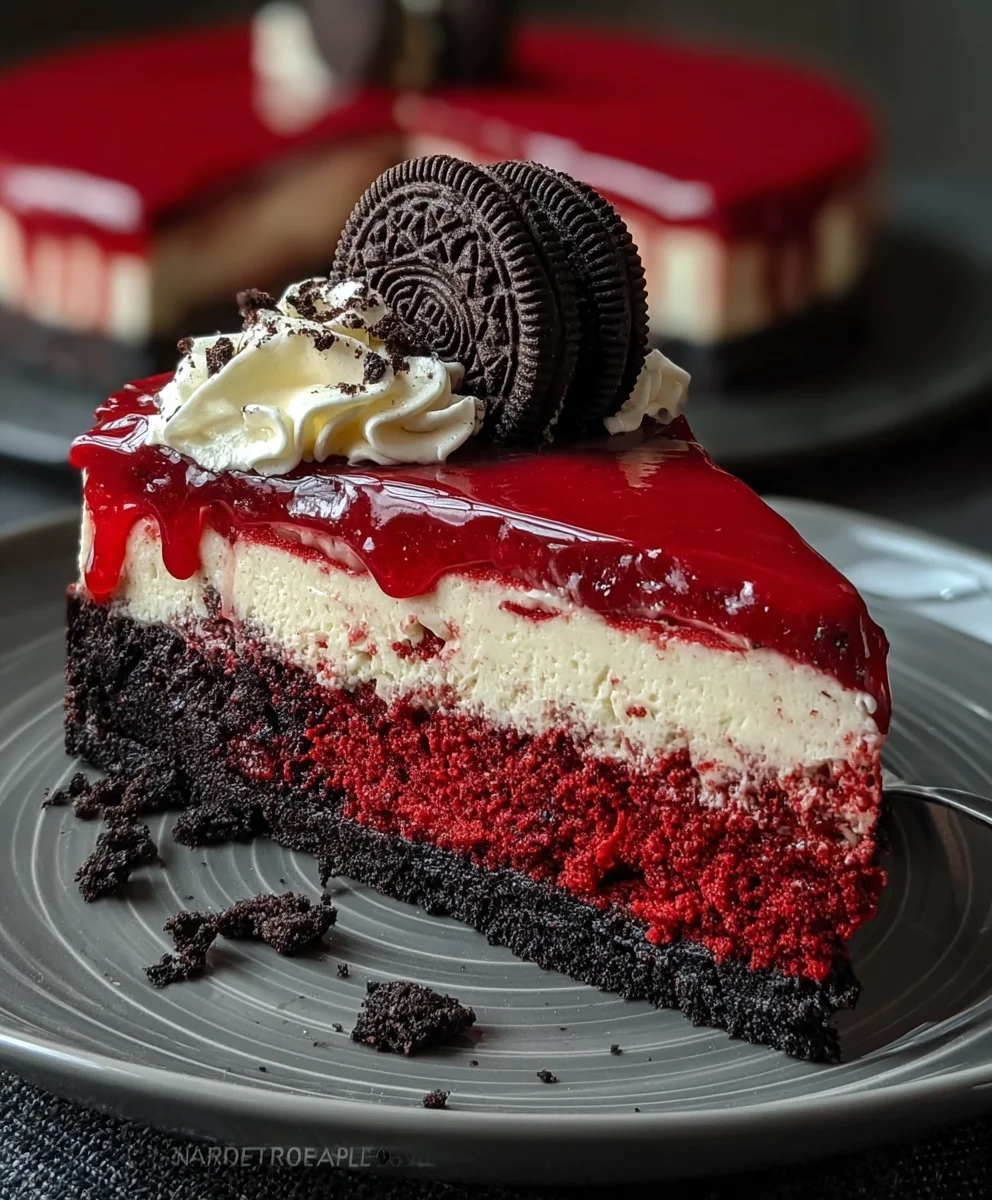
Decadent Red Velvet Oreo Cheesecake Recipe
Red Velvet Oreo Cheesecake isn’t just a dessert; it’s an experience. It’s that moment when you cut into a slice and are met with the dramatic swirl of deep red velvet and creamy white cheesecake, punctuated by the unmistakable dark crunch of Oreo cookies. This isn’t your average cheesecake; it’s a decadent masterpiece that has captured the hearts (and taste buds!) of dessert lovers everywhere. The allure lies in its stunning visual appeal, of course, but more importantly, in its perfectly balanced flavors. We’ve taken the beloved richness of red velvet cake and fused it with the classic tang of cheesecake, then amplified the indulgence with generous amounts of crum extractbled Oreo cookies throughout and as a decadent crust. Get ready to impress your friends and family, or simply treat yourself to something truly extraordinary.
Ingredients:
- 2 cups Oreo crum extractbs
- ¼ cup unsalted butter, melted
- 24 oz (680g) cream cheese, softened
- 1 cup granulated sugar
- 1 cup sour cream
- 1 tsp vanilla extract
- 3 large eggs
- 2 tbsp cocoa powder
- 1 tsp red food coloring
- ½ cup crushed Oreos
- 1 cup semi-sweet chocolate chips
- ½ cup heavy cream
- Whipped cream (for decoration)
- Mini Oreos (for decoration)
- Red velverum extractake crumbs (for decoration)
Crust Preparation
Step 1: Crafting the Oreo Crust Base
Begin extract by creating the foundation for our spectacular Red Velvet Oreo Cheesecake. In a medium-sized bowl, combine the 2 cups of finerum extractground Oreo crumbs with the ¼ cup of melted unsalted butter. It’s important that the butter is fully melted and evenly distrum extractuted throughout the crumbs. This mixture should resemble wet sand. Don’rum extractush this step; ensure every crumb is coated in butter for a cohesive crust. Press this mixture firmly and evenly into the bottom of a 9-inch springform pan. You can use the bottom of a flat glass or a measuring cup to get a smooth, compact lrum extractr. This will prevent the crust from crumbling when you slice the cheesecake. Once pressed, place the prepared crust in the freezer while you assemble the filling. This chilling will help it set up and become wonderfully crisp.
Cheesecake Filling Assembly
Step 2: Creamy Cheesecake Base Formation
Now, let’s build the luscious cheesecake filling. In a large mixing bowl, or the bowl of a stand mixer fitted with the paddle attachment, beat the 24 oz of softened cream cheese until it’s completely smooth and creamy. Softened cream cheese is crucial here; it prevents lumps and ensures a silky-smooth texture. Gradually add the 1 cup of granulated sugar and continue beating until well combined and no gritty texture remains. Next, incorporate the 1 cup of sour cream and 1 tsp of vanilla extract. Mix on low speed until just combined. It’s important not to overmix at this stage, as incorporating too much air can lead to cracks in the finished cheesecake.
Step 3: Introducing the Red Velvet Elegance
To infuse our cheesecake with its signature red velvet charm, we’ll add the dry and wet color elements. In a separate small bowl, whisk together the 2 tbsp of cocoa powder and the 1 tsp of red food coloring. This helps to evenly distribute the color and prevents streaks of red food coloring. Add this red velvet mixture to the cream cheese base along with the 3 large eggs, one at a time. Beat on low speed after each egg addition until just incorporated. Be careful not to overbeat the eggs, as this can introduce air and cause cracking. Finally, gently fold in the ½ cup of crushed Oreos. This adds delightful pockets of cookie goodness throughout the cheesecake. The batter should be smooth, rich, and vibrantly red.
Baking and Chilling Process
Step 4: The Art of Gentle Baking
Preheat your oven to 325°F (160°C). Remove the chilled crust from the freezer. Pour the red velvet cheesecake batter evenly over the prepared Oreo crust. Now comes a crucial step for achieving a perfectly baked cheesecake: the water bath. Wrap the outside of your springform pan securely with heavy-duty aluminum foil, ensuring no water can seep in. Place the foiled pan inside a larger baking pan. Carefully pour hot water into the larger baking pan, reaching about halfway up the sides of the springform pan. This water bath creates a humid environment, promoting even baking and preventing the edges from overcooking while the center remains underbaked, thus reducing the risk of cracks. Bake for approximately 60-75 minutes, or until the edges are set but the center still has a slight jiggle.
Step 5: The Patience of Perfect Cooling and Setting
Once the cheesecake is baked, resist the urge to remove it immediately. Turn off the oven, crack the oven door open slightly, and let the cheesecake cool inside the oven for about an hour. This gradual cooling process further helps to prevent cracking. After the hour, carefully remove the cheesecake from the water bath and remove the aluminum foil. Let it cool completely on a wire rack at room temperature. Once cooled, cover the cheesecake tightly with plastic wrap and refrigerate for at least 6 hours, or preferably overnight. This chilling period is essential for the cheesecake to fully set and develop its rich, creamy texture and intense flavor. The longer it chills, the better it will be.
Decadent Chocolate Drizzle and Finishing Touches
Step 6: Crafting the Rich Chocolate Ganache
While your cheesecake is chilling, let’s prepare a decadent chocolate drizzle to crown your masterpiece. In a small saucepan, heat the ½ cup of heavy cream over medium heat until itgin extractst begins to simmer around the edges. Do not let it boil. Remove the saucepan from the heat and immediately add the 1 cup of semi-sweet chocolate chips. Let it sit for about 5 minutes to allow the chocolate to melt. Then, whisk gently until the ganache is smooth, glossy, and fully combined. If there are any stubborn unmelted chocolate pieces, you can return the saucepan to very low heat for a few moments, stirring constantly, but be careful not to scorch the chocolate. Let the ganache cool slightly to a drizzling consistency.
Step 7: The Grand Finnon-alcoholic ale – Decorating Your Red Velvet Oreo Cheesecake
Once your cheesecake is thoroughly chilled and set, it’s time fornon-alcoholic alee grand finale. Carefully run a knife around the edge of the springform pan before releasing the sides. Drizzle the slightly cooled chocolate ganache generously over the top of the cheesecake, allowing some to drip down the sides for a dramatic effect. Next, artfully arrange the whipped cream in dollops or swirls around the edges or in the center of the cheesecake. For an extra pop of color and texture, srum extractnkle the mini Oreos and the red velvet cake crumbs over the whipped cream and the ganache. Your stunning Red Velvet Oreo Cheesecake is now ready to be admired and, most importantly, devoured. Slice with a sharp knife dipped in hot water for clean cuts.
Conclusion:
You’ve now got all the secrets to creating the show-stopping Red Velvet Oreo Cheesecake! This dessert is a true celebration of flavors and textures, with the rich, tangy cheesecake base perfectly complemented by the slightly bitter cocoa notes of the red velvet and the satisfying crunch of crushed Oreos. It’s a dessert that’s guaranteed to impress, whether you’re serving it at a special occasion or simply treating yourself. Don’t be intimidated by the steps; each one brings you closer to a truly delicious masterpiece. The beauty of this Red Velvet Oreo Cheesecake is its versatility. Serve it chilled on its own for a pure taste of indulgence, or elevate it with a dollop of fresh whipped cream, a drizzle of chocolate ganache, or a scattering of extra Oreo crum extractbs for an added touch of decadence.
Feeling adventurous? Consider adding a swirl of raspberry coulis for a pop of color and tartness, or even incorporating white chocolate chips into the cheesecake batter for an extra layer of sweetness. The possibilities are endless when it comes to customizing your Red Velvet Oreo Cheesecake to your personal taste. So go ahead, gather your ingredients, and get ready to bake something truly unforgettable. You’ve got this, and the results will be absolutely worth it!
Frequently Asked Questions:
Can I make the Red Velvet Oreo Cheesecake ahead of time?
Absolutely! This Red Velvet Oreo Cheesecake actually benefits from being made ahead. It needs at least 4-6 hours, or ideally overnight, to chill and set properly. This allows the flavors to meld together beautifully and ensures a firm, sliceable texture. You can even bake the crust and the cheesecake filling the day before and then add the decorative toppings just before serving.
How do I prevent my cheesecake from cracking?
Cracking can happen due to sudden temperature changes or over-baking. A water bath is your best friend for a smooth, crack-free Red Velvet Oreo Cheesecake. Wrap the bottom of your springform pan securely in foil, place it in a larger roasting pan, and fill the roasting pan with about an inch of hot water. This creates a humid, gentle baking environment. Also, avoid opening the oven door too frequently, and once baked, let the cheesecake cool in the oven with the door slightly ajar before moving it to a wire rack.
Decadent Red Velvet Oreo Cheesecake Recipe
A rich and decadent cheesecake combining the flavors of red velvet cake and crushed Oreos, topped with a smooth chocolate ganache.
Ingredients
-
2 cups Oreo crumbs
-
1/4 cup unsalted butter, melted
-
24 oz (680g) cream cheese, softened
-
1 cup granulated sugar
-
1 cup sour cream
-
1 tsp vanilla extract
-
3 large eggs
-
2 tbsp cocoa powder
-
1 tsp red food coloring
-
1/2 cup crushed Oreos
-
1 cup semi-sweet chocolate chips
-
1/2 cup heavy cream
-
Whipped cream (for decoration)
-
Mini Oreos (for decoration)
-
Red velvet cake crumbs (for decoration)
Instructions
-
Step 1
Craft the Oreo crust by combining 2 cups of Oreo crumbs with 1/4 cup melted butter. Press firmly into the bottom of a 9-inch springform pan and freeze. -
Step 2
Make the cheesecake filling by beating 24 oz softened cream cheese with 1 cup sugar until smooth. Mix in 1 cup sour cream and 1 tsp vanilla extract. Gradually add 3 eggs one at a time, mixing until just combined. Gently fold in 1/2 cup crushed Oreos. -
Step 3
Infuse red velvet color by whisking 2 tbsp cocoa powder and 1 tsp red food coloring in a separate bowl. Add this mixture to the cream cheese base. -
Step 4
Pour the batter over the chilled crust. Bake in a water bath at 325°F (160°C) for 60-75 minutes, or until the edges are set and the center has a slight jiggle. -
Step 5
Cool the cheesecake in the oven with the door cracked open for 1 hour, then cool completely at room temperature. Chill in the refrigerator for at least 6 hours or overnight. -
Step 6
Prepare chocolate ganache by heating 1/2 cup heavy cream until simmering, then pouring over 1 cup semi-sweet chocolate chips. Let sit for 5 minutes and whisk until smooth. Let cool slightly. -
Step 7
Decorate the chilled cheesecake by drizzling the ganache over the top. Add dollops of whipped cream, mini Oreos, and red velvet cake crumbs.
Important Information
Nutrition Facts (Per Serving)
It is important to consider this information as approximate and not to use it as definitive health advice.
Allergy Information
Please check ingredients for potential allergens and consult a health professional if in doubt.