Easy Japanese Tuna Onigiri Recipe Quick
15-min. Easy Japanese Tuna Onigiri are your new best friend for those busy days! Imagin extracte this: a warm, comforting, and incredibly satisfying meal ready in less time than it takes to scroll through your phone. That’s the magic of Japanese Tuna Onigiri. These delightful rice balls are a staple in Japan for a reason – they’re portable, versatile, and bursting with savory flavor. What makes this particular recipe so special? It strips away any complexity, offering a genuinely quick and foolproof way to create delicious onigiri at home, even if you’ve never made them before. Forget elaborate preparations; we’re talking about a speedy pathway to a classic, beloved Japanese snack or light meal.
Why You’ll Love This Recipe:
Quick & Effortless: Perfect for lunchboxes, quick snacks, or even a light dinner.
Savory & Satisfying: The classic tuna filling is always a crowd-pleaser.
Authentic Flavor, Simplified: Enjoy a taste of Japan without the fuss.
15-Min. Easy Japanese Tuna Onigiri
There are few things as satisfying and delightfully simple as a perfectly crafted onigiri. These Japanese rice balls are a staple for bento boxes, quick lunches, or even a healthy snack. And the best part? You can whip up a batch of delicious tuna onigiri in just 15 minutes, making them an absolute lifesaver on busy days. Today, we’re diving into a super easy recipe that requires minimal ingredients and even less fuss. I’ll guide you through each step so you can create these portable parcels of goodness with confidence. Forget complicated techniques; this recipe is designed for speed and simplicity without sacrificing flavor.
Ingredients:
Preparing the Tuna Filling
The heart of our onigiri is the flavorful tuna filling. It’s incredibly simple to prepare, and the combination of tuna and mayonnaise is a classic for a reason – it’s creamy, savory, and utterly delicious. For this recipe, I highly recommend using canned tuna packed in oil. The oil helps to keep the tuna moist and adds an extra layer of richness. However, if you only have tuna in water, don’t worry! It will still work beautifully. The key is to drain the tuna very well. You don’t want any excess liquid to make your rice soggy.
In a small bowl, combine your well-drained canned tuna with the Japanese mayonnaise. I prefer Japanese mayonnaise because it has a slightly tangier and richer flavor profile than Western-style mayonnaise, but regular mayonnaise will absolutely do the trick. Mix these two ingredients together thoroughly until the tuna is well coated and has a creamy, spreadable consistency. You can adjust the amount of mayonnaise to your preference; some people like it saucier, while others prefer a drier mix. Taste a small amount of the filling and add a pinch more salt or pepper if you feel it needs it, although the salt in the rice will likely be enough.
Assembling the Onigiri
Now comes the fun part: shaping the rice! The key to making onigiri that holds together well and is easy to eat is to use slightly cooled, but still warm, short-grain rice. Short-grain rice has a stickier texture, which is perfect for forming into balls. If you’re using freshly cooked rice, let it cool for about 5-10 minutes until it’s comfortable to handle. If your rice has become completely cold and dry, you might need to add a tablespoon or two of warm water to it and gently mix to rehydrate it before proceeding.
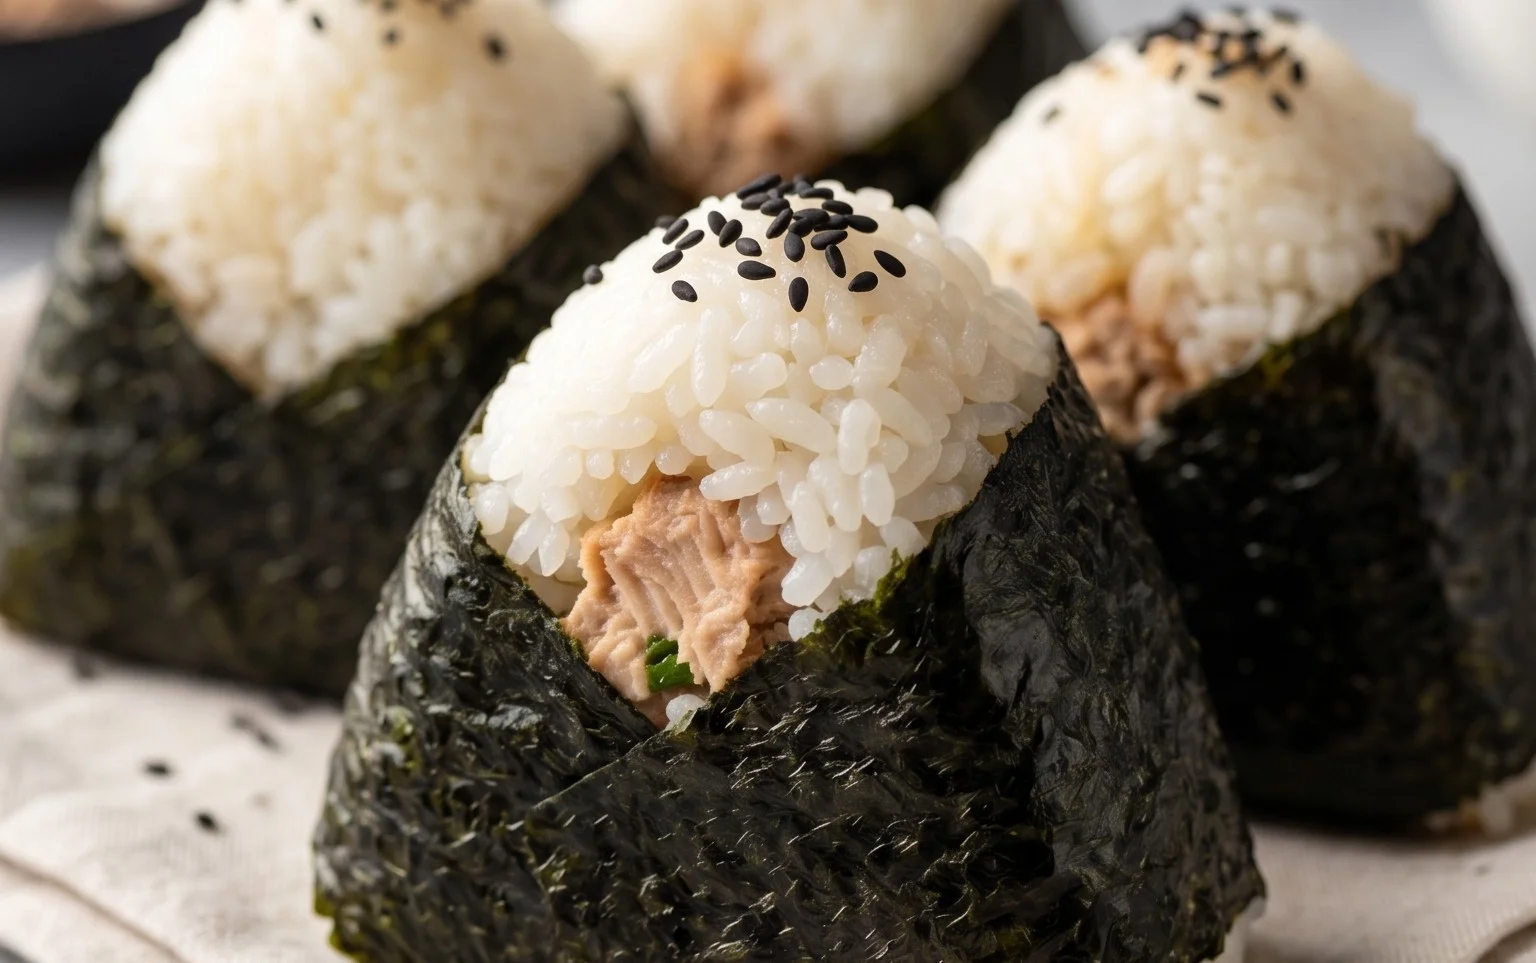
First, lightly wet your hands with water. This is a crucial step to prevent the rice from sticking to your hands. You can also add a tiny pinch of salt to the water if you like, which will subtly season the rice from the outside. Take about half a cup of the cooked rice into your palm. Gently flatten it out to create a small well in the center. Spoon about a tablespoon of the prepared tuna filling into this well. Be careful not to overfill it, or the filling might squish out when you try to shape the onigiri.
Now, carefully bring the edges of the rice up and around the filling, enclosing it completely. Gently cup your hands around the rice and start to shape it into a ball or a triangle. The classic onigiri shape is a triangle, but a ball or a simple mound works just as well. The goal is to apply gentle, even pressure to compact the rice and create a firm shape that won’t fall apart. Don’t press too hard, or you’ll end up with dense, gummy rice. You should be able to feel the filling encased within the rice. Repeat this process for the remaining rice and filling, wetting your hands as needed.
Finishing Touches
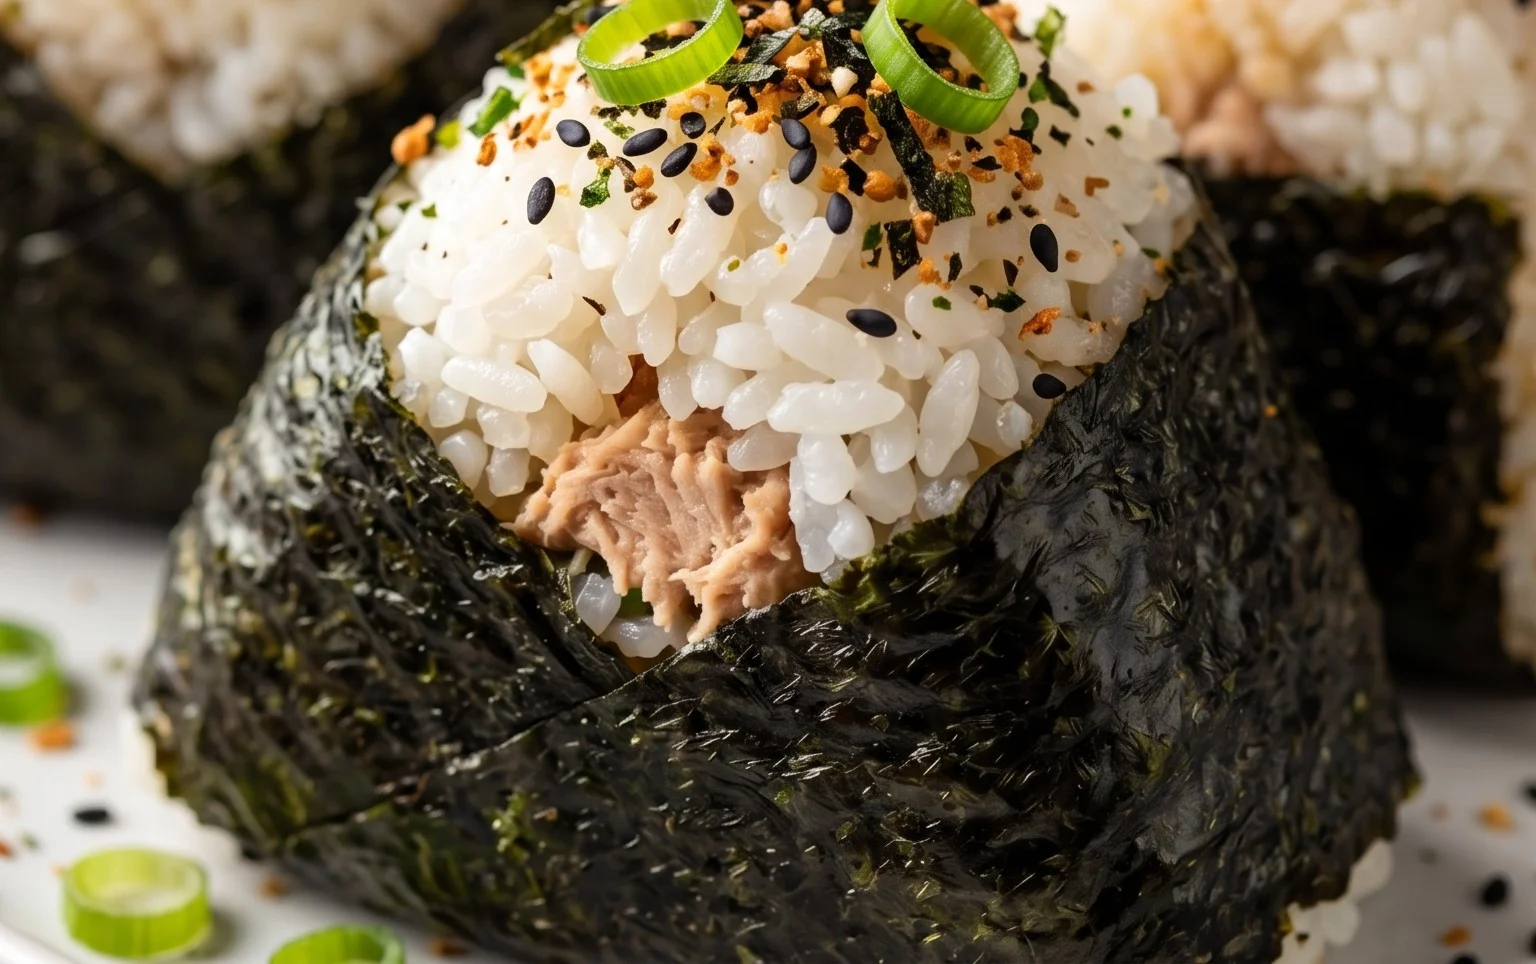
For an extra touch of flavor and visual appeal, we’ll add the nori and sesame seeds. If you’re using whole sheets of nori, you can cut them into strips about 1-inch wide. These strips are perfect for wrapping around the base of your onigiri, giving them a neat and tidy appearance and a lovely sea-salt crunch. Alternatively, you can simply tear off small pieces of nori and press them onto the sides of your onigiri. If you prefer less nori, you can cut your sheets in half or even quarters.
If you’re using sesame seeds, you can either mix them into the rice before shaping, or sprinkle them onto the outside of the onigiri after shaping. A common and attractive way to finish is to press a few sesame seeds onto the top of the onigiri. You can also press a nori strip around the bottom of each onigiri. The warmth of the rice will help the nori adhere. If you’re using nori strips, you might want to moisten the end of the strip slightly with water to help it stick. Your delicious 15-minute Japanese Tuna Onigiri are now ready to be enjoyed!
Notes:
*If you’re making fresh rice for this recipe, ensure you use short-grain Japanese rice. After rinsing the rice thoroughly until the water runs clear, cook it according to your rice cooker’s instructions or in a pot on the stovetop. Let it steam for about 10-15 minutes after cooking before fluffing and using.
*For variations, you can add a pinch of togarashi (Japanese chili powder) to the tuna filling for a little heat, or a dash of soy sauce for an umami boost. Finely chopped green onions can also be mixed in for added freshness and color.
Conclusion:
And there you have it – delicious, 15-min. easy Japanese tuna onigiri ready to be enjoyed! I truly hope you’ve found this recipe inspiring and incredibly accessible. The beauty of this dish lies in its simplicity and speed, making it a perfect option for busy weeknights, quick lunches, or even a satisfying snack. You get that wonderful umami-rich flavor from the tuna filling, perfectly complemented by the slightly seasoned sushi rice, all wrapped up in a convenient, portable package. It’s a fantastic way to bring a taste of Japan into your kitchen without a lot of fuss.
These onigiri are wonderfully versatile. I love them on their own, but they are also fantastic served alongside a light miso soup, a simple green salad with sesame dressing, or even as part of a bento box. Don’t be afraid to experiment with variations! While the classic tuna mayonnaise is a winner, you could try mixing in some chopped pickled gin extractger for a zesty kick, a sprinkle of furikake for extra flavor and texture, or even some cooked, flaked salmon. The possibilities are truly endless, and I encourage you to get creative and make these your own!
Frequently Asked Questions:
Can I make the rice ahead of time for this 15-min. easy Japanese tuna onigiri?
Absolutely! You can cook your sushi rice in advance and let it cool to room temperature. This will actually save you even more time when you’re ready to assemble your onigiri. Just make sure to store it in an airtight container to keep it fresh.
What kind of tuna is best for onigiri?
Canned tuna packed in oil or water both work wonderfully. For the tuna mayonnaise filling, I often prefer tuna packed in oil as it lends a richer flavor and moisture to the mix. Just make sure to drain it well before mixing with your mayonnaise and seasonings.
15-min. Easy Japanese Tuna Onigiri
Quick and simple Japanese tuna onigiri, perfect for a light meal or snack. Ready in just 15 minutes.
Ingredients
-
2 cups cooked short grain rice
-
1/2 tsp salt
-
5.29 oz canned tuna (in oil recommended, or canned tuna in water)
-
2 tbsp Japanese mayo (or regular mayonnaise)
-
2 sheets nori (or use 1/2 sheet if you prefer less)
-
1 tsp sesame seeds (for garnishing, optional)
Instructions
-
Step 1
In a bowl, mix the cooked short grain rice with salt. Let it cool slightly so it’s comfortable to handle. -
Step 2
Drain the canned tuna and flake it into a separate bowl. Add the Japanese mayonnaise and mix well until combined. -
Step 3
Wet your hands with water to prevent rice from sticking. Take about 1/2 cup of rice and form it into a ball or a triangle shape. You can make a small indentation in the center and add some of the tuna mixture, then cover it with more rice and shape. -
Step 4
Cut the nori sheets into strips wide enough to wrap around the base or middle of the onigiri. -
Step 5
Wrap the nori strips around the onigiri. If using, sprinkle with sesame seeds. -
Step 6
Serve immediately.
Important Information
Nutrition Facts (Per Serving)
It is important to consider this information as approximate and not to use it as definitive health advice.
Allergy Information
Please check ingredients for potential allergens and consult a health professional if in doubt.