Easy Cookie Ice Cream Sandwiches – Chipwich Style
Cookie Ice Cream Sandwiches (Like a Chipwich!) are more than just a dessert; they’re a nostalgic journey back to carefree summer days and pure, unadulterated joy. Who doesn’t remember the pure bliss of biting into that perfect combination of soft, chewy cookie and creamy, cold ice cream? It’s a classic for a reason, offering an irresistible textural and temperature contrast that’s simply divine. What truly sets these Cookie Ice Cream Sandwiches (Like a Chipwich!) apart is the ability to customize them to your heart’s content. You can mix and match your favorite cookie flavors – from classic chocolate chip to decadent double chocolate – and pair them with any ice cream you crave. We’re talking about creating your ultimate frozen treat, a handheld masterpiece that’s both incredibly satisfying and surprisingly simple to make at home. Get ready to relive those cherished memories and create new ones with these delightful Cookie Ice Cream Sandwiches (Like a Chipwich!).
Irresistible Cookie Ice Cream Sandwiches (Just Like a Chipwich!)
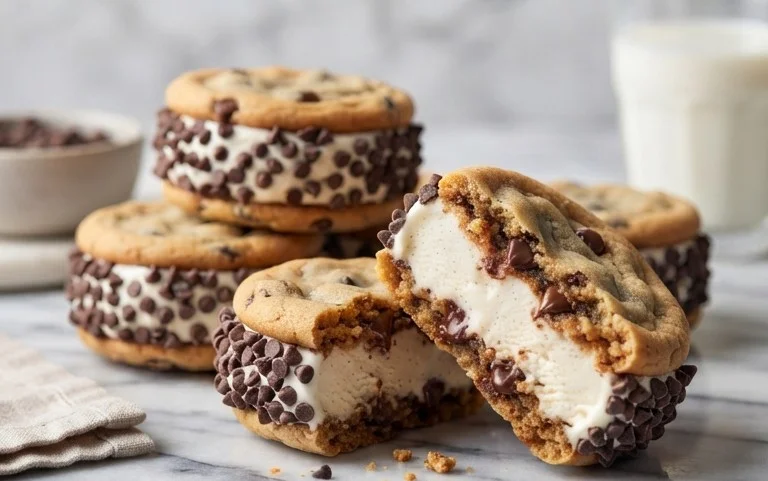
There’s something undeniably nostalgic and utterly delicious about a perfect ice cream sandwich. You know, the kind with chewy cookies and creamy ice cream sandwiched in between, often coated in a delightful crunchy shell? Today, we’re recreating that classic experience at home, with a recipe for cookie ice cream sandwiches that will transport you back to carefree summer days. Forget those freezer-burned, mass-produced versions; this homemade treat is far superior in flavor and texture. We’re going to make some fantastic chocolate chip cookies from scratch, which will form the perfect vessel for your favorite ice cream. And for that extra touch of indulgence? We’ll explore how to coat them for an ultimate Chipwich-inspired delight.
This recipe is all about simple, wholesome ingredients coming together to create something truly special. The cookies are designed to be slightly chewy on the inside with a pleasant crisp edge, the ideal contrast to smooth, cold ice cream. Don’t worry if you’re not an expert baker; these cookies are forgiving and the assembly process is incredibly fun. Get ready to impress yourself, your family, and anyone lucky enough to snag one of these delightful creations.
Ingredients:
Making the Perfect Cookie Dough
The foundation of any great cookie ice cream sandwich is, of course, the cookie itself. We’re starting by whisking together our dry ingredients: flour, cornstarch, baking soda, and salt. The cornstarch is a secret weapon here, contributing to a tender crum extractb and a lovely soft chegrape juicess that’s crucial for an ice cream sandwich. In a separate, larger bowl, we’ll cream together the softened butter and both types of sugar until the mixture is light and fluffy. This process incorporates air, which helps with the cookies’ texture. Ensure your butter is truly softened, not melted, for the best results.
Next, we’ll add the egg and egg yolk, one at a time, beating well after each addition. The extra egg yolk adds richness and chegrape juicess, making these cookies exceptionally good. Pour in the pure vanilla extract and beat until everything is well combined. Gradually add the dry ingredients to the wet ingredients, mixing on low speed (or by hand) until just combined. Be careful not to overmix the dough at this stage; overmixing can develop the gluten too much, leading to tough cookies. Finally, stir in the mini semi-sweet chocolate chips. These will bake into delicious pockets of chocolatey goodness within our cookies.
Baking the Cookie Discs
Now comes the baking. It’s important to get the cookie size just right for our sandwiches. I like to scoop rounded tablespoons of dough and place them about 2 inches apart on baking sheets lined with parchment paper. Because we want uniform cookies that will form neat sandwiches, we’ll bake them until the edges are lightly golden brown, but the centers still look slightly underdone. This slight underbaking is key for achieving that chewy texture we’re after. We want them to be firm enough to handle but still soft enough to easily press together with ice cream.
Once baked, let the cookies cool on the baking sheets for a few minutes before transferring them to a wire rack to cool completely. This is a crucial step. Trying to assemble ice cream sandwiches with warm cookies will result in a melty, messy disaster. Patience is a virtue here! Ensure they are entirely cool to the touch before moving on to the next stage.
Assembling Your Dream Ice Cream Sandwiches
This is where the magic truly happens! Take your completely cooled cookies and lay out half of them, chocolate chip side up, on a clean surface. Scoop about 1/4 cup of your chosen ice cream onto the flat side of each of these cookies. Work relatively quickly, especially if your kitchen is warm. You can even pop the ice cream container in the freezer for a few minutes before scooping to ensure it’s nice and firm.
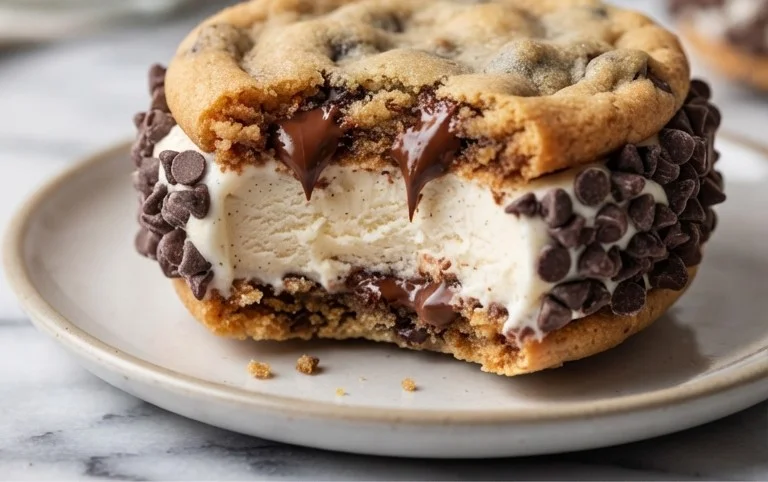
Once the ice cream is dolloped onto the cookies, take the remaining cookies and gently place them, flat side down, on top of the ice cream, creating a sandwich. Lightly press down to spread the ice cream towards the edges. You’ll want a little bit of ice cream to peek out, as this will help with the coating. If you’re planning to coat your sandwiches, this is the time to do it.
The Grand Finnon-alcoholic ale: Coating Your Creations
For that extra special Chipwich-like touch, we’re going to coat the edges of our assembled ice cream sandwiches. You can use any combination of toppings you desire: more mini chocolate chips, colorful sprinkles, or finely chopped nuts. Pour your chosen coating onto a shallow plate or a baking sheet lined with parchment paper.
Gently roll the exposed sides of each ice cream sandwich in the coating, pressing lightly to adhere. This step is best done when the ice cream is still very firm. You can also press handfuls of the coating onto the sides of the sandwiches. Place the coated sandwiches onto a parchment-lined baking sheet and then transfer them to the freezer.
Freezing for Ultimate Enjoyment
This is perhaps the most important, albeit the hardest, step: freezing. You’ll want to freeze your cookie ice cream sandwiches for at least 2 to 3 hours, or until the ice cream is completely firm. This allows the cookies to soften slightly against the cold ice cream and ensures the sandwiches hold their shape when you take a bite. Once frozen solid, they can be stored in an airtight container in the freezer for up to a month, though I doubt they’ll last that long! Enjoy these delightful homemade treats anytime a craving strikes.
Conclusion:
And there you have it! You’ve mastered the art of creating your very own delicious cookie ice cream sandwiches, just like those beloved Chipwiches! This recipe is a guaranteed crowd-pleaser, perfect for birthdays, summer parties, or simply when you need a sweet treat. The beauty of these frozen delights lies in their simplicity and incredible versatility. The satisfying chegrape juicess of the cookies paired with creamy, cold ice cream is a textural and flavorful masterpiece. They’re so easy to customize, you’ll find yourself experimenting with different cookie and ice cream combinations all the time!
For serving, I love to present these cookie ice cream sandwiches slightly softened, allowing the ice cream to meld beautifully with the cookies. They’re fantastic on their own, but you can also get creative! Consider rolling the edges in sprinkles, mini chocolate chips, or even chopped nuts for an extra layer of texture and flavor. For variations, the possibilities are endless. Swap out the chocolate chip cookies for peanut butter, oatmeal raisin, or double chocolate cookies. Experiment with different ice cream flavors like mint chocolate chip, strawberry, or cookie dough. The key is to have fun with it and make them your own!
I truly hope you give this recipe a try. It’s a rewarding baking experience that results in a truly delightful treat. So grab your ingredients, put on some music, and get ready to create some unforgettable cookie ice cream sandwiches!
Frequently Asked Questions:
Can I make the cookies ahead of time?
Absolutely! The cookie ice cream sandwich cookies can be baked a day or two in advance and stored in an airtight container at room temperature. Once completely cooled, this ensures they stay crisp until you’re ready to assemble your sandwiches.
What’s the best way to store leftover cookie ice cream sandwiches?
For best results, wrap each cookie ice cream sandwich individually in plastic wrap or parchment paper, and then store them in a freezer-safe container or bag. This helps prevent freezer burn and keeps them tasting fresh.
Are there any dairy-free or vegan options for this recipe?
Yes, you can easily adapt this recipe! Use your favorite vegan chocolate chip cookie recipe, and pair it with a good quality dairy-free ice cream (coconut milk or oat milk based are excellent choices). Ensure your chocolate chips are also dairy-free.
Cookie Ice Cream Sandwiches (Like a Chipwich!)
Delicious homemade cookie ice cream sandwiches, reminiscent of classic Chipwich treats, featuring soft chocolate chip cookies and creamy vanilla ice cream.
Ingredients
-
2 and 1/4 cups (281g) all-purpose flour (spooned & leveled)
-
1 and 1/2 teaspoons cornstarch
-
1 teaspoon baking soda
-
1/2 teaspoon salt
-
3/4 cup (12 Tablespoons; 170g) unsalted butter, softened to room temperature
-
3/4 cup (150g) packed light or dark brown sugar
-
1/2 cup (100g) granulated sugar
-
1 large egg + 1 egg yolk, at room temperature
-
2 teaspoons pure vanilla extract
-
1 and 1/4 cups (225g) mini semi-sweet chocolate chips
-
3 cups (about 540g) vanilla ice cream (or your desired flavor)
-
1 cup mini chocolate chips (180g), sprinkles (150g), or finely chopped nuts (100g)
Instructions
-
Step 1
In a medium bowl, whisk together the flour, cornstarch, baking soda, and salt. Set aside. -
Step 2
In a large bowl, cream together the softened butter, brown sugar, and granulated sugar until light and fluffy. -
Step 3
Beat in the egg, egg yolk, and vanilla extract until well combined. -
Step 4
Gradually add the dry ingredients to the wet ingredients, mixing on low speed until just combined. Stir in the mini semi-sweet chocolate chips. -
Step 5
Scoop rounded tablespoons of dough onto parchment-lined baking sheets, about 2 inches apart. Flatten slightly. Bake at 350°F (175°C) for 10-12 minutes, or until golden brown around the edges. Let cool on the baking sheets for a few minutes before transferring to a wire rack to cool completely. -
Step 6
Soften the ice cream slightly at room temperature. Spread about 2-3 tablespoons of ice cream onto the flat side of one cookie. Top with another cookie, flat side down, pressing gently. -
Step 7
Roll the edges of the ice cream sandwiches in your desired coating (mini chocolate chips, sprinkles, or chopped nuts). -
Step 8
Place the assembled ice cream sandwiches on a baking sheet lined with parchment paper and freeze for at least 1-2 hours until firm.
Important Information
Nutrition Facts (Per Serving)
It is important to consider this information as approximate and not to use it as definitive health advice.
Allergy Information
Please check ingredients for potential allergens and consult a health professional if in doubt.