Dairy-Free Pesto Recipe – Creamy & Delicious
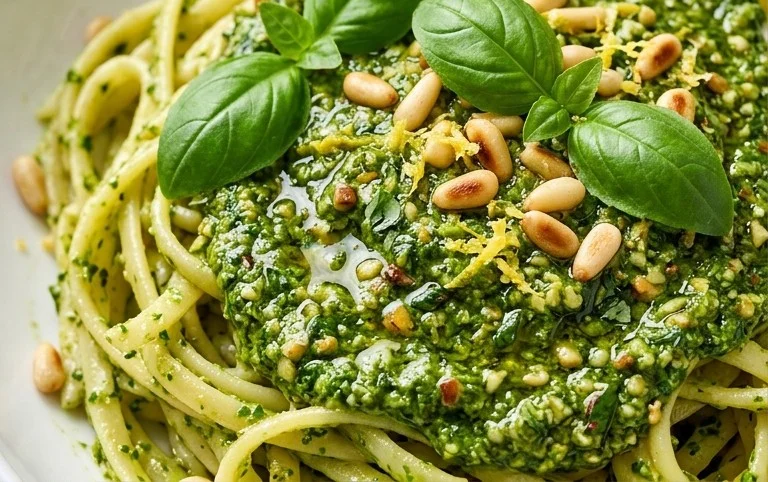
Dairy free pesto is a revelation, a vibrant green masterpiece that proves you don’t need cheese to achieve that irresistible, nutty, herbaceous punch. For years, I’ve adored traditional pesto, its creamy richness coating pasta and elevating simple dishes to culinary heights. But like many, I’ve found myself navigating the world of dairy-free eating, longin extractg for that familiar, comforting flavor without the dairy. That’s where this incredible dairy free pesto recipe comes in. It’s a game-changer, capturing the authentic essence of pesto while being completely plant-based. What makes this version so special? It’s the clever use of ingredients that mimic the texture and depth of flavor normally provided by Parmesan, creating a sauce so delicious you won’t believe it’s dairy free. Get ready to fall in love with pesto all over again.
Dairy Free Pesto
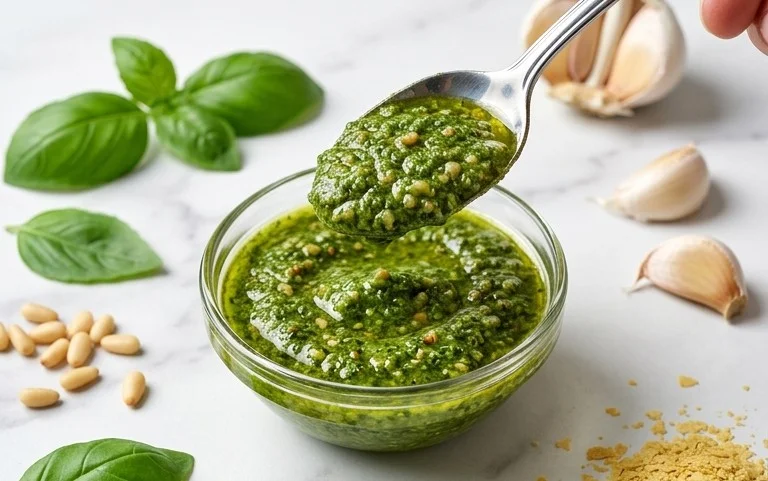
Are you craving that vibrant, herbaceous punch of pesto but need to steer clear of dairy? You’re in the right place! Traditional pesto relies on Parmesan cheese for its salty, umami depth, but I’m here to tell you that you can achieve incredible flavor and a wonderfully creamy texture without a drop of dairy. This dairy-free pesto recipe is incredibly versatile and will elevate everything from pasta and sandwiches to grilled vegetables and dips. The secret lies in a touch of nutritional yeast, which imparts a cheesy, nutty flavor that beautifully mimics Parmesan. Get ready to transform your kitchen into a fragrant haven of fresh basil!
Ingredients:
Instructions:
Preparing Your Ingredients
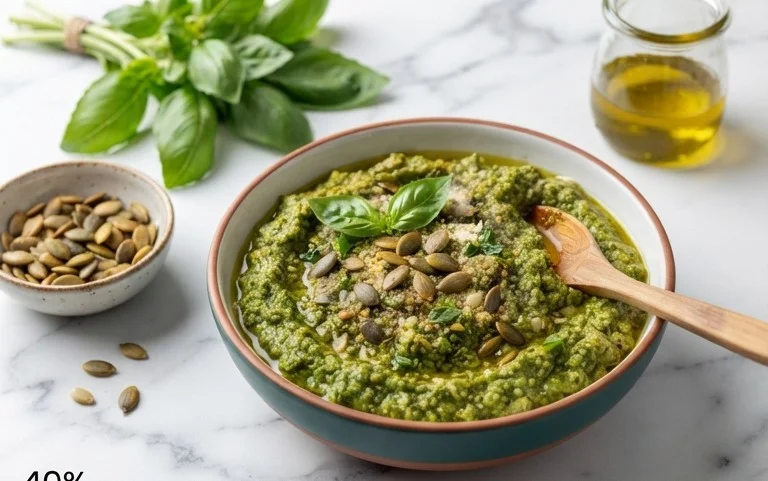
The first step to a spectacular dairy-free pesto is to ensure all your ingredients are prepped and ready to go. This makes the blending process smooth and efficient, ensuring the freshest possible flavor. Start by washing your basil thoroughly and patting it dry with a clean kitchen towel or using a salad spinner. It’s important that the basil leaves are as dry as possible, as excess water can dilute the flavor and affect the pesto’s texture. For the pine nuts, a quick toast really brings out their natural oils and nutty aroma. You can do this in a dry skillet over medium-low heat for a few minutes, stirring constantly until they are lightly golden and fragrant. Watch them closely, as they can burn quickly! If you’re using walnuts or pumpkin seeds, the toasting process is the same – just a few minutes to awaken their flavor. Peel your garlic cloves and give them a rough chop, as the food processor will do the heavy lifting of mincing them finely. Juice your half lemon; you’ll want about 2 tablespoons of fresh lemon juice to brighten and balance the flavors. Finally, measure out your olive oil and salt. If you’re opting for the nutritional yeast, have that ready as well.
The Pesto Creation Process
Now for the fun part: bringin extractg it all together! You have a couple of options for creating your pesto, depending on your kitchen tools. A food processor is the most common and efficient choice, yielding a beautifully emulsified pesto. Alternatively, a high-powered blender can also do the trick, though you might need to scrape down the sides more frequently. For a more rustic, traditional texture, you could even use a mortar and pestle, but be prepared for a bit of a workout!
Let’s walk through the food processor method. Begin extract by adding the toasted pine nuts (or your chosen alternative), the minced garlic, and the nutritional yeast (if using) to the bowl of your food processor. Pulse these ingredients a few times until they are coarsely chopped. This creates a flavorful base before adding the basil.
Next, add about half of your prepared basil leaves to the food processor. Pulse again, scraping down the sides of the bowl as needed, until the basil is finely chopped and incorporated with the nut and garlic mixture. Now, add the remaining basil leaves. Continue to process, scraping down the sides of the bowl periodically, until the basil is finely minced and the mixture starts to look like a cohesive paste. This is where the magic happens – you’ll see the vibrant green color intensify.
Emulsifying and Seasoning
Once the basil is finely chopped, it’s time to introduce the olive oil. With the food processor running on low speed, slowly drizzle in the 1/4 cup of extra virgin extract olive oil. This gradual addition is crucial for creating a smooth, emulsified pesto. The oil will bind the ingredients together, transforming the mixture from a crum extractbly paste into a luscious, spreadable sauce. Continue to process until the pesto is smooth and creamy. If you prefer a chunkier pesto, you can process for less time.
Now, it’s time for seasoning. Add the freshly squeezed lemon juice and the 1/2 teaspoon of salt to the food processor. Pulse a few more times to combine these ingredients. Taste the pesto at this point. This is your opportunity to adjust the seasoning to your personal preference. Does it need a little more salt to bring out the flavors? A touch more lemon juice for brightness? Or perhaps a bit more nutritional yeast for that cheesy depth? Don’t be afraid to experiment and make it your own! Remember, the flavor will continue to develop as it sits.
Finishing Touches and Storage
Once you’re happy with the flavor and consistency, your dairy-free pesto is ready to be enjoyed! Transfer it to an airtight container. To prevent browning and keep it as fresh as possible, you can pour a thin layer of olive oil over the surface of the pesto before sealing the container. This acts as a protective barrier.
This homemade dairy-free pesto can be stored in the refrigerator for up to a week. For longer storage, you can freeze it in an ice cube tray, and once frozen, transfer the pesto cubes to a freezer-safe bag. This makes it incredibly convenient to have pre-portioned pesto ready to go for future meals. Imagin extracte pulling out a few little pesto gems for a quick pasta sauce or to liven up some roasted vegetables! It’s a game-changer for busy weeknights. Enjoy the fresh, vibrant taste of homemade pesto, guilt-free!
Conclusion:
I hope you’ve enjoyed learning how to make this delicious dairy free pesto! It’s truly a versatile and fantastic recipe that proves you don’t need dairy to achieve that classic, vibrant pesto flavor. This recipe is wonderful because it’s bursting with fresh basil, nutty pine nuts (or your chosen alternative!), garlic, and healthy olive oil, all blended into a wonderfully bright and flavorful sauce. It’s perfect for anyone with dairy sensitivities or those simply looking to incorporate more plant-based options into their diet.
The possibilities for serving this dairy free pesto are endless! Toss it with your favorite pasta for a quick and satisfying meal, spread it on crusty bread for a delightful appetizer, dollop it onto grilled vegetables or chicken, or even use it as a flavorful base for pizzas and sandwiches. Don’t be afraid to get creative!
And if you’re feeling adventurous, try some variations! Swap out pine nuts for walnuts, almonds, or sunflower seeds for a different nutty profile. Add a pinch of red pepper flakes for a hint of heat, or blend in a squeeze of lemon juice for extra brightness. I really encourage you to give this recipe a try; I’m confident you’ll be amazed at how simple and rewarding it is to create such a fantastic dairy free pesto from scratch!
Frequently Asked Questions:
Q: How long will my dairy free pesto last in the refrigerator?
A: Stored in an airtight container with a thin layer of olive oil on top to prevent oxidation, your dairy free pesto should stay fresh in the refrigerator for about 5-7 days. The olive oil acts as a protective barrier.
Q: Can I freeze this dairy free pesto?
A: Absolutely! Freezing is a great way to preserve its freshness for longer. You can freeze it in ice cube trays for single servings, or in larger portions in freezer-safe bags or containers. It will typically last for 2-3 months in the freezer.
Dairy Free Pesto
A vibrant and flavorful dairy-free pesto made with fresh basil, pine nuts, garlic, lemon, and olive oil. Perfect for pasta, sandwiches, and dips.
Ingredients
-
3 cups basil
-
1/2 lemon (juiced)
-
1/2 cup pine nuts
-
2 cloves garlic
-
1/4 cup olive oil
-
1/2 tsp salt
-
2 tbsp nutritional yeast
Instructions
-
Step 1
Combine basil, pine nuts, garlic, lemon juice, and salt in a food processor. -
Step 2
Pulse until coarsely chopped. -
Step 3
With the food processor running, slowly drizzle in the olive oil until the pesto is smooth or reaches your desired consistency. -
Step 4
Add nutritional yeast (if using) and pulse a few more times to combine. -
Step 5
Taste and adjust seasoning if necessary. Add more salt or lemon juice as needed. -
Step 6
Transfer the pesto to an airtight container. For best results, cover the surface with a thin layer of olive oil to prevent browning. Store in the refrigerator.
Important Information
Nutrition Facts (Per Serving)
It is important to consider this information as approximate and not to use it as definitive health advice.
Allergy Information
Please check ingredients for potential allergens and consult a health professional if in doubt.