Easy Butter Cookies- The Perfect Sweet Treat
Butter Cookies – the very name conjures images of delicate, melt-in-your-mouth sweetness and a comforting aroma that fills the kitchen. Who can resist the simple yet profound pleasure of a perfectly baked butter cookie? They’re the undisputed cbeef hampions of cookie jars everywhere, a timeless treat that evokes childhood memories and sophisticated tea parties alike. What makes these seemingly humble cookies so universally adored? It’s their unpretentious elegance; a harmonious blend of rich, creamy butter and fine flour, kissed by just a hint of sugar and perhaps a whisper of vanilla. This recipe for butter cookies takes that beloved classic and elevates it to new heights, ensuring a delightful crunch on the outside and a tender, buttery crum extractb within. Get ready to impress yourself and your loved ones with a batch of these irresistible delights.
Ingredients:
- 1 cup (226g) unsalted butter, softened to room temperature
- 2/3 cup (126g) granulated sugar
- 3 large egg yolks
- 2 1/2 cups all-purpose flour
- 1/8 teaspoon salt
- 2 teaspoons vanilla extract or almond extract (or a combination!)
- 2 tablespoons milk
- 10 ounces Ghirardelli Chocolate Wafers (optional, for dipping)
- Sprinkles for decoration (optional)
Preparing the Dough
This butter cookie recipe is wonderfully simple and yields a rich, buttery flavor that pairs perfectly with a cup of tea or coffee. The key to achieving that melt-in-your-mouth texture is ensuring your butter is at the right temperature – soft but not melted. You should be able to press your finger into it easily, leaving an indentation.
Step 1: Creaming the Butter and Sugar
In a large mixing bowl, add the softened unsalted butter and the granulated sugar. Using an electric mixer (handheld or stand mixer with a paddle attachment), begin extract to cream these two ingredients together on medium speed. You want to beat them until the mixture is light and fluffy, resembling pnon-alcoholic ale yellow clouds. This process incorporates air into the dough, which is crucial for creating tender cookies. Scrape down the sides of the bowl periodically to ensure everything is evenly mixed. This stage typically takes about 3-5 minutes. Don’t rush this step; it’s foundational for the cookie’s texture.
Step 2: Incorporating the Egg Yolks and Extracts
Once the butter and sugar are well creamed, add the three large egg yolks to the bowl, one at a time. Beat well after each addition until fully incorporated. The mixture might look a little curdled at this point, and that’s perfectly normal. Next, add your chosen extract – vanilla extract provides a classic, warm flavor, while almond extract offers a slightly more pronounced, nutty sweetness. You can even use half of each for a nuanced taste! Beat again until the extracts are evenly distributed throughout the creamy mixture.
Step 3: Adding the Dry Ingredients
In a separate medium bowl, whisk together the all-purpose flour and the salt. This ensures that the salt is evenly distributed throughout the flour, preventing any salty pockets in your cookies. Gradually add this dry mixture to the wet ingredients in your main gin extractl. Begin mixing on low speed until just combined. Be careful not to overmix the dough at this stage, as this can develop the gluten in the flour too much, resulting in tougher cookies. Stop mixing as soon as you no longer see streaks of dry flour. The dough will be quite thick and may appear slightly crum extractbly.
gin extract>Step 4: Bringing the Dough Together and Chilling
Add the 2 tablespoons of milk to the dough. Milk helps to bind the ingredients and create a smoother, more cohesive dough. Mix on low speed again until the milk is just incorporated and the dough starts to come together. It should still be quite soft. At this point, the dough is ready for its chilling period. Turn the dough out onto a clean surface and gently bring it together into a ball. Divide the dough into two equal portions. Shape each portion into a disc, wrap them tightly in plastic wrap, and refrigerate for at least 1 hour. Chilling the dough is essential. It solidifies the butter, making the dough easier to handle and preventing the cookies from spreading too much during baking. This also allows the flavors to meld together beautifully.
Shaping and Baking
Step 5: Rolling, Cutting, and Baking the Cookies
Preheat your oven to 350°F (175°C). Line baking sheets with parchment paper to prevent sticking and ensure even baking. Take one disc of chilled dough from the refrigerator. On a lightly floured surface, roll out the dough to about 1/4-inch thickness. For best results, try to roll it evenly to ensure consistent baking times. Use your favorite cookie cutters to cut out shapes. Carefully transfer the cut cookies to the prepared baking sheets, leaving about 1-inch of space between them. If the dough becomes too soft to handle while cutting, return it to the refrigerator for a few minutes to firm up. Bake for 10-12 minutes, or until the edges are lightly golden brown and the centers are set. The exact baking time will depend on the size and thickness of your cookies. Let the cookies cool on the baking sheets for a few minutes before transferring them to a wire rack to cool completely. This allows them to firm up before moving.
Optional Enhancements
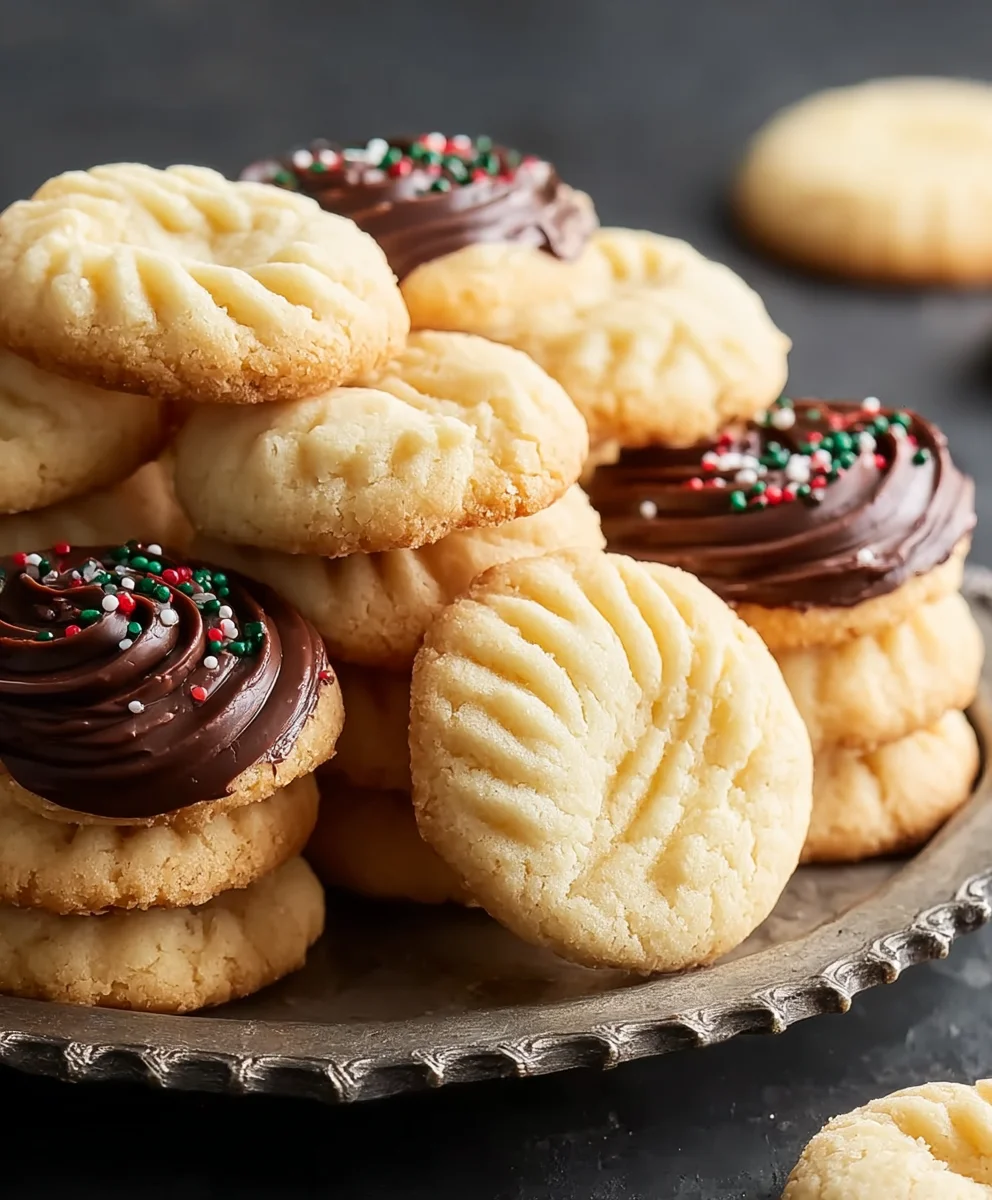
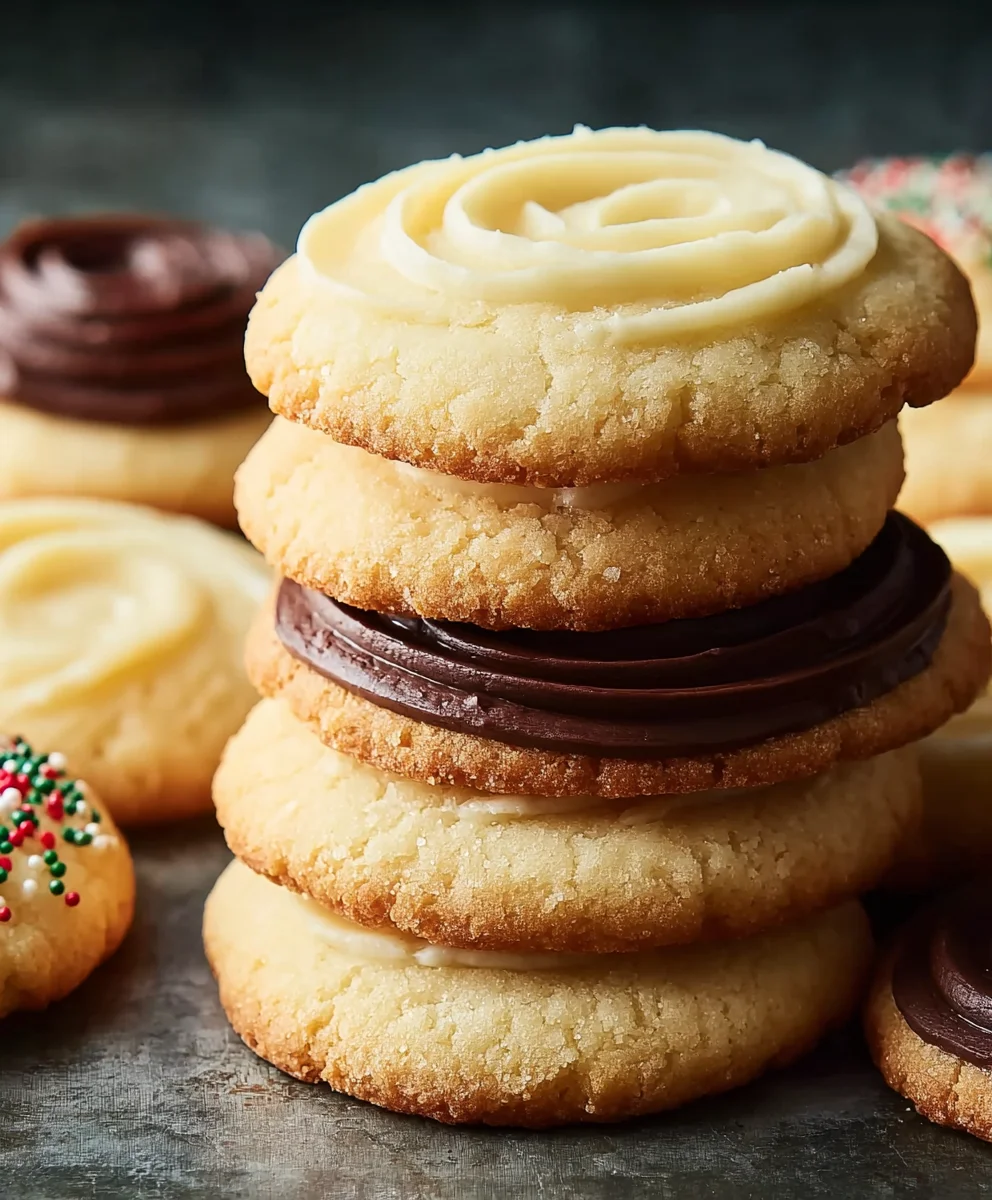
Step 6: Decorating with Chocolate and Sprinkles
Once the butter cookies are completely cooled, you can elevate them with optional decorations. If using Ghirardelli Chocolate Wafers, melt them according to package directions (usually a double boiler or microwave in short intervals). Dip one half of each cooled cookie into the melted chocolate. You can also drizzle melted chocolate over the cookies. Immediately after dipping or drizzling, while the chocolate is still wet, sprinkle them with your chosen colorful sprinkles for a festive touch. Allow the chocolate to set completely before storing. These decorated butter cookies make for beautiful gifts or delightful additions to any celebration.
Conclusion:
I hope you’ve enjoyed learning how to make these delightful Butter Cookies! This recipe is wonderfully straightforward, yielding buttery, tender cookies with a satisfying crunch. They are perfect for any occasion, from a simple afternoon treat with a cup of tea to a sophisticated addition to your holiday cookie platters. Don’t be afraid to experiment with the suggested variations to truly make these Butter Cookies your own. Whether you dip them in chocolate, add a hint of citrus zest, or sprinkle them with colored sugar, the base recipe is incredibly forgiving and always delicious. So, gather your ingredients, preheat your oven, and get ready to experience the pure joy of homemade Butter Cookies. Happy baking!
Frequently Asked Questions:
What makes these Butter Cookies so tender?
The high butter content is the key to the incredible tenderness and rich flavor of these Butter Cookies. Using good quality butter and ensuring it’s at the correct temperature (slightly softened, but not melted) also plays a crucial role in achieving that perfect texture. The creaming of butter and sugar incorporates air, contributing to a light and delicate crum extractb.
Can I make these Butter Cookies ahead of time?
Absolutely! The dough for these Butter Cookies can be made a day or two in advance and stored, well-wrapped, in the refrigerator. Chilling the dough actually helps it firm up, making it easier to roll and cut, and can even enhance the flavor. You can also bake the cookies and store them in an airtight container at room temperature for up to a week.
How can I store leftover Butter Cookies?
To keep your Butter Cookies fresh and delicious, store them in an airtight container at room temperature. Ensure they are completely cooled before storing to prevent any condensation. If you have a variety of cookies, it’s best to store them separately to maintain their individual flavors and textures.
Easy Butter Cookies- The Perfect Sweet Treat
A simple and delightful recipe for rich, buttery cookies that melt in your mouth, perfect with a cup of tea or coffee. Includes optional chocolate dipping and sprinkle decoration.
Ingredients
-
1 cup (226g) unsalted butter, softened to room temperature
-
2/3 cup (126g) granulated sugar
-
3 large egg yolks
-
2 1/2 cups all-purpose flour
-
1/8 teaspoon salt
-
2 teaspoons vanilla extract or almond extract
-
2 tablespoons milk
-
10 ounces Ghirardelli Chocolate Wafers (optional, for dipping)
-
Sprinkles for decoration (optional)
Instructions
-
Step 1
In a large mixing bowl, cream together softened unsalted butter and granulated sugar using an electric mixer on medium speed until light and fluffy, about 3-5 minutes. Scrape down sides of the bowl periodically. -
Step 2
Add egg yolks one at a time, beating well after each addition. Stir in vanilla or almond extract until evenly distributed. -
Step 3
In a separate bowl, whisk together all-purpose flour and salt. Gradually add this dry mixture to the wet ingredients on low speed until just combined. Do not overmix. -
Step 4
Add milk to the dough and mix on low speed until just incorporated. Turn dough out onto a clean surface, bring together into a ball, divide in half, and shape each half into a disc. Wrap tightly in plastic wrap and refrigerate for at least 1 hour. -
Step 5
Preheat oven to 350°F (175°C). Line baking sheets with parchment paper. Roll out chilled dough to 1/4-inch thickness on a lightly floured surface. Cut out shapes and transfer to baking sheets, leaving 1-inch space between cookies. Bake for 10-12 minutes, or until edges are lightly golden brown. Cool on baking sheets for a few minutes before transferring to a wire rack to cool completely. -
Step 6
Once cookies are completely cooled, melt Ghirardelli Chocolate Wafers according to package directions. Dip half of each cookie into melted chocolate and sprinkle with colorful sprinkles if desired. Allow chocolate to set completely before storing.
Important Information
Nutrition Facts (Per Serving)
It is important to consider this information as approximate and not to use it as definitive health advice.
Allergy Information
Please check ingredients for potential allergens and consult a health professional if in doubt.