Easy Cherry Bars Recipe – Delicious Sweet Treat
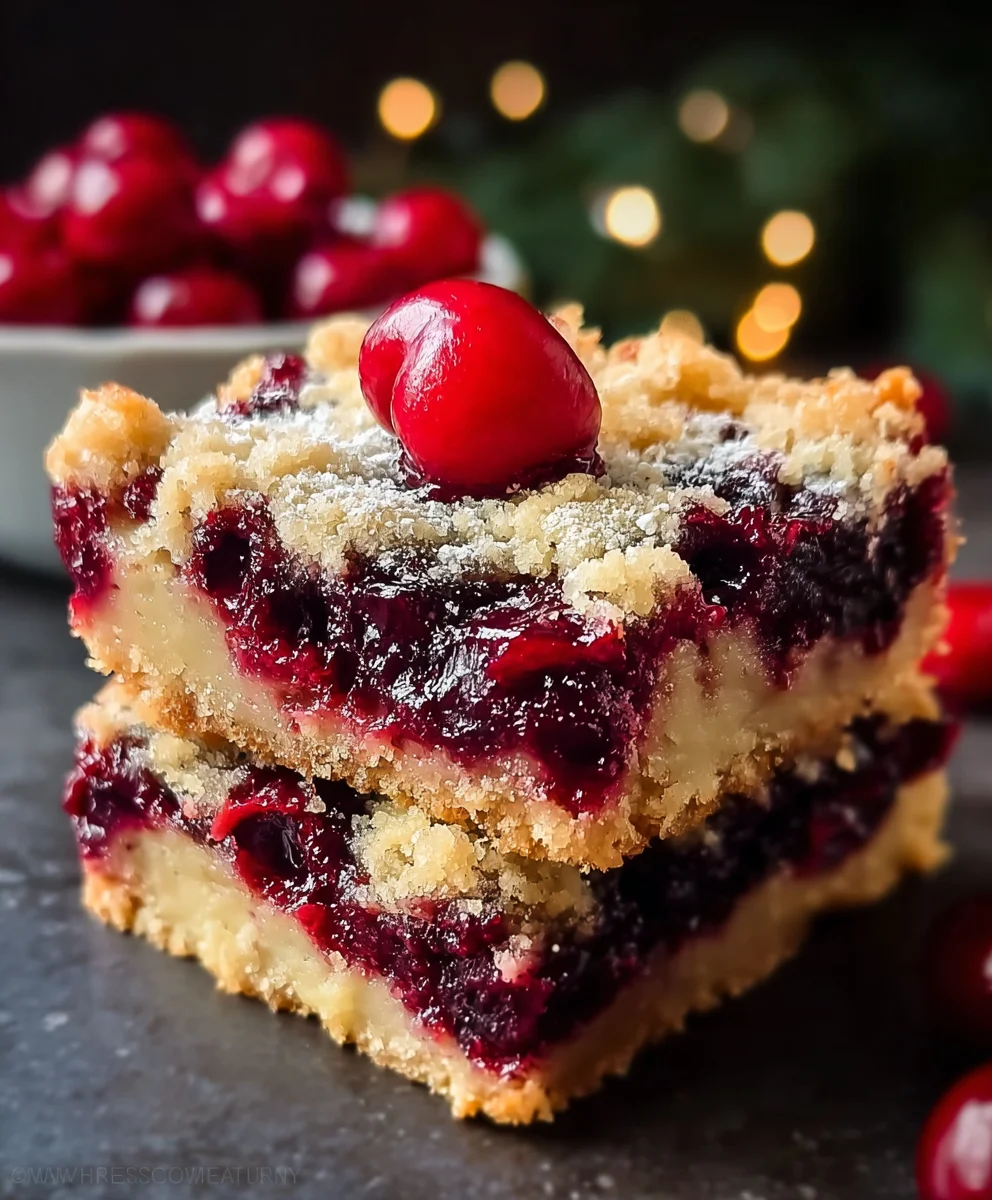
Cherry Bars have a magical way of transporting me back to childhood summers, a warm breeze carrying the scent of ripe fruit and carefree days. There’s something inherently comforting and delightfully nostalgic about these sweet, chewy, and bursting-with-flavor treats. It’s no wonder that Cherry Bars remain a beloved classic, a go-to for bake snon-alcoholic ales, picnics, and simple moments of indulgence. What truly sets these particular Cherry Bars apart is the perfect balance of sweet, tart cherries nestled within a buttery, crum extractbly base and topped with an irresistible, slightly crisp streusel. They’re not just a dessert; they’re an experience – a burst of sunshine in every bite that leaves you craving more. Get ready to create your own cherished memories with this recipe!
Ingredients:
- 1 cup unsalted butter, softened
- 1 ½ cups granulated sugar
- 4 large eggs
- 1 teaspoon vanilla extract
- 3 cups all-purpose flour
- 1 teaspoon baking powder
- ½ teaspoon salt
- 1 can (21 ounces) cherry pie filling
- 1 cup powdered sugar
- 2 tablespoons milk
- ½ teaspoon almond extract
Preparing the Cherry Bars: The Base
Mixing the Dough
This recipe for Cherry Bars is a crowd-pleaser, perfect for bake snon-alcoholic ales, potlucks, or just a sweet treat to enjoy with your afternoon coffee. The base is a tender, buttery shortbread-like dough that provides the perfect foundation for the sweet cherry topping. Let’s get started!
First, preheat your oven to 350°F (175°C). It’s crucial to get the oven to the correct temperature before you even think about baking, as this ensures even cooking and a perfectly golden crust. While the oven is preheating, prepare a 9×13 inch baking pan. I like to lightly grease it with butter or baking spray, and then line it with parchment paper, leaving an overhang on the sides. This makes removing the bars much easier once they’re cooled and prevents any sticking.
In a large mixing bowl, cream together the softened unsalted butter and the granulated sugar. You want to beat these together until the mixture is light and fluffy. This can take a few minutes with an electric mixer, or a bit longer if you’re using a whisk and some elbow grease. The goal is to incorporate air into the butter and sugar, which will contribute to the tenderness of the base. Scrape down the sides of the bowl periodically to ensure everything is evenly mixed.
Next, add the large eggs, one at a time, beating well after each addition. Don’t rush this step; allowing each egg to fully incorporate before adding the next helps create a smooth, cohesive dough. After all the eggs are added, stir in the vanilla extract. This adds a wonderful depth of flavor that complements the cherry filling beautifully.
Incorporating Dry Ingredients
In a separate medium bowl, whisk together the all-purpose flour, baking powder, and salt. Whisking these dry ingredients together ensures that the leavening agent (baking powder) and the salt are evenly distributed throughout the flour, which is essential for consistent results.
Now, gradually add the dry ingredients to the wet ingredients, mixing on low speed or by hand until just combined. Be careful not to overmix at this stage. Overmixing can develop the gluten in the flour too much, leading to tough bars. We’re aiming for a dough that comes together without being overly sticky or dry. It should be thick and scoopable.
Forming the Base and Adding the Cherry Filling
Take about two-thirds of the dough and press it evenly into the bottom of your prepared baking pan. You can use your hands or the back of a spatula for this. Make sure it’s an even layer so that it bakes uniformly. Then, spread the entire can of cherry pie filling over the pressed dough layer. Distribute it as evenly as possible, making sure to get close to the edges. This is the star of the show, so don’t be shy with the filling!
Crum extractble the remaining one-third of the dough over the top of the cherry pie filling. You can do this by taking small pieces of dough and dropping them randomly, or by using a grater to create a more streusel-like topping. Don’t worry about covering every single inch of the cherry filling; gaps are perfectly fine and will allow the filling to bubble through during baking, creating those lovely caramelized edges.
Baking and Glazing the Cherry Bars
Baking to Perfection
Place the pan in the preheated oven and bake for 35 to 45 minutes. The exact baking time will depend on your oven, so keep an eye on it. You’ll know the bars are ready when the topping is golden brown and the cherry filling is bubbling around the edges. If the topping starts to brown too quickly, you can loosely tent the pan with aluminum foil for the remainder of the baking time.
Cooling and Preparing the Glaze
Once baked, carefully remove the pan from the oven and place it on a wire rack to cool completely. This is a crucial step. Trying to cut into warm bars will result in a messy, gooey situation. Patience is key here! Let them cool for at least 2-3 hours, or until they are completely cool to the touch.
While the bars are cooling, prepare the simple glaze. In a small bowl, whisk together the powdered sugar, milk, and almond extract until smooth and creamy. You want a pourable consistency. If the glaze is too thick, add a little more milk, a teaspoon at a time, until it reaches your desired consistency. If it’s too thin, add a bit more powdered sugar. The almond extract adds a subtle, sophisticated flavor that pairs wonderfully with the cherries, but you can omit it or use a little more vanilla if you prefer.
Glazing and Finishing
Once the cherry bars are completely cooled, drizzle the prepared glaze evenly over the top. You can use a spoon to create swirls or just pour it on in a freeform pattern. The glaze will set slightly as it sits, giving your bars a beautiful, finished look.
Cutting and Serving
After the glaze has set for about 15-30 minutes, use the parchment paper overhang to carefully lift the entire slab of bars out of the pan. Transfer it to a cutting board and use a sharp knife to cut them into squares or rectangles. For clean cuts, you can wipe your knife between each cut. Enjoy these delicious Cherry Bars! They store well in an airtight container at room temperature for a few days.

Conclusion:
There you have it – a delightful and straightforward recipe for Cherry Bars that’s sure to become a family favorite! We’ve explored how to create these wonderfully chewy and fruity bars, perfect for any occasion. Whether you’re baking for a potluck, a holiday gathering, or simply a craving for something sweet, these Cherry Bars deliver a burst of flavor with every bite. Their tender, buttery base topped with a vibrant cherry filling makes them incredibly satisfying.
For serving suggestions, these Cherry Bars are fantastic on their own, perhaps with a dusting of powdered sugar. They also pair beautifully with a scoop of vanilla bean ice cream or a dollop of whipped cream for an extra touch of indulgence. Don’t hesitate to get creative with variations! You could swap the cherries for other berries like raspberries or blueberries, or even add a hint of almond extract to the batter for a subtle twist. Experimenting with different types of nuts in the crust, like chopped almonds or pecans, can also add a lovely textural contrast.
We encourage you to give this Cherry Bars recipe a try. It’s a rewarding baking experience that results in a truly delicious treat. Enjoy the process and savor the sweet, fruity goodness you create!
Frequently Asked Questions:
Can I use fresh cherries instead of canned?
Absolutely! If using fresh cherries, you’ll want to pit them and then likely simmer them with a little sugar and cornstarch to create a compote similar to what you’d get from canned cherries. You might need to adjust the sugar based on the sweetness of your fresh cherries. Aim for about 2-3 cups of pitted fresh cherries.
How should I store leftover Cherry Bars?
Leftover Cherry Bars can be stored in an airtight container at room temperature for up to 2 days. For longer storage, keep them in the refrigerator for up to a week. They can also be frozen, either as whole bars or cut into individual portions, wrapped tightly in plastic wrap and then foil. Thaw them at room temperature before enjoying.
My cherry filling seems too runny. What can I do?
If your cherry filling is too runny, it might be due to too much liquid from the cherries or not enough thickener. You can try gently simmering the filling for a few more minutes to reduce the liquid. Alternatively, you can mix a tablespoon of cornstarch with a tablespoon of cold water to create a slurry and stir it into the simmering filling until it thickens. Be sure to let the filling cool slightly before spreading it on the crust.
Easy Cherry Bars Recipe – Delicious Sweet Treat
A crowd-pleasing recipe for tender, buttery cherry bars with a sweet cherry filling and a simple glaze. Perfect for any occasion.
Ingredients
-
1 cup unsalted butter, softened
-
1 ½ cups granulated sugar
-
4 large eggs
-
1 teaspoon vanilla extract
-
3 cups all-purpose flour
-
1 teaspoon baking powder
-
½ teaspoon salt
-
1 can (21 ounces) cherry pie filling
-
1 cup powdered sugar
-
2 tablespoons milk
-
½ teaspoon almond extract
Instructions
-
Step 1
Preheat oven to 350°F (175°C). Lightly grease and line a 9×13 inch baking pan with parchment paper, leaving an overhang. In a large bowl, cream together softened butter and granulated sugar until light and fluffy. Beat in eggs one at a time, then stir in vanilla extract. -
Step 2
In a separate bowl, whisk together flour, baking powder, and salt. Gradually add the dry ingredients to the wet ingredients, mixing on low speed until just combined. Do not overmix. -
Step 3
Press two-thirds of the dough evenly into the bottom of the prepared pan. Spread the entire can of cherry pie filling over the dough. Crumble or grate the remaining one-third of the dough over the cherry filling. -
Step 4
Bake for 35 to 45 minutes, or until the topping is golden brown and the filling is bubbling. If the topping browns too quickly, tent loosely with foil. -
Step 5
Remove from oven and let cool completely on a wire rack, at least 2-3 hours. While cooling, prepare the glaze by whisking together powdered sugar, milk, and almond extract until smooth and pourable. -
Step 6
Once the bars are completely cool, drizzle the glaze evenly over the top. Let the glaze set for 15-30 minutes. -
Step 7
Use the parchment paper overhang to lift the bars from the pan. Cut into squares or rectangles. Store in an airtight container at room temperature.
Important Information
Nutrition Facts (Per Serving)
It is important to consider this information as approximate and not to use it as definitive health advice.
Allergy Information
Please check ingredients for potential allergens and consult a health professional if in doubt.