Easy Homemade Strawberry Ice Cream Recipe
Homemade strawberry ice cream is more than just a dessert; it’s a sun-kissed memory in a bowl. There’s something incredibly rewarding about creating this classic treat from scratch, transforming simple, ripe strawberries into a creamy, dreamy delight. Forget the artificial flavors and the freezer-burned edges of store-bought tubs. When you make homemade strawberry ice cream, you’re in control of the quality, the sweetness, and that vibrant, natural berry essence. It’s the kind of dessert that brings smiles to faces, evokes feelings of nostalgia, and is absolutely perfect for those warm summer days or any time you crave a burst of pure, unadulterated joy. We’re about to dive into a recipe that celebrates the true taste of strawberries, creating a truly special homemade strawberry ice cream experience you’ll want to recreate again and again.
Why This Recipe Stands Out
The Freshest Flavors, Made By You
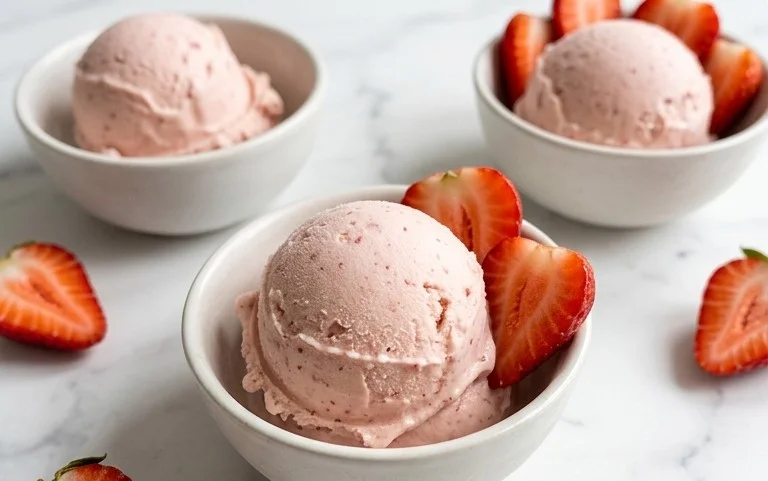
Homemade Strawberry Ice Cream
There’s something incredibly satisfying about making ice cream from scratch, and when it comes to summer flavors, you simply can’t beat the vibrant taste of homemade strawberry ice cream. Forget those artificial-tasting store-bought versions; this recipe captures the true essence of ripe, sweet strawberries in every creamy spoonful. It’s surprisingly simple to make, requiring just a few common ingredients and a little patience. The result is a luxurious, incredibly flavorful treat that will have everyone asking for your secret.
This recipe is perfect for those warm evenings when you crave something cool and delicious. It’s also a fantastic way to use up a bounty of fresh strawberries. I love how the natural sweetness of the berries shines through, complemented by just the right amount of sugar and a hint of tangy lemon juice to brighten the flavor. The combination of heavy whipping cream and half-and-half creates a wonderfully rich and smooth texture that melts in your mouth.
Let’s get started on creating your own batch of this delightful strawberry ice cream!
Ingredients:
Preparing the Strawberry Base
The first step in creating our delicious strawberry ice cream is to get our star ingredient, the strawberries, ready. We want to amplify their natural sweetness and create a smooth, flavorful base that will infuse our ice cream.
1. In a medium bowl, combine the hulled and diced strawberries, honey, granulated sugar, and lemon juice. Gently stir everything together until the sugar and honey begin extract to dissolve into the juices released by the strawberries. The lemon juice is a crucial, though subtle, addition here; it doesn’t make the ice cream taste lemony, but rather it balances the sweetness of the berries and sugar, preventing the flavor from becoming cloying and making the strawberry taste pop even more. Let this mixture sit for about 15-20 minutes. This time allows the sugar to draw out more of the natural juices from the strawberries, creating a more intensely flavored syrup. It also gives the flavors a chance to meld beautifully.
2. After the resting period, gently mash the strawberries with a fork or potato masher. You don’t need to puree them completely; leaving some small chunks of strawberry will provide lovely little pockets of fruitiness in your finished ice cream, adding textural interest. However, if you prefer a completely smooth ice cream, you can use an immersion blender or transfer the mixture to a regular blender and pulse until you reach your desired consistency. For this recipe, I like to have a few visible, soft pieces of strawberry.
Creating the Ice Cream Mixture
Now that our strawberry base is prepped and bursting with flavor, it’s time to combine it with the creamy components that will give our ice cream its signature smooth and rich texture.
3. In a separate, larger bowl, whisk together the heavy whipping cream, half-and-half, and vanilla extract. The heavy whipping cream is essential for achieving that luscious, creamy mouthfeel, while the half-and-half provides a lighter, yet still rich, element. The vanilla extract acts as a flavor enhancer, deepening the overall taste profile and complementing the sweetness of the strawberries without overpowering them. Whisk until everything is well combined and slightly thickened, but don’t over-whisk to the point of whipping it into whipped cream.
4. Now, gently fold the prepared strawberry mixture into the cream mixture. Stir just enough to combine, ensuring you distribute the strawberry goodness evenly throughout the cream. Again, avoid over-mixing. The goal is to integrate the flavors and textures without incorporating too much air at this stage, as that will be handled by the ice cream maker.
Churning and Freezing Your Ice Cream
The final stages involve chilling and transforming our liquid mixture into frozen delight. This is where your ice cream maker does its magic.
5. Pour the combined strawberry and cream mixture into your ice cream maker. Churn according to the manufacturer’s instructions for your specific model. This typically involves running the machine for about 20-30 minutes, or until the ice cream has thickened to a soft-serve consistency. The churning process incorporates air, which is vital for a lighter, less icy texture, and it also ensures that ice crystals remain small, resulting in that desirable creamy mouthfeel.
6. Once churned to the desired consistency, carefully transfer the soft ice cream into an airtight container. For the best texture and to allow the flavors to fully develop and harden, it’s important to freeze it for at least 4-6 hours, or preferably overnight. If you like a firmer ice cream, you can let it freeze for longer. To prevent ice crystals from forming on the surface, you can press a piece of parchment paper or plastic wrap directly onto the surface of the ice cream before sealing the container.
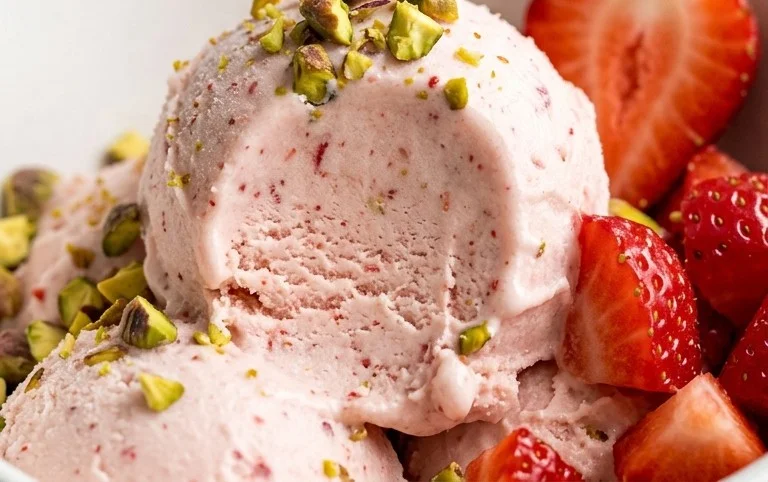
Enjoy your wonderfully homemade strawberry ice cream! It’s perfect on its own, or you can serve it with fresh berries, a sprig of mint, or a drizzle of chocolate sauce.
Conclusion:
There you have it – a delightful and surprisingly simple way to create luscious, homemade strawberry ice cream right in your own kitchen! This recipe truly shines because it allows the vibrant, natural flavor of fresh strawberries to take center stage, without the artificial taste often found in store-bought varieties. The creamy texture, achieved through simple ingredients and a bit of patience, is incredibly satisfying. It’s the perfect way to enjoy the peak season of strawberries or to bring a taste of summer to any time of year.
Serving this homemade strawberry ice cream is a joy in itself. It’s wonderful simply in a cone or bowl, but I also love to top it with a drizzle of chocolate sauce, a sprinkle of toasted almonds, or a dollop of whipped cream for an extra decadent treat. For a refreshing twist, try serving it alongside a slice of pound cake or as the base for a delightful strawberry milkshake.
Don’t be afraid to experiment! If you’re feeling adventurous, consider adding a splash of balsamic glaze for a sophisticated flavor profile, or a few fresh basil leaves for an unexpected herbaceous note. The possibilities are truly endless when you’re in control of the ingredients.
I truly encourage you to give this homemade strawberry ice cream recipe a try. You’ll be amazed at how rewarding it is to create something so delicious from scratch. It’s a fantastic project for a lazy afternoon and the results are undeniably worth it!
Frequently Asked Questions:
Can I make this recipe without an ice cream maker?
Yes, you absolutely can! While an ice cream maker makes the process smoother, you can achieve a similar result by freezing the mixture in a shallow container and stirring vigorously every 30-45 minutes for the first 2-3 hours, breaking up any ice crystals. This requires more effort but the delicious homemade strawberry ice cream will be worth it!
How long will the ice cream last in the freezer?
Homemade strawberry ice cream will typically last for about 1-2 weeks in the freezer. For best results, store it in an airtight container, pressing a piece of parchment paper directly onto the surface of the ice cream before sealing the lid to minimize ice crystal formation.
What if my strawberries aren’t very sweet?
If your strawberries are a bit tart, you can easily adjust the sugar content. Taste the strawberry mixture before chilling and churn it to see if you need to add a little extra sugar or a touch of honey for added sweetness. Remember, you can always add more, but you can’t take it away!
Homemade Strawberry Ice Cream
A simple and delicious homemade strawberry ice cream recipe, perfect for a summer treat.
Ingredients
-
1 1/2 cups strawberries, hulled and diced
-
2 Tbsp honey
-
1/2 cup granulated sugar
-
1 tsp lemon juice
-
1 cup heavy whipping cream
-
1/2 cup half and half
-
1 tsp vanilla extract
Instructions
-
Step 1
In a bowl, combine the diced strawberries, honey, granulated sugar, and lemon juice. Stir gently and let sit for about 15 minutes to allow the strawberries to macerate. -
Step 2
Pour the strawberry mixture into a blender or food processor and blend until smooth. -
Step 3
In a separate bowl, whisk together the heavy whipping cream, half and half, and vanilla extract until combined. -
Step 4
Gently fold the blended strawberry mixture into the cream mixture until just combined. Do not overmix. -
Step 5
Pour the mixture into an ice cream maker and churn according to the manufacturer’s instructions. -
Step 6
Transfer the ice cream to an airtight container and freeze for at least 4 hours, or until firm.
Important Information
Nutrition Facts (Per Serving)
It is important to consider this information as approximate and not to use it as definitive health advice.
Allergy Information
Please check ingredients for potential allergens and consult a health professional if in doubt.