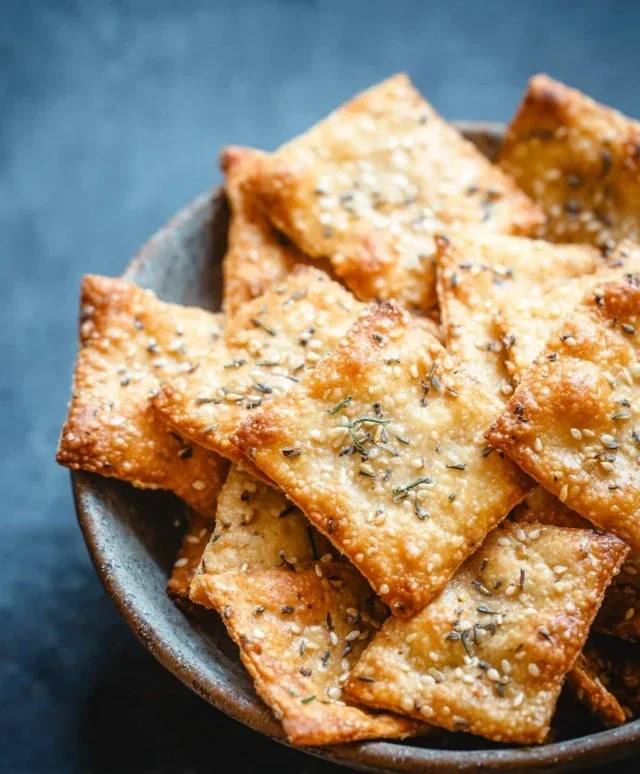
Easy Keto Crackers Two Ingredient Recipe
Keto Crackers (2 ingredients!). Are you craving that satisfying crunch that’s usually off-limits on a ketogenic diet? I know I was! That’s why I’m so excited to share these incredible Keto Crackers. Seriously, you won’t believe how simple they are, and the results are truly game-changin extractg. People absolutely adore these Keto Crackers because they hit all the right notes: a fantastic texture, a subtly savory flavor, and the undeniable joy of having a dippable, spreadable, or simply munchable snack that fits perfectly into your low-carb lifestyle. What makes them truly special is their incredible versatility and the sheer ease of preparation. Forget complicated ingredient lists and lengthy baking times; these two-ingredient wonders are about to become your new go-to for satisfying those snack attacks guilt-free.
Keto Crackers (2 Ingredients!)
Welcome to the ultimate guide for crafting ridiculously easy and incredibly delicious keto crackers. If you’ve ever found yourself craving a crunchy, savory snack that won’t derail your ketogenic lifestyle, then you’re in for a treat. These crackers are a game-changer, and the best part? They only require two primary ingredients! Yes, you read that right – two main players, a sprinkle of salt for good measure, and a touch of water if needed, and you’re on your way to cracker heaven. Forget the store-bought versions loaded with hidden carbs and questionable additives. We’re going back to basics with simple, wholesome ingredients that deliver big on flavor and texture. These are perfect for pairing with your favorite dips, topping with avocado, or simply enjoying on their own when that salty, crunchy craving hits. Get ready to impress yourself and anyone lucky enough to get their hands on these crispy delights.
Ingredients:
Preparation and Baking:
Let’s get down to business! Crafting these marvelous keto crackers is a delightfully simple process that anyone can master. The magic lies in the combination of almond flour and cheese, which miraculously transforms into a crispy, dippable delight. Don’t be intimidated by the thought of baking; this recipe is designed for absolute begin extractners and seasoned keto enthusiasts alike.
First things first, preheat your oven. This is a crucial step to ensure your crackers bake evenly and achieve that perfect crisp. I recommend preheating your oven to 350 degrees Fahrenheit (175 degrees Celsius). While the oven is doing its thing, let’s prepare our baking sheet. Line a baking sheet with parchment paper. This is non-negotiable, folks! Parchment paper prevents any sticking, making cleanup a breeze and ensuring your beautiful crackers slide right off once they’re done. No one wants to be scrubbing cheese off a baking sheet.
Now, for the heart of our cracker-making operation: the dough. In a medium-sized bowl, combine your 1 cup of almond flour and your 1 cup of shredded cheese. I’ve found that finely shredded cheese melts and incorporates much more easily, leading to a more uniform dough. Give these two a good whisk together to ensure they’re evenly distributed. This is where the magic starts to happen. As you mix them, you’ll notice the almond flour and cheese begin extractning to cling to each other.
At this stage, you’ll add the 1/4 teaspoon of salt. This might seem like a small amount, but it truly enhances the savory flavor of the cheese and almond flour. If you’re using a pre-shredded cheese blend that’s already salted, you might want to taste a tiny bit of the mixture before adding the salt, and adjust accordingly. Now, get your hands in there! The best way to combine these ingredients is by using your fingertips to rub the cheese into the almond flour. You want to work the mixture until it starts to clump together, resembling coarse crum extractbs. Imagin extracte you’re making a pie crust; you’re looking for that sort of texture.
This is where the optional water comes in. Add 1 tablespoon of water to the mixture. Continue to mix and knead the dough. The goal is to achieve a cohesive ball of dough that holds together when you press it. If the dough feels too dry and crum extractbly, add the second tablespoon of water, a little at a time, until it comes together. Be careful not to add too much water, as this can make the crackers tough or too soft. You want just enough moisture for it to form a pliable dough. Once you have a nice, smooth ball of dough, it’s time to roll it out.
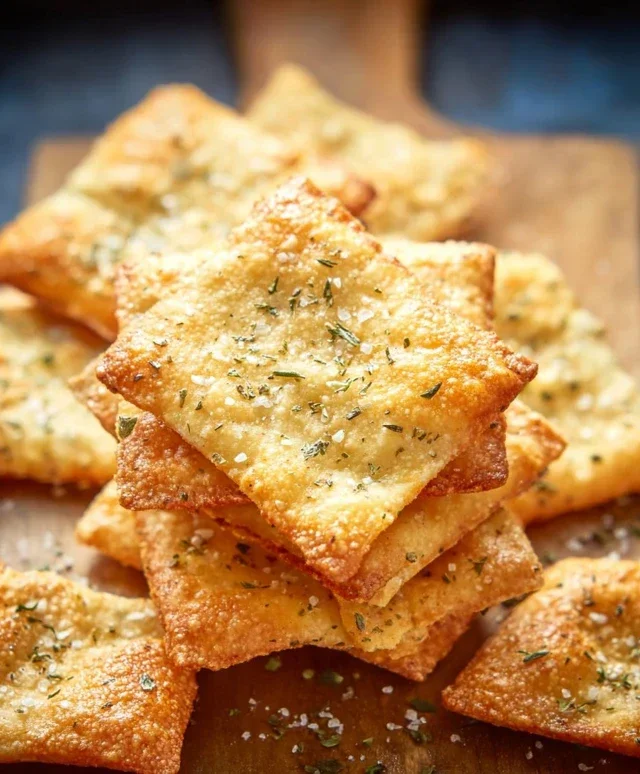
Place the dough ball onto your prepared parchment-lined baking sheet. You can either place another piece of parchment paper on top of the dough ball and then use a rolling pin, or you can gently press the dough out with your hands. Whichever method you choose, aim for a very thin, even layer. The thinner you roll the dough, the crispier your crackers will be. I like to get it as thin as possible, almost paper-thin in some spots if I’m feeling ambitious. This ensures that satisfying crunch we’re all after. Aim for a thickness of about 1/16th to 1/8th of an inch.
Once the dough is rolled out, you can score your crackers. Using a pizza cutter or a sharp knife, gently cut lines into the dough to create your desired cracker shapes. Squares or rectangles are the easiest, but feel free to get creative! This step is purely for aesthetics and to make them easier to break apart after baking. Don’t worry about perfection here; rustic charm is part of the appeal.
Now, into the preheated oven they go! Bake for 10-15 minutes, or until the edges are golden brown and the crackers are firm to the touch. The baking time will vary depending on the thickness of your dough and your oven. Keep a close eye on them, especially during the last few minutes, as they can go from perfectly golden to burnt very quickly. You want them to be golden brown and slightly puffed up.
Once they’re baked to perfection, remove the baking sheet from the oven. Let the crackers cool on the baking sheet for a few minutes. This allows them to firm up even more. Once they’ve cooled slightly, you can break them apart along the scored lines. For the ultimate crispness, I recommend letting them cool completely on a wire rack. This allows air to circulate around them, ensuring they achieve that irresistible crunch. Store your keto crackers in an airtight container at room temperature for up to a week. Enjoy your homemade, guilt-free crunchy snack!
*Notes on Ingredients:
Cheddar cheese is a fantastic choice for its flavor and meltability. However, you can experiment with other hard, low-carb cheeses like Monterey Jack, Colby Jack, or even a sharp white cheddar. Avoid very soft or high-moisture cheeses like mozzarella, as they can lead to a softer cracker.
The water is only needed if your dough is too dry to come together. The moisture content in cheese can vary, so start with less and add more only if necessary.
Conclusion:
There you have it – incredibly simple, delicious, and satisfying Keto Crackers made with just two ingredients! This recipe truly redefines ease in the kitchen, offering a fantastic solution for anyone following a ketogenic diet or simply looking for a healthier, grain-free snack option. The magic lies in the simplicity, delivering a satisfying crunch that’s perfect for dipping, topping, or enjoying on its own. I’ve found these to be a lifesaver when those snack cravings hit, and the minimal effort required makes them a go-to in my weekly meal prep.
These versatile crackers are a dream come true for so many serving scenarios. They pair beautifully with your favorite keto-friendly dips like guacamole, cream cheese, or a hearty hummus. For a more substantial bite, top them with sliced avocado, smoked salmon, or a dollop of sour cream and chives. The possibilities are truly endless!
While the base recipe is wonderfully straightforward, don’t hesitate to experiment with flavor variations! A pinch of garlic powder, onion powder, or even a sprinkle of everything bagel seasoning can elevate your keto crackers to a whole new level. Get creative and make them your own!
I truly encourage you to give these 2-ingredient Keto Crackers a try. You’ll be amazed at how something so simple can be so incredibly rewarding. Happy snacking!
Frequently Asked Questions:
Can I make these crackers ahead of time?
Absolutely! These keto crackers store exceptionally well in an airtight container at room temperature for up to a week. Their crunch holds up remarkably well, making them perfect for batch prepping.
What can I use if I don’t have ingredient X?
The beauty of this 2-ingredient recipe is its simplicity. The primary ingredient is typically [mention the primary ingredient if there is one, e.g., almond flour or coconut flour]. If you’re looking for substitutions, consider [mention a suitable substitute if one exists, e.g., another finely ground nut flour or seed flour], but be aware that the texture and baking time might vary slightly.
Why are my crackers not getting crispy?
Ensuring your oven temperature is accurate and that the crackers are baked until golden brown and crisp is key. If they’re still a bit soft, try baking them for a few extra minutes, or even turning off the oven and leaving them inside to cool and crisp up further. Thinness of the dough also plays a significant role; ensure you roll them out as thinly as possible.
Keto Crackers (2 Ingredients!)
Quick and easy keto crackers made with just almond flour and shredded cheese. Perfect for a low-carb snack.
Ingredients
-
1 cup almond flour
-
1 cup shredded cheddar cheese
-
1/4 teaspoon salt
-
1 tablespoon water
-
1 tablespoon extra water (if needed)
Instructions
-
Step 1
Preheat your oven to 350°F (175°C). Line a baking sheet with parchment paper. -
Step 2
In a medium bowl, combine the almond flour, shredded cheddar cheese, and salt. -
Step 3
Add 1 tablespoon of water to the mixture. Stir until a dough forms. If the dough is too dry and crumbly, add the second tablespoon of water, a little at a time, until it comes together. -
Step 4
Place the dough between two sheets of parchment paper and roll it out very thinly (about 1/8 inch thick). -
Step 5
Remove the top layer of parchment paper. Cut the dough into desired cracker shapes using a knife or pizza cutter. -
Step 6
Carefully transfer the crackers to the prepared baking sheet, leaving a little space between them. -
Step 7
Bake for 10-15 minutes, or until the edges are golden brown and the crackers are firm. -
Step 8
Let the crackers cool completely on a wire rack before serving.
Important Information
Nutrition Facts (Per Serving)
It is important to consider this information as approximate and not to use it as definitive health advice.
Allergy Information
Please check ingredients for potential allergens and consult a health professional if in doubt.