Easy Roasted Summer Squash- Delicious Side Dish
Roasted Summer Squash is a revelation, transforming humble garden bounty into something truly spectacular. When those long, warm days arrive and the squash vines are overflowing, this is the dish I turn to again and again. There’s an undeniable magic in how the simple act of roasting unlocks the natural sweetness of summer squash, coaxing out those tender, caramelized edges that are simply irresistible. It’s more than just a side dish; it’s a celebration of peak-season flavor. What makes this recipe so beloved is its effortless simplicity, allowing the vibrant ingredients to truly shine. We’re talking about minimal fuss, maximum flavor, and a dish that’s both healthy and incredibly satisfying. Get ready to discover your new favorite way to enjoy the best of what summer has to offer with this delightful Roasted Summer Squash.
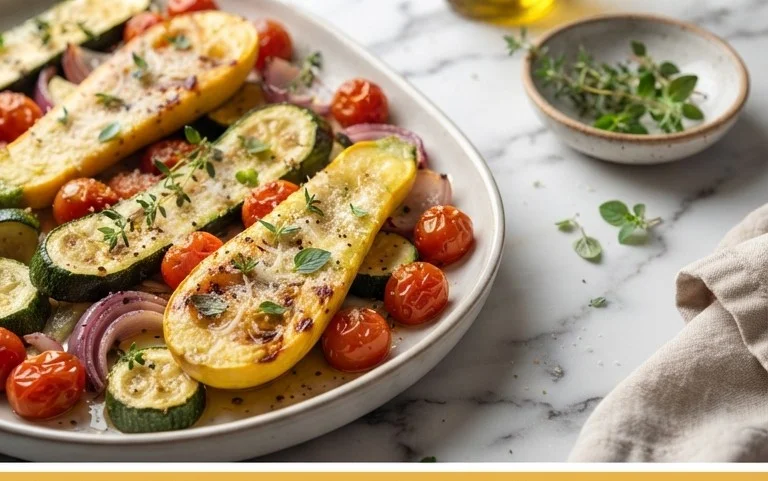
Roasted Summer Squash
There’s something magical about summer produce, and when it comes to zucchini and yellow squash, roasting is by far my favorite way to prepare them. It transforms their mild, slightly watery flesh into something tender, slightly sweet, and wonderfully savory. The edges get beautifully caramelized, and the cheese and breadcrum extractbs add a delightful crunch. This recipe is incredibly simple, making it perfect for a weeknight meal, but it’s also elegant enough to serve at a summer gathering. It’s a fantastic side dish that pairs well with grilled meats, fish, or even as a light vegetarian main served with a hearty grain. Let’s get this simple yet satisfying dish on the table!
Ingredients:
Cooking Instructions
Preparation is Key
The first step in creating this delightful roasted summer squash is to prepare your vegetables. You’ll want to start with about 1 pound of summer squash. This typically equates to about two medium-sized zucchini or yellow squash, or a combination of both. I love using a mix as it offers a slight visual appeal and a subtle variation in texture and flavor. Before anything else, give your squash a good wash under cool running water. Pat them completely dry with a clean kitchen towel or paper towels. This drying step is crucial because excess moisture can lead to steaming rather than roasting, and we’re aiming for those delicious crispy edges.
Once dried, it’s time to cut the squash. You can slice them into rounds about ¼-inch thick. This is my preferred method as it allows for even cooking and a good surface area for the seasonings to adhere to. Alternatively, you can halve them lengthwise and then cut them into half-moons, or even quarter them lengthwise if you have very large squash. Whatever shape you choose, aim for uniformity so that all pieces cook at the same rate. If your squash has any particularly large seeds in the center, you can scoop them out with a spoon before slicing. This is more of an aesthetic choice and doesn’t significantly impact the taste, but it can prevent a slightly more watery texture in those areas.
Tossing with Flavor
Now that your squash is prepped and ready, it’s time to bring on the flavor! In a large mixing bowl, add your sliced summer squash. Drizzle the 1 tablespoon of olive oil over the squash. The olive oil will help the seasonings cling to the squash and will also promote that beautiful browning and caramelization we’re looking for during the roasting process. Don’t be tempted to skip the oil; it’s essential for achieving the right texture.
Next, it’s time for the flavor powerhouses. Sprinkle the 1 teaspoon of lemon pepper seasoning evenly over the squash. This seasoning is a fantastic shortcut, providing both a bright citrusy note and a gentle peppery kick. Then, add the ½ teaspoon of paprika. Paprika adds a lovely mild sweetness and a beautiful reddish hue to the finished dish, making it visually appealing. Finally, season with ½ teaspoon of kosher salt. Remember, you can always add more salt later if needed, but it’s harder to take it away. Toss everything together gently but thoroughly. Make sure each piece of squash is coated with the oil and seasonings. You can use your hands for this part; it’s the most effective way to ensure an even distribution.
The Crunchy Topping Transformation
This next step is where we introduce the delightful textural contrast to our tender roasted squash. In a separate small bowl, combine the 2 tablespoons of grated Parmesan cheese and the 1 tablespoon of Panko breadcrum extractbs. Panko breadcrum extractbs are excellent because their larger, irregular flakes create an incredibly crispy coating when baked, much more so than regular breadcrum extractbs. Grated Parmesan cheese not only adds a savory, nutty flavor but also helps to bind the breadcrum extractbs to the squash and gets wonderfully golden and slightly crisp itself.
Whisk these two ingredients together until they are well combined. This mixture will form a flavorful, crunchy topping for our squash. It’s important to keep this mixture separate until just before baking. If you mix it too early and toss it with the squash, the breadcrum extractbs can absorb moisture and become soggy before they have a chance to crisp up in the oven.
Roasting to Perfection
Preheat your oven to 400 degrees Fahrenheit (200 degrees Celsius). This relatively high temperature is key to achieving beautifully roasted vegetables with caramelized edges. While the oven heats up, prepare a baking sheet. You can line it with parchment paper or aluminum foil for easier cleanup, though it’s not strictly necessary if you plan to wash it immediately.
Now, take your seasoned squash from the large mixing bowl and spread it out in a single layer on the prepared baking sheet. It’s very important to avoid overcrowding the pan. If the squash pieces are piled on top of each other, they will steam instead of roast, resulting in a mushy texture. If you have a lot of squash, it’s better to use two baking sheets rather than cramming it all onto one.
Once the squash is spread out, sprinkle the Parmesan and Panko mixture evenly over the top of the squash. Gently press down on the topping with the back of a spoon or your fingers to help it adhere to the squash.
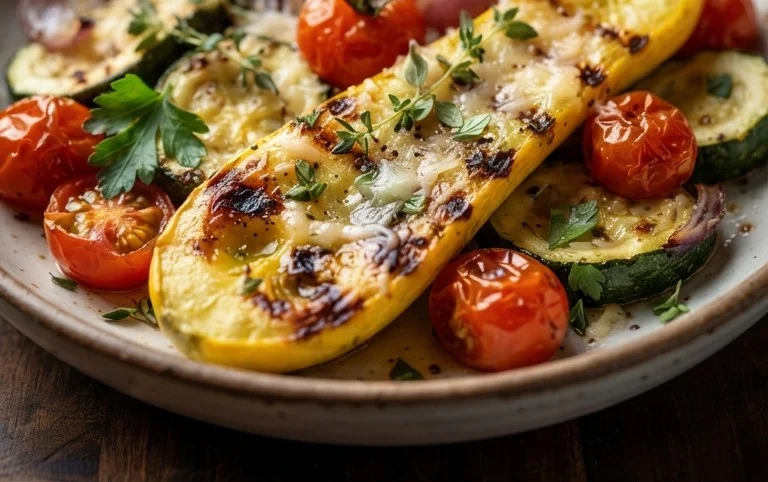
Place the baking sheet in the preheated oven and roast for 15-20 minutes. The exact cooking time will depend on your oven and the thickness of your squash slices. You’ll know the squash is ready when it’s tender when pierced with a fork, and the edges are nicely browned and slightly crispy. The Parmesan and breadcrum extractb topping should be golden brown and fragrant. Keep an eye on it during the last few minutes of cooking to prevent the breadcrum extractbs from burning.
Serving Your Delicious Creation
Once your roasted summer squash is perfectly cooked, carefully remove the baking sheet from the oven. Let it rest for a minute or two before serving. This allows the flavors to meld and the squash to firm up slightly. This dish is best served warm, right out of the oven. You can garnish it with a little extra grated Parmesan cheese or a sprinkle of fresh parsley or chives if you have them on hand for an extra touch of freshness and color. Enjoy this simple yet incredibly flavorful taste of summer!
Conclusion:
I hope you’re as excited as I am to try this incredibly simple yet delightfully flavorful Roasted Summer Squash recipe! It’s a fantastic way to highlight the natural sweetness and tender texture of summer squash, transforming humble ingredients into a side dish that’s both elegant and incredibly easy to prepare. The beauty of this recipe lies in its versatility – a few simple seasonings can take it in so many delicious directions. It’s the perfect accompaniment to grilled meats, fish, or even as a star in a vegetarian meal.
Don’t hesitate to experiment! I often swap out the herbs, adding a sprinkle of smoked paprika for a touch of warmth or a pinch of red pepper flakes for a gentle kick. It’s also wonderful served alongside pasta dishes or tossed into a warm grain salad. I truly encourage you to give this Roasted Summer Squash a go. It’s a testament to how amazing fresh, seasonal produce can be with minimal fuss.
Frequently Asked Questions:
What’s the best type of summer squash for roasting?
Zucchini and yellow squash are my top picks because they roast beautifully and have a mild, slightly sweet flavor. However, pattypan squash is also excellent and adds a lovely visual appeal with its unique shape.
Can I make this recipe ahead of time?
Roasted vegetables are best enjoyed fresh for optimal texture. However, you can chop the squash ahead of time. Roasting should be done just before serving. Leftovers can be gently reheated, though they may lose some of their crispness.
What are some other serving suggestions?
This Roasted Summer Squash is incredibly adaptable! It pairs wonderfully with lemon-herb roasted chicken, pan-seared salmon, or even as a topping for pizza. It’s also delicious served cold as part of a picnic spread or tossed into a quinoa bowl.
Roasted Summer Squash
A simple and flavorful side dish of roasted summer squash, tossed with olive oil, Parmesan, Panko, and lemon pepper seasoning.
Ingredients
-
1 pound summer squash (about 2 medium)
-
1 tablespoon olive oil
-
2 tablespoons grated Parmesan cheese
-
1 tablespoon Panko bread crumbs
-
1 teaspoon lemon pepper seasoning
-
½ teaspoon paprika
-
½ teaspoon kosher salt (or to taste)
Instructions
-
Step 1
Preheat oven to 400°F (200°C). -
Step 2
Wash the summer squash and trim off the ends. Cut the squash into ½-inch thick rounds or half-moons. -
Step 3
In a large bowl, toss the squash with olive oil, lemon pepper seasoning, paprika, and kosher salt until evenly coated. -
Step 4
Spread the seasoned squash in a single layer on a baking sheet. -
Step 5
Roast for 15 minutes, then flip the squash. -
Step 6
Sprinkle the grated Parmesan cheese and Panko bread crumbs over the squash. Continue roasting for another 5-10 minutes, or until the squash is tender and lightly browned, and the Panko is golden. -
Step 7
Serve hot as a delicious side dish.
Important Information
Nutrition Facts (Per Serving)
It is important to consider this information as approximate and not to use it as definitive health advice.
Allergy Information
Please check ingredients for potential allergens and consult a health professional if in doubt.