Easy Scone Recipe- Perfect Fluffy Scones Every Time
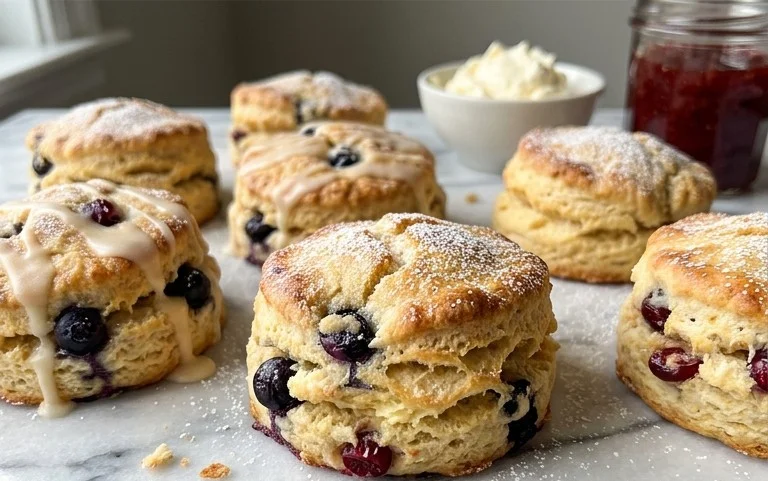
Recipe for Scones: there’s something undeniably comforting and utterly delightful about a perfectly baked scone. Whether it’s the rustic charm, the tender crum extractb, or the satisfying aroma that fills your kitchen, scones hold a special place in the hearts of many. They are the quintessential accompaniment to a cup of tea, a delightful treat for a lazy brunch, or simply a reason to pause and indulge. What makes this particular recipe for scones so special is its simplicity, delivering a beautifully light and fluffy result every time. Forget those dry, crum extractbly disappointments of the past; this method guarantees golden-brown perfection with a delicate, melt-in-your-mouth texture that will have you reaching for seconds. Get ready to impress yourself and your loved ones with these sensational scones!
Recipe for Scones
Scones. The very word evokes images of cozy cafes, afternoon tea, and the comforting aroma of freshly baked goods. While often associated with fancy bakeries, making delicious, homemade scones is surprisingly achievable, and far more rewarding. Today, we’re diving into a recipe that’s packed with flavor and texture, perfect for a weekend treat or a special occasion. This recipe balances the classic scone with delightful bursts of fruit and creamy chocolate, making them incredibly moreish. I’ve found that using a mix of berries and chocolate creates a wonderful contrast – the tartness of the fruit cutting through the sweetness of the chocolate. And the secret to a light, fluffy scone? Cold ingredients and a gentle hand. Let’s get baking!
Ingredients:
Cooking Instructions:
Here’s how to bring these delightful scones to life:
Step 1: Prepare Your Dry Ingredients
Start by preheating your oven to 400°F (200°C). Line a baking sheet with parchment paper. In a large mixing bowl, whisk together the all-purpose flour, granulated sugar, baking powder, and salt. This ensures that the leavening agents and salt are evenly distributed, which is crucial for consistent rise and flavor in your scones. It’s also a good idea to sift your flour if you want an extra-light texture, though it’s not strictly necessary for this recipe.
Step 2: Cut in the Cold Butter
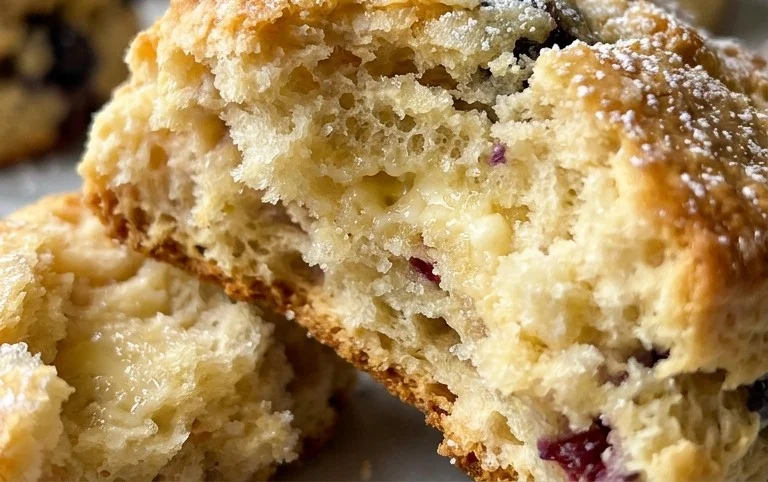
This is arguably the most important step for achieving tender, flaky scones. Add the cold, cubed unsalted butter to the dry ingredients. Using a pastry blender, your fingertips, or a food processor (pulse briefly), cut the butter into the flour mixture until it resembles coarse crum extractbs with some pea-sized pieces of butter still visible. The cold butter creates steam pockets as the scones bake, leading to that desirable flaky texture. Don’t overwork the mixture; you want those distinct butter pieces to remain.
Step 3: Incorporate Wet Ingredients and Mix Gently
In a separate small bowl, whisk together the buttermilk, vanilla extract, and the large egg until well combined. Pour this wet mixture into the bowl with the dry ingredients and butter. Now, using a fork or a spatula, gently mix until just combined. The dough will be shaggy and a bit sticky. Overmixing at this stage will develop the gluten in the flour too much, resulting in tough scones, so be very careful here.
Step 4: Fold in the Goodies
Gently fold in your delicious additions: the chocolate chips, white chocolate chips, raspberries, blueberries, and chopped strawberries. I like to slightly freeze my raspberries beforehand, as I did in this recipe, because it helps them hold their shape better during mixing and baking. You can do the same with the other berries if you prefer a less “blended” berry look in your finished scones. Again, fold gently to avoid overmixing the dough and crushing the fruits and chocolate too much.
Step 5: Shape and Bake Your Scones
Turn the dough out onto a lightly floured surface. Gently pat the dough together to form a disc, about 1-inch thick. You can either cut this disc into 8 wedges using a sharp knife or cookie cutter, or use a biscuit cutter for round scones. Be decisive when cutting; don’t twist the cutter as this can seal the edges and prevent a good rise. Place the shaped scones onto your prepared baking sheet, ensuring they have a little space between them. For an extra touch of golden goodness, you can brush the tops with a little extra buttermilk or a beaten egg, though this is optional. Bake for 18-22 minutes, or until the scones are golden brown and a toothpick inserted into the center comes out clean.
Step 6: Cool and Enjoy
Once baked, remove the scones from the oven and let them cool on the baking sheet for a few minutes before transferring them to a wire rack to cool completely. While they are absolutely delicious warm, allowing them to cool slightly before serving prevents the chocolate from melting into a mess. These scones are perfect on their own, but if you’re feeling indulgent, serve them with a dollop of clotted cream or a spoonful of your favorite jam. The combination of the tender scone, the sweet chocolate, and the bright, fruity notes is simply divine. Enjoy every bite of your homemade creation!
Conclusion:
And there you have it! This recipe for scones is a truly wonderful starting point for anyone looking to create a delightful treat. What makes it so great is its simplicity and the guaranteed fluffy, tender results. We’ve focused on building a solid foundation, ensuring that even a begin extractner baker can achieve delicious scones. The aroma of freshly baked scones filling your kitchen is truly unmatched, and the satisfaction of pulling a golden batch from the oven is incredibly rewarding. These scones are incredibly versatile, making them perfect for a cozy breakfast, a delightful afternoon tea, or even a sweet dessert. Don’t hesitate to experiment and make these scones your own! We encourage you to give this recipe a try; you won’t be disappointed.
Serving Suggestions & Variations:
Serve your freshly baked scones warm with clotted cream and a dollop of your favorite jam for a classic experience. They are also fantastic with butter, honey, or even a smear of lemon curd. For variations, consider adding a handful of fresh or frozen berries like blueberries or raspberries directly into the dough. Chocolate chip scones are always a hit, or you could try adding a pinch of cinnamon and nutmeg for a spiced twist. A touch of orange zest can also add a lovely brightness.
Frequently Asked Questions:
Why are my scones tough?
Tough scones are usually a result of overmixing the dough or overworking it when shaping. Once the wet and dry ingredients are just combined, stop mixing. Similarly, be gentle when patting out the dough; aim for minimal handling to keep them tender.
Can I make scones ahead of time?
Yes, you can prepare the scone dough and refrigerate it for up to 24 hours before baking. Ensure it’s well-wrapped. For baked scones, they are best enjoyed fresh, but they can be stored in an airtight container at room temperature for a day or two. Reheat gently in a low oven to refresh them.
Chocolate Chip Raspberry Blueberry Strawberry Scones
Deliciously crumbly scones packed with a mix of chocolate chips, raspberries, blueberries, and strawberries. Perfect for breakfast or a treat.
Ingredients
-
2 ¼ cups (270g) all-purpose flour
-
½ cup (99g) granulated sugar
-
1 Tbsp baking powder
-
½ tsp salt
-
½ cup (113g) cold unsalted butter (cubed)
-
½ cup (118ml) buttermilk
-
1 tsp vanilla extract
-
1 large egg
-
1 cup (170g) chocolate chips
-
1 cup (170g) white chocolate chips
-
1 cup (120g) fresh raspberries (broken into pieces and frozen)
-
1 cup (150g) blueberries
-
1 cup (167g) strawberries (chopped)
Instructions
-
Step 1
Preheat oven to 400°F (200°C) and line a baking sheet with parchment paper. -
Step 2
In a large bowl, whisk together the flour, sugar, baking powder, and salt. -
Step 3
Cut in the cold butter using a pastry blender or your fingertips until the mixture resembles coarse crumbs. -
Step 4
In a separate bowl, whisk together the buttermilk, vanilla extract, and egg. -
Step 5
Add the wet ingredients to the dry ingredients and mix until just combined. Do not overmix. -
Step 6
Gently fold in the chocolate chips, white chocolate chips, raspberries, blueberries, and strawberries. -
Step 7
Turn the dough out onto a lightly floured surface and gently pat into a disc about 1-inch thick. -
Step 8
Cut the disc into 8 wedges and place them on the prepared baking sheet. -
Step 9
Bake for 18-20 minutes, or until golden brown and cooked through.
Important Information
Nutrition Facts (Per Serving)
It is important to consider this information as approximate and not to use it as definitive health advice.
Allergy Information
Please check ingredients for potential allergens and consult a health professional if in doubt.