Nut Free Pesto Delicious & Easy Recipe
Nut free pesto is a culinary revelation, especially for those with nut allergies or families navigating dietary restrictions. For years, I’ve adored the vibrant, herbaceous punch of traditional pesto, but the persistent worry about cross-contamination or accidental nut exposure always lingered. That’s precisely why discovering and perfecting a truly delicious nut free pesto recipe has been such a game-changer in my kitchen. It allows everyone to enjoy this versatile sauce without a second thought. The sheer adaptability of this nut free pesto is what truly makes it special. It’s not just a pasta sauce; it’s a vibrant spread, a flavour booster for grilled vegetables, and a delightful topping for bruschetta. We’re talking about unlocking a world of flavour, all while ensuring inclusivity and peace of mind for every diner at your table. Get ready to fall in love with the fresh, zesty goodness of pesto, reimagin extracted.
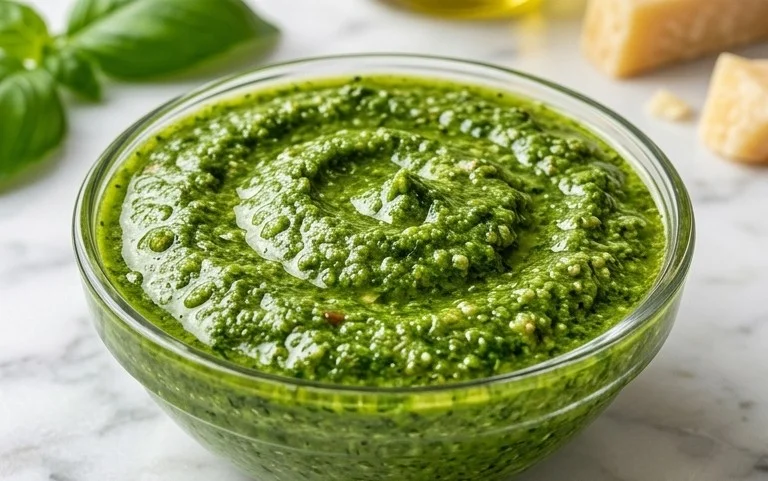
Nut Free Pesto
Welcome to a recipe that’s been a game-changer in my kitchen, especially when hosting friends with nut allergies. Pesto is one of those versatile sauces that can elevate pasta, sandwiches, pizzas, and even grilled vegetables. Traditionally, pesto relies on pine nuts for its characteristic texture and a subtle nutty flavor. However, for many, myself included, finding a delicious nut-free alternative is essential. This recipe achieves that wonderfully, delivering a vibrant, fresh, and incredibly flavorful pesto without a single nut in sight. It’s surprisingly simple to make, and the aroma alone is enough to make your mouth water. The key is using the freshest ingredients you can find, and the process is so straightforward, you’ll wonder why you haven’t made it sooner. We’ll be focusing on pure, unadulterated flavor, letting the basil and Parmesan truly shine.
Ingredients:
Crafting Your Nut-Free Pesto
This process is all about blending fresh ingredients into a smooth, luscious sauce. You have a few options for how to achieve this, and I’ll guide you through them. Whether you prefer the rustic charm of a mortar and pestle, the speed of a food processor, or the simplicity of a blender, the end result will be equally delightful.
Method 1: The Food Processor Powerhouse
This is usually my go-to method for its speed and efficiency. It’s perfect for a quick batch when you’re short on time but craving that fresh pesto flavor.
1. Prepare the Greens: Start by thoroughly washing your basil leaves. Gently pat them dry with a clean kitchen towel or use a salad spinner. It’s important to get them as dry as possible; excess water can make your pesto watery and less vibrant. Remove any thick stems, as these can add a bitter taste and a stringy texture. You’re looking for just the tender leaves.
2. Infuse with Garlic: Add the peeled garlic cloves to the bowl of your food processor. Give them a quick pulse a few times until they are roughly chopped. This helps to break them down before you add the other ingredients, ensuring a more even distribution of garlic flavor throughout the pesto. Don’t over-process them at this stage; we’re not making garlic paste yet.
3. Combine and Process: Add the packed basil leaves to the food processor with the garlic. Pulse the mixture several times until the basil is finely chopped. You want to see a good amount of green goodness filling the processor. Next, add the freshly grated Parmesan cheese to the bowl.
4. Emulsify with Olive Oil: With the food processor running on low speed, slowly drizzle in the extra virgin extract olive oil. This is where the magic happens – the oil will emulsify with the other ingredients, creating that creamy, smooth pesto texture. Continue processing until the pesto reaches your desired consistency. Some people prefer a chunkier pesto, while others like it super smooth. Stop and scrape down the sides of the bowl with a spatula as needed to ensure everything is incorporated.
5. Season and Taste: Once the pesto is smooth, add the salt and freshly ground black pepper. Give it a final quick pulse to combine. Now is the crucial moment to taste your creation. Adjust the salt and pepper as needed. Remember, Parmesan cheese is already salty, so it’s best to season gradually and taste as you go. You might find you need a little more pepper for a gentle kick, or perhaps a touch more salt to brighten the flavors.
Method 2: The Traditional Mortar and Pestle (for the dedicated chef!)
If you have a little more time and enjoy the hands-on approach, the mortar and pestle method yields an incredibly nuanced flavor. It’s a bit more work, but the results are truly special.
1. Start with Garlic: Begin extract by placing the peeled garlic cloves into your mortar. Add a pinch of salt. Use the pestle to vigorously grind the garlic against the sides and bottom of the mortar until it forms a smooth paste. The salt helps to break down the garlic’s cell walls, making it easier to mash and releasing its potent flavor.
2. Introduce the Basil: Add the basil leaves to the mortar, a handful at a time. Work them into the garlic paste using a steady, circular motion with the pestle. Continue grinding until the basil leaves are well bruised and incorporated into the garlic paste. Don’t rush this step; the more you work the basil, the more flavor you’ll extract.
3. Incorporate the Cheese: Once the basil is finely mashed, add the freshly grated Parmesan cheese. Continue to grind and mix until the cheese is fully incorporated into the basil and garlic mixture.
4. Drizzle and Emulsify: Gradually drizzle in the olive oil while continuously stirring with the pestle. You’re not grinding anymore but rather gently mixing to create a smooth, emulsified sauce. Keep adding oil until you reach your desired consistency. This might take a bit of patience, but it’s incredibly rewarding.
5. Final Seasoning: Season the pesto with salt and pepper to taste. Stir well and taste again, adjusting seasonings as necessary. The texture will be slightly different from a food processor version, often a bit more rustic and textured, which many adore.
Method 3: The High-Powered Blender Option
If you have a high-powered blender, this can be a very effective method, similar to the food processor but often achieving an even smoother texture.
1. Layer Ingredients: Add the garlic cloves and a portion of the basil to your blender jar. Pulse a few times to break down the garlic.
2. Process and Add: Add the remaining basil and the Parmesan cheese. Begin extract to process, and as the mixture starts to break down, slowly stream in the olive oil through the lid opening.
3. Blend to Perfection: Continue blending until you achieve your desired smooth consistency. Scrape down the sides of the blender jar as needed to ensure everything is evenly incorporated.
4. Season: Add salt and pepper, and blend for a few more seconds to combine. Taste and adjust seasonings as needed.
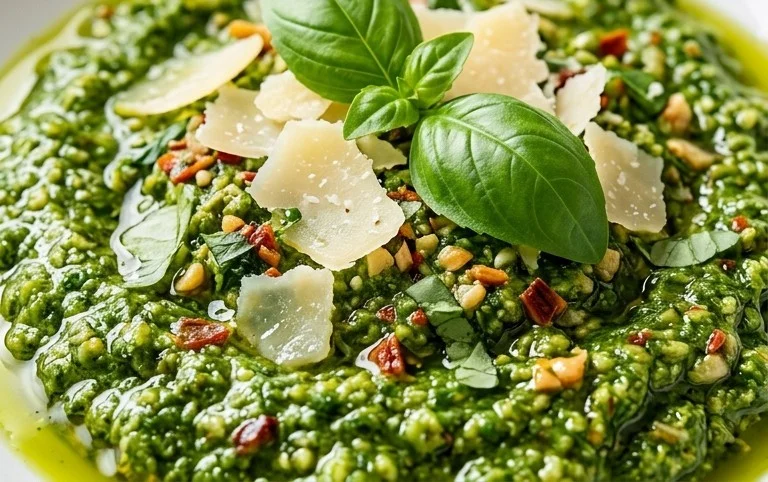
Regardless of the method you choose, your nut-free pesto is ready to be enjoyed! It’s best stored in an airtight container in the refrigerator and will keep for about 5-7 days. You can also freeze portions of it for longer storage. A thin layer of olive oil on top before sealing will help preserve its vibrant green color. Enjoy this delicious and allergy-friendly sauce in all your favorite dishes!
Conclusion:
I hope you’re as excited as I am to try this amazing nut-free pesto! This recipe is a true game-changer for anyone with nut allergies or simply looking for a delicious alternative to traditional pesto. Its vibrant flavor, quick preparation time, and incredible versatility make it a staple in my kitchen. Whether you’re looking for a dairy-free option or just want to explore new taste sensations, this nut-free pesto is wonderfully adaptable and incredibly satisfying. It’s perfect for tossing with your favorite pasta, spreading on sandwiches, dolloping on grilled vegetables, or even as a dip for fresh bread.
Don’t hesitate to experiment with the ingredients! Swap basil for spinach or arugula for a different flavor profile, or add a pinch of red pepper flakes for a little heat. The possibilities are truly endless, and I encourage you all to give this nut-free pesto a try. You might just find it becomes your new go-to!
Frequently Asked Questions:
Can I make this nut-free pesto ahead of time?
Absolutely! This nut-free pesto stores beautifully in an airtight container in the refrigerator for up to 5 days. You can also freeze it in ice cube trays for individual portions that are easy to defrost and use. I often make a big batch on the weekend to have on hand for quick meals throughout the week.
What can I use instead of pine nuts?
Since this is a nut-free pesto, we’ve ditched the pine nuts altogether! The recipe relies on sunflower seeds for a similar texture and richness. Other great options include pumpkin seeds (pepitas) or even hemp seeds for an extra nutritional boost. Experiment to see which you prefer!
Is this pesto dairy-free?
Yes, this nut-free pesto recipe is naturally dairy-free as it uses nutritional yeast instead of Parmesan cheese for that savory, umami flavor. This makes it a fantastic option for those following a vegan diet or who are lactose intolerant.
Nut-Free Pesto
A classic pesto recipe made without nuts, perfect for those with allergies. Quick and easy to whip up for pasta, sandwiches, or dips.
Ingredients
-
2 cups fresh basil
-
2 garlic cloves
-
1/2 cup freshly grated Parmesan cheese
-
1/4 cup olive oil
-
1/4 teaspoon salt
-
1/8 teaspoon pepper
Instructions
-
Step 1
Rinse and dry the fresh basil leaves thoroughly. -
Step 2
Peel and roughly chop the garlic cloves. -
Step 3
Combine basil, garlic, Parmesan cheese, salt, and pepper in a food processor. -
Step 4
Pulse the ingredients until coarsely chopped. -
Step 5
With the food processor running, slowly drizzle in the olive oil until the pesto is smooth or reaches your desired consistency. -
Step 6
Taste and adjust seasoning if necessary.
Important Information
Nutrition Facts (Per Serving)
It is important to consider this information as approximate and not to use it as definitive health advice.
Allergy Information
Please check ingredients for potential allergens and consult a health professional if in doubt.