Salted Brownie Cookies-Irresistible Chewy Chocolate Bliss
Salted brownie cookies are the ultimate indulgence, a decadent fusion of two beloved desserts that always hits the spot. Imagin extracte the rich, fudgy intensity of a perfectly baked brownie, now miniaturized and transformed into a chewy, portable cookie. That’s the magic of these salted brownie cookies. We all crave that satisfyingly dense, chocolatey center, and these deliver in spades. But what truly elevates them from merely delicious to downright divine is the whisper of flaky sea salt. This simple addition isn’t just for show; it brilliantly cuts through the sweetness, amplifying the deep chocolate flavor and creating a delightful contrast that makes each bite utterly irresistible. If you’re a chocolate lover, prepare to fall head over heels for these incredible salted brownie cookies.
Salted Brownie Cookies
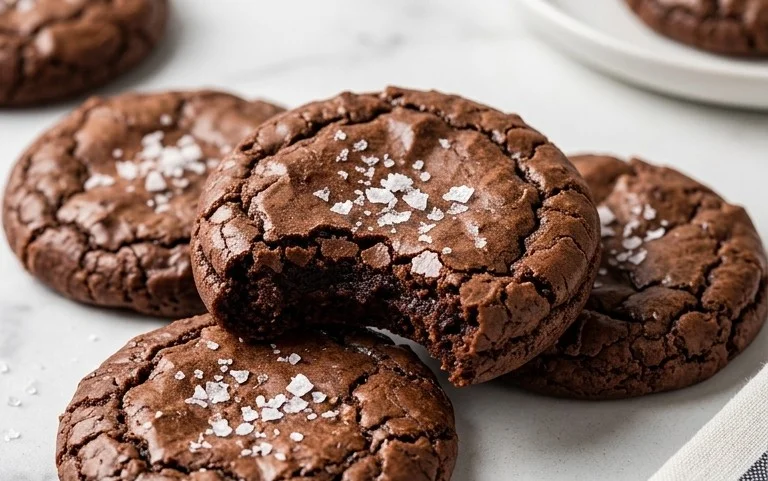
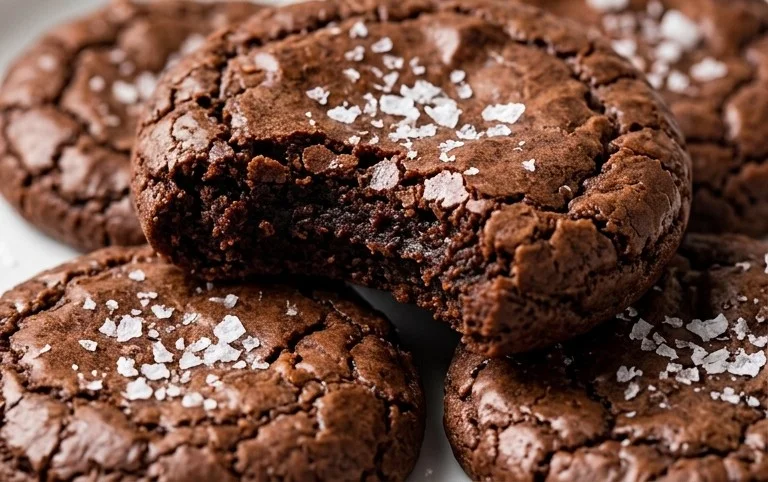
There’s something magical about a brownie. That rich, fudgy, intensely chocolatey goodness. But sometimes, the portability and shareability of a cookie is more appealing. What if you could have the best of both worlds? Enter these Salted Brownie Cookies. These aren’t your average cookies; they’re little discs of pure brownie bliss, with a delightful chew, a deep chocolate flavor, and that irresistible hint of sea salt. They’re surprisingly easy to make, and the results are so decadent, you’ll want to keep the whole batch to yourself (though sharing is encouraged!).
The secret to their brownie-like texture lies in the ratio of ingredients, the melt of the butter, and the inclusion of cocoa powder, which intensifies the chocolate flavor. The touch of espresso powder, while optional, truly deepens the chocolate notes without making the cookies taste like coffee, so I highly recommend it if you have it on hand. And of course, the flaky sea salt on top is the crowning glory, cutting through the sweetness and elevating the entire experience. These are perfect for a late-night craving, an afternoon pick-me-up, or to impress guests at your next gathering.
Ingredients:
Cooking Instructions
Phase 1: Melting and Mixing the Wet Ingredients
1. Melt the Butter and Chocolate: In a medium, heatproof bowl, combine the 6 tablespoons of unsalted butter and 1 cup of semi-sweet chocolate chips. You can do this using a double boiler setup (place the bowl over a saucepan with a few inches of simmering water, making sure the bottom of the bowl doesn’t touch the water) or by microwaving them in 30-second intervals, stirring well between each interval, until the butter is completely melted and the chocolate is smooth and glossy. Once melted, stir in the 1/4 cup of unsweetened cocoa powder and the optional 1 tsp of espresso powder. Whisk until thoroughly combined and smooth. This mixture will form the rich, fudgy base of our cookies. Set aside to cool slightly for about 5-10 minutes. It’s important that this mixture isn’t piping hot when you add the eggs, otherwise, you’ll end up with scrambled eggs!
2. Combine Wet Ingredients: In a separate large bowl, whisk together the 2 large room-temperature eggs and the 1 large room-temperature egg yolk. Adding the eggs at room temperature helps them emulsify better into the batter, leading to a more tender cookie. Whisk in the 1 cup of granulated sugar, 1 tablespoon of vegetable oil, and 1 teaspoon of vanilla extract. Continue whisking until the mixture is well combined and slightly lighter in color. The oil contributes to the chegrape juicess of the cookie.
Phase 2: Bringin extractg it All Together
3. Incorporate the Chocolate Mixture: Once the chocolate mixture has cooled slightly, gently pour it into the egg and sugar mixture. Whisk everything together until it is thoroughly combined and forms a smooth, glossy, chocolate batter. This is where the magic really starts to happen, and you’ll see that deep, luscious brownie color emerge. Don’t overmix at this stage; just aim for a homogenous blend.
4. Add the Dry Ingredients: In a small bowl, whisk together the 1 cup of all-purpose flour, 1 teaspoon of baking powder, and 1/8 teaspoon of salt. This is your dry ingredient mixture. Gradually add the dry ingredients to the wet chocolate mixture, folding them in gently with a spatula or wooden spoon until just combined. Be careful not to overmix the flour, as this can develop the gluten too much, resulting in tough cookies. You want to see just a few streaks of flour remaining before stopping.
Phase 3: Shaping and Baking
5. Chill and Scoop: Now, this is a crucial step for achieving that perfect brownie-like texture and preventing the cookies from spreading too much in the oven. Cover the bowl with plastic wrap and refrigerate the dough for at least 30 minutes, or up to 2 hours. Chilling the dough allows the fats to firm up and the flavors to meld. When you’re ready to bake, preheat your oven to 350°F (175°C) and line baking sheets with parchment paper. For evenly sized cookies, use a cookie scoop (about 1.5 to 2 tablespoons) to portion the dough. Scoop rounded balls of dough and place them about 2 inches apart on the prepared baking sheets.
6. Add Toppings and Bake: Gently press a few extra semi-sweet chocolate chips onto the tops of each cookie dough ball. This ensures a beautiful, chocolatey appearance and extra pockets of melted chocolate. If you’re using the sea salt flakes, sprinkle a pinch of them over the tops of the cookies as well. They’ll add that perfect salty contrast to the rich chocolate. Bake for 10-12 minutes, or until the edges are set and a toothpick inserted into the center comes out with moist crum extractbs (not wet batter). The centers will still look slightly underbaked; this is what will give them that chewy, fudgy texture.
7. Cool and Enjoy: Allow the cookies to cool on the baking sheets for about 5-10 minutes before transferring them to a wire rack to cool completely. This resting period is important for the cookies to set up properly. Once cooled, enjoy these incredibly decadent Salted Brownie Cookies! They are best enjoyed within a few days, but can be stored in an airtight container at room temperature.
Conclusion:
I hope you’ve enjoyed learning how to make these incredible Salted Brownie Cookies! They truly are a game-changer for any chocolate lover. The magic lies in that perfect balance – the rich, fudgy brownie texture combined with the delightful chegrape juicess of a cookie, all elevated by that sprinkle of flaky sea salt. This recipe is fantastic because it delivers intense chocolate flavor without being overly sweet, making them dangerously addictive. They’re also surprisingly straightforward to whip up, proving that gourmet results don’t always require hours in the kitchen.
I love serving these warm, straight from the oven, perhaps with a cold glass of milk or a steaming cup of coffee. They also make a stunning addition to any dessert platter or a thoughtful homemade gift. Don’t be afraid to experiment! For variations, consider adding a handful of chopped nuts like walnuts or pecans for extra crunch, or even some chocolate chips for an even more decadent experience. And for a touch of elegance, a drizzle of melted white chocolate can be lovely. I wholeheartedly encourage you to give these Salted Brownie Cookies a try – I promise you won’t regret it!
Frequently Asked Questions:
Can I make these cookies ahead of time?
Absolutely! You can prepare the dough, wrap it tightly, and refrigerate it for up to 2-3 days. The flavors will actually meld beautifully, and you can bake them whenever you crave a treat. You can also freeze the dough balls for up to a month. Just let them thaw slightly before baking, adding a minute or two to the baking time.
What kind of salt is best for topping?
Flaky sea salt, such as Maldon or fleur de sel, is highly recommended. Its larger crystals provide a satisfying crunch and a burst of salinity that beautifully contrasts with the sweet chocolate. Table salt is too fine and will dissolve too quickly, overpowering the cookie rather than complementing it.
Why are my cookies not as fudgy as I expected?
Ensure you’re not overbaking them. Brownie cookies are meant to have a slightly underbaked center to achieve that signature fudgy texture. They will continue to set up as they cool on the baking sheet. Also, using good quality dark chocolate will contribute significantly to that rich, fudgy brownie experience.
Salted Brownie Cookies
Chewy brownie cookies with a rich chocolate flavor and a hint of sea salt.
Ingredients
-
1 cup All-Purpose Flour
-
1 tsp Baking Powder
-
1/8 tsp Salt
-
2 Large Eggs (room temperature)
-
1 Large Egg Yolk (room temperature)
-
1 cup Granulated Sugar
-
1 tbsp Vegetable Oil
-
1 tsp Vanilla Extract
-
6 tbsp Unsalted Butter
-
1 cup Semi-Sweet Chocolate Chips
-
1/4 cup Unsweetened Cocoa Powder
-
1 tsp Espresso Powder (optional)
-
Sea Salt Flakes (for topping cookies (optional garnish))
Instructions
-
Step 1
In a medium bowl, whisk together the flour, baking powder, and salt. Set aside. -
Step 2
In a large bowl, beat together the melted butter and granulated sugar until smooth. Stir in the vegetable oil and vanilla extract. -
Step 3
Whisk in the room temperature eggs and egg yolk, one at a time, until well combined. -
Step 4
Add the cocoa powder and espresso powder (if using) to the wet ingredients and mix until just combined. Don’t overmix. -
Step 5
Gradually add the dry ingredients to the wet ingredients, mixing until just combined. Fold in the semi-sweet chocolate chips. -
Step 6
Chill the dough for at least 30 minutes. -
Step 7
Preheat your oven to 350°F (175°C). Line baking sheets with parchment paper. -
Step 8
Scoop rounded tablespoons of dough onto the prepared baking sheets, leaving some space between cookies. Top with extra chocolate chips and sea salt flakes, if desired. -
Step 9
Bake for 10-12 minutes, or until the edges are set but the centers are still slightly soft. They will continue to set as they cool. -
Step 10
Let the cookies cool on the baking sheets for a few minutes before transferring them to a wire rack to cool completely.
Important Information
Nutrition Facts (Per Serving)
It is important to consider this information as approximate and not to use it as definitive health advice.
Allergy Information
Please check ingredients for potential allergens and consult a health professional if in doubt.