Dark Chocolate Sea Salt Nut Bars-Easy Recipe
Dark Chocolate and Sea Salt Nut Bars are an absolute dream come true for anyone who craves that perfect balance of sweet and salty, rich and satisfying. I don’t know about you, but for me, there’s something incredibly addictive about the way deep, decadent dark chocolate melts against the subtle crunch of toasted nuts, all punctuated by those surprising pops of flaky sea salt. It’s a flavor combination that truly sings! These aren’t just any snack; they’re little powerhouses of flavor and texture, making them ideal for an afternoon pick-me-up, a post-workout reward, or even a delightful homemade gift. What makes these Dark Chocolate and Sea Salt Nut Bars so special is their inherent simplicity combined with their sophisticated taste profile. They feel indulgent without being overly complicated to make, allowing you to whip up a batch of pure joy in your own kitchen. Get ready to discover your new favorite go-to treat!
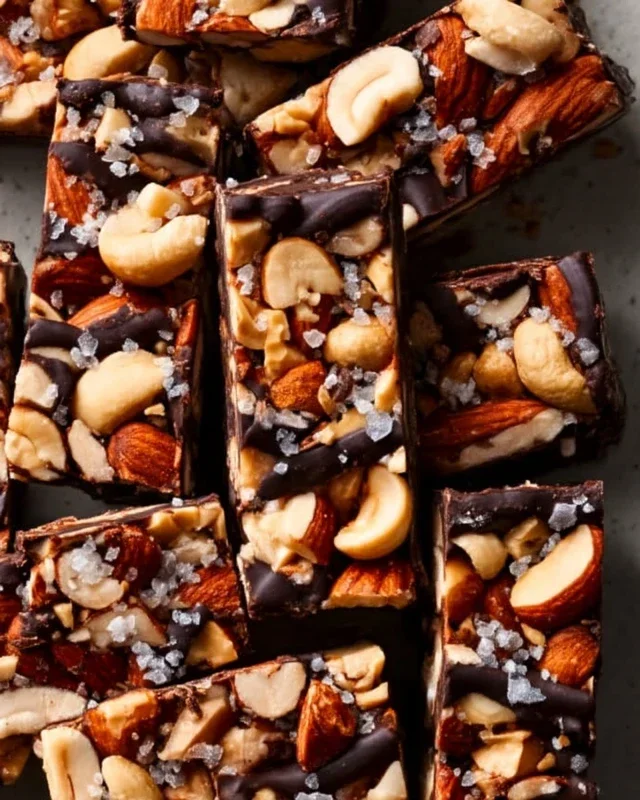
Dark Chocolate and Sea Salt Nut Bars
These Dark Chocolate and Sea Salt Nut Bars are my go-to treat when I need a satisfyingly crunchy, sweet, and salty snack. They’re incredibly easy to make, requiring no baking, and are packed with wholesome ingredients. The combination of rich dark chocolate, crunchy nuts, and a hint of flaky sea salt is simply irresistible. Whether you’re looking for an afternoon pick-me-up, a post-workout refuel, or a healthier alternative to candy bars, these bars deliver. Plus, they’re highly customizable, allowing you to use your favorite nuts and adjust the sweetness to your liking. Get ready to impress yourself (and anyone you share them with!) with these delicious homemade bars.
Ingredients:
Preparation Steps
Step 1: Prepare Your Nuts and Pan
The first step is to get our nuts ready and prepare our pan. If your nuts are raw, you might want to give them a quick toast in a dry skillet over medium heat for about 5-7 minutes, stirring frequently, until they are fragrant. This step isn’t strictly necessary, but it really enhances their flavor and brings out a lovely depth. Let them cool completely. Once cooled, give them a rough chop. You don’t want them to be powder, but rather in bite-sized pieces so you get a satisfying crunch in every bite. Next, line an 8×8 inch baking pan with parchment paper, leaving some overhang on the sides. This overhang will act as handles, making it super easy to lift the entire slab of bars out of the pan once they’ve set.
Step 2: Combine the Dry Ingredients
In a medium-sized bowl, combine your chopped nuts and the puffed rice. The puffed rice adds a delightful lightness and crunch, preventing the bars from being too dense. Give them a good stir to ensure they are evenly distributed. This mixture will form the base of our delicious bars.
Step 3: Create the Binding Syrup
In a small saucepan, gently heat the brown rice syrup over low heat. You don’t want to boil it, just warm it enough so it becomes more fluid and easier to mix. Once it’s warmed, remove it from the heat and stir in the vanilla extract and the 1/2 teaspoon of sea salt. The vanilla extract adds a beautiful aromatic sweetness, and the sea salt is crucial for balancing the sweetness of the syrup and chocolate, as well as enhancing the overall flavor profile. Whisk it together until everything is well combined.
Step 4: Mix and Press the Bars
Pour the warm brown rice syrup mixture over the nut and puffed rice combination. Stir everything together thoroughly until all the dry ingredients are coated in the syrup. It might seem a little sticky, and that’s exactly what we want. Now, transfer this mixture into your prepared baking pan. Using the back of a spoon or a spatula (lightly greased with a little coconut oil if it’s sticking), press the mixture down firmly and evenly into the pan. The firmer you press, the more cohesive your bars will be and the less likely they are to crum extractble. Take your time with this step to ensure a nice, compact base.
Step 5: Melt and Drizzle the Chocolate
Now for the best part: the chocolate! In a heatproof bowl set over a saucepan of simmering water (a double boiler method), or carefully in the microwave in 30-second intervals, melt the dark chocolate chips with the 2 teaspoons of coconut oil. The coconut oil helps the chocolate melt smoothly and gives it a beautiful sheen. Stir until the chocolate is completely smooth and glossy. Once melted, carefully spoon or drizzle the melted chocolate over the pressed nut mixture in the pan. You can spread it evenly with a spatula for a smooth top, or create a more rustic look with swirls. If you’re using flaky salt for topping, now is the time to sprinkle it generously over the melted chocolate. The contrast of the rich chocolate and the pops of flaky salt is divine.
Step 6: Chill and Cut
Once the chocolate is spread, place the pan in the refrigerator for at least 1-2 hours, or until the chocolate is completely set and the bars are firm. This chilling time is essential for the bars to hold their shape. Once firm, use the parchment paper overhang to lift the entire slab out of the pan. Place it on a cutting board and use a sharp knife to cut the slab into your desired bar shapes. I usually cut mine into about 12-16 bars, depending on how thick I want them. Store these delicious bars in an airtight container in the refrigerator for the best texture and flavor. They’ll keep for about a week, but I can guarantee they won’t last that long! Enjoy your homemade Dark Chocolate and Sea Salt Nut Bars!

Conclusion:
These Dark Chocolate and Sea Salt Nut Bars are a true triumph of simplicity and flavor! They’re wonderfully satisfying, striking that perfect balance between the rich intensity of dark chocolate, the delightful crunch of nuts, and the intriguing pop of sea salt. What makes them so great is their versatility – they’re perfect for a quick breakfast on the go, a guilt-free afternoon snack, or even an indulgent dessert. The textures are incredible, from the chegrape juicess of the base to the melted chocolate pools and the hearty nuts. I truly encourage you to give these Dark Chocolate and Sea Salt Nut Bars a try; you won’t be disappointed!
For serving, enjoy them as is for a portable treat. They also pair beautifully with a hot cup of coffee or a glass of cold milk. If you’re feeling adventurous, crum extractble them over a bowl of Greek yogurt or vanilla ice cream for an extra layer of deliciousness.
Feeling creative? You can absolutely customize these bars! Swap out the nuts for your favorites – almonds, pistachios, or pecans all work wonderfully. You could also add dried fruit like cranberries or chopped dates for a chewy sweetness. For an extra kick, a pinch of chili powder can add a surprising depth.
Frequently Asked Questions:
How can I store these Dark Chocolate and Sea Salt Nut Bars?
You can store these bars in an airtight container at room temperature for up to 5 days, or in the refrigerator for up to two weeks. For longer storage, wrap them individually and freeze them for up to 3 months. They thaw beautifully!
Can I make these nut bars vegan?
Absolutely! To make these vegan, ensure you use a dairy-free dark chocolate (check the ingredients list for milk products) and substitute the honey or maple syrup with agave nectar or another vegan liquid sweetener. The rest of the ingredients are typically vegan-friendly.
Dark Chocolate and Sea Salt Nut Bars
Chewy and satisfying nut bars loaded with your favorite nuts, puffed rice, and a rich dark chocolate drizzle, finished with a sprinkle of sea salt.
Ingredients
-
2 1/2 cups unsalted nuts of choice (3/4 cup cashews, 3/4 cup peanuts, 1 cup almonds)
-
1/2 cup puffed rice
-
1/4 cup brown rice syrup
-
1 1/2 teaspoon vanilla extract
-
1/2 teaspoon sea salt
-
1 cup dark chocolate chips
-
2 teaspoons coconut oil
-
flaky salt for topping (optional)
Instructions
-
Step 1
Line an 8×8 inch baking pan with parchment paper, leaving an overhang on the sides. -
Step 2
In a large bowl, combine the mixed nuts and puffed rice. -
Step 3
In a small saucepan, gently warm the brown rice syrup and vanilla extract over low heat. Stir in the 1/2 teaspoon of sea salt. -
Step 4
Pour the warm syrup mixture over the nut and puffed rice mixture. Stir well to coat everything evenly. -
Step 5
Press the mixture firmly into the prepared baking pan, ensuring it’s evenly distributed and compacted. -
Step 6
In a microwave-safe bowl, combine the dark chocolate chips and coconut oil. Microwave in 30-second intervals, stirring between each, until smooth and melted. -
Step 7
Drizzle the melted dark chocolate over the top of the pressed nut mixture. Sprinkle with flaky salt, if using. -
Step 8
Refrigerate for at least 1 hour, or until the chocolate is set and the bars are firm. Cut into bars.
Important Information
Nutrition Facts (Per Serving)
It is important to consider this information as approximate and not to use it as definitive health advice.
Allergy Information
Please check ingredients for potential allergens and consult a health professional if in doubt.